The Potential of Enhanced Venting Materials
Stop fighting venting problems with mold retrofits and prevent them by designing the original mold with an enhanced venting steel.
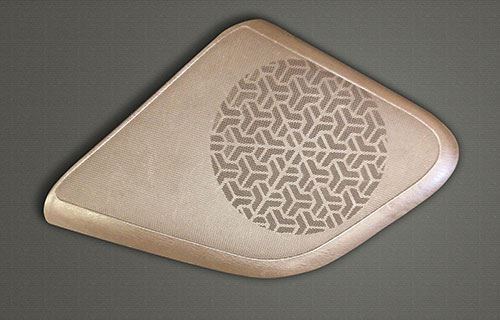
One of the advantages of being in the office on a Saturday is the quiet. After finishing the projects you came in to address, you can kick back, relax and let your mind wander. One Saturday a few weeks ago, I reached over to my bookcase and picked up a 1993 Toyota speaker grill (see Figure 1). It is a beautifully molded part with perfect fill and finish, and a fine mesh across the face—a technically revolutionary piece.
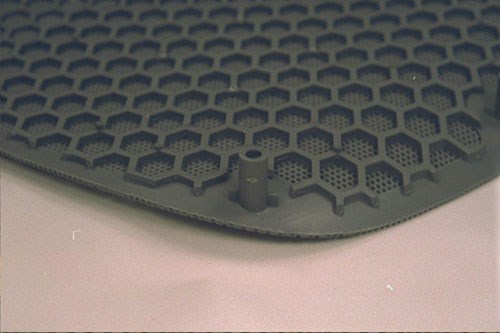
One look at the back of the part told me it was filled with one sub-gate (see Figure 2). In the U.S at the time, we were trying to pack out this type of speaker grill with 12-drop systems, which resulted in poor fill and a lot of stress in the piece. In Japan, moldmakers were using a mold material developed to enhance venting. This was a steel manufactured with interconnecting pores so the gas could pass through the seemingly solid piece of metal. To make this steel, powder metal was combined with metal fibers for added strength, cold-pressed into master blocks measuring 215 by 300 by 650 mm, sintered and heat-treated to 35 HRC. It was available with average pore diameter of either 7 or 20 microns; porosity averaged 25 percent of the mass of the block. Other materials available at the time ranged from porous ceramics to sintered porous vent buttons.
Twenty years ago, I was convinced that when molders and mold designers understood the potential of these enhanced venting materials to eliminate trapped gas issues they would revolutionize design and molding processes. A few of the problems these venting materials can solve include:
Weld lines. There are two primary reasons for the occurrence of weld lines where resin flows merge: failure of the resin to fuse sufficiently due to a temperature drop from traveling over a long distance or residual air at the resin’s emerging point in the cavity. The permeability of enhanced venting materials placed near potential gas traps reduces back pressure and improves the flow rate, which reduces cooling of the resin. These materials also reduce the presence of residual gas in the cavity by giving it a way to escape.
Shrinkage. The presence of an air or gas layer between the mold surface and the resin is one cause of material shrinkage. Enhanced venting materials prevent the formation of this layer, allowing for close contact between the mold surface and the resin.
Short shots. Insufficient injection pressure, low resin temperature and trapped gas can cause incomplete filling of a mold cavity, or short shots. Enhanced venting materials can decrease the required injection pressure by reducing back pressure, and can also help to vent blind holes and eliminate gas traps by reducing fill time. Pulling a vacuum during injection will also reduce back pressure and fill time, while reverse blowing during ejection breaks any vacuum and eases the ejection. In some cases, it also is possible to reduce resin temperatures but maintain good fill.
Despite these advantages offered by enhanced venting materials, the revolution I expected 20 years ago never came. Why not?
I pulled out a few plastic mold design and engineering handbooks to find references to venting. Each one said basically the same thing: Proper venting is crucial, and lack of proper venting can cause short shots, burns, poor weld lines, splay, internal stress in parts and inefficient cycle times. All of these problems can be solved with enhanced venting materials.
Consider these real-world examples:
• The mold for an automobile door panel wasn’t filling properly, so a 3-inch-diameter piece of porous steel was installed in the mold, which improved fill and reduced cycle time from 56 seconds to 44 seconds.
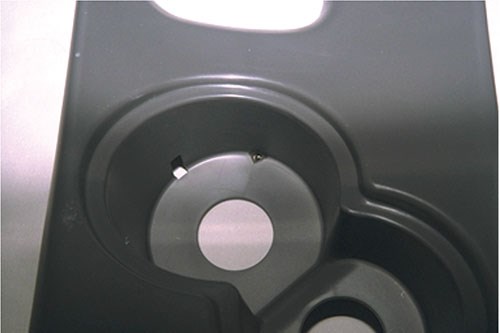
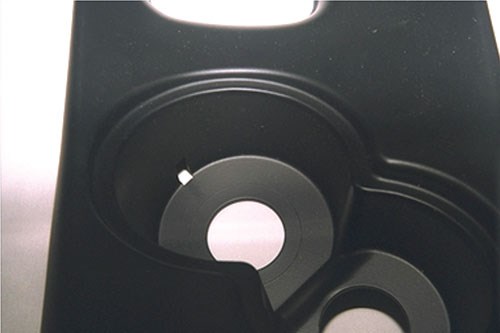
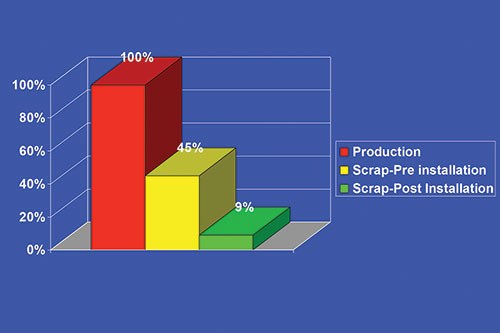
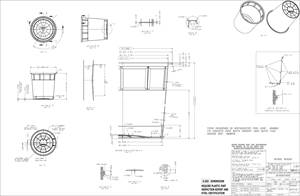
• Production of a car’s center console was yielding a 45-percent scrap rate. The majority of the scrap was due to a burn in the cup holder. By retrofitting a piece of porous metal venting steel in the problem area, the burn was eliminated, and the scrap rate (due to other issues) was reduced to 9 percent (see Figures 3, 4 and 5).
• A dishwasher filter screen showed so much stress from being packed out on a 750-ton press (the mold was originally scheduled for a 500-ton press, but it wouldn’t fill in this press) that it sprung out of shape when it came into contact with hot water. After retrofitting with porous metal buttons, the molds were able to be installed back on the 500-ton press and produced stress-free parts.
The list of examples could go on, from thin-walled medical molds that would not fill using conventionally designed vents to small automotive wire harness clips with blind holes to high-pressure PVC elbows that had reduced structural integrity due to serious burn problems. Retrofitting enhanced venting materials into the molds solved each of these problems.
Still, there has been no mold design and molding revolution. Why? Probably because anything published about proper venting techniques includes a lot of conventional wisdom, which creates a sense of risk associated with trying something new and a sense of safety in doing what has always been done. For example, conventional wisdom dictated 30 percent of the parting line be reserved for vents, vent dimensions of 0.0005- to 0.003-inch-deep by 0.0625- to 0.5000-inch-wide (depending on where the resins flashes), extremities of the cavity be vented, vents be the last area of the mold to fill, grind flats on ejector pins, etc.
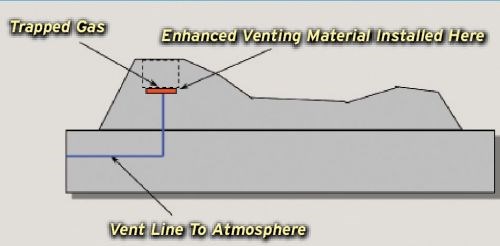
As long as conventional wisdom was the guideline on an original mold design, new venting materials would only be used to retrofit an existing mold to solve the worst problems. Although retrofitting is not difficult—a simple installation of the material in the core side, close to the problem area and opening the back side to the atmosphere—oftentimes, waterlines or other obstructions prevent placement of the material in the right spot. Using the material in the original design and build of the mold enables it to be installed in the most effective area(s). It makes me wonder how many molders still are producing substandard parts because they are fighting venting problems that would not exist if they had designed the original mold using an enhanced venting steel.
The advantage of using an enhanced venting steel in an original installation was the basis of collaborative experiment among an automotive OEM, a molder and a mold builder. The challenge was eliminating flow lines and haloing around the edges of automotive texture standards plaques. The standard mold design for these 8.5-by-11-by-0.125-inch-thick plaques required a full edge gate (10 by 0.060 inches) and land vents 0.5-inch wide by 0.002-inch deep located every 0.5 inch around the perimeter (50 percent of the parting line). A new cavity was built with the same gate, but the only venting was a 10.5-inch piece of porous venting steel opposite the gate. Parts were run side by side to ensure identical temperatures for the mold, resin and machine.
The results of using porous metal inserts and no additional venting were chronic flow lines disappeared, ghosting at the edge of the plaques was eliminated, virtual elimination of material splay, reduced injection pressure, increased injection speed, 10°F decrease in nozzle temperature, nearly 4-percent reduction in shot size, and appropriate gloss and appearance.
Still, there has been no revolution in the industry. However, we’ll continue the fight with education on how to use enhanced venting steels from original part and mold design. Maybe a design contest would work, asking for the most creative solution to a molding challenge using porous metal in the original mold design. First prize could be 5 pounds of venting steel. Maybe this will get the revolution started.
Related Content
Line Width vs. Depth Ratio in Laser Engraving
A laser does not produce 90-degree sidewalls. It requires a certain amount of draft in order to produce the required pattern.
Read MoreHow to Determine the Proper Vent Depth
Vent depth is critical to optimizing mold performance, so here is one approach to finding that elusive right number.
Read MoreIt Starts With the Part: A Plastic Part Checklist Ensures Good Mold Design
All successful mold build projects start with examining the part to be molded to ensure it is moldable and will meet the customers' production objectives.
Read MoreHow to Eliminate Chatter
Here are techniques commonly used to combat chatter and guidelines to establish a foundation for optimizing the moldmaking process.
Read MoreRead Next
Get Schooled on Mold Material Selection
The evolution of pre-hardened mold steels was presented during the "Global Advances in Pre-hardened Mold Steels" webinar by International Mold Steel last month, and audience members walked away learning these five facts about mold steels.
Read MoreThree Considerations for Mold Steel Selection
Although a big challenge is selecting the right steel for the right job, steel selection has never been better in regards to quality, price and delivery speed. Here is a simple checklist when selecting your next mold steel.
Read MoreConsiderations for Mold Base Material Selection
Choosing the right material can greatly affect the profitability and cost of your application.
Read More
