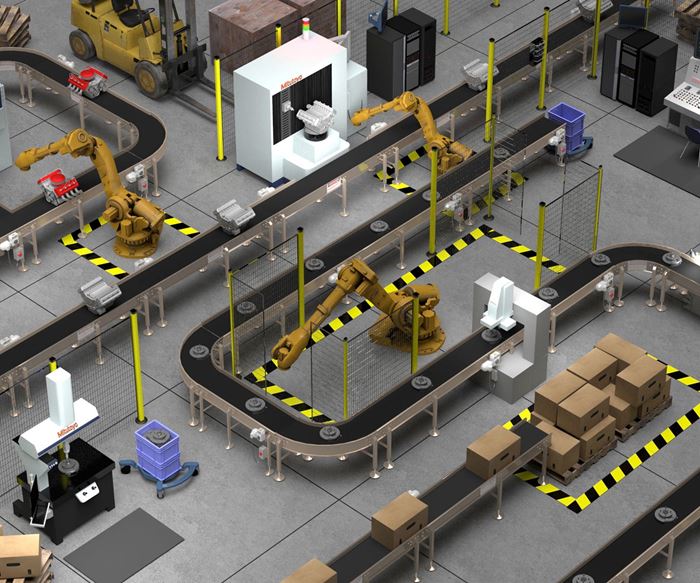
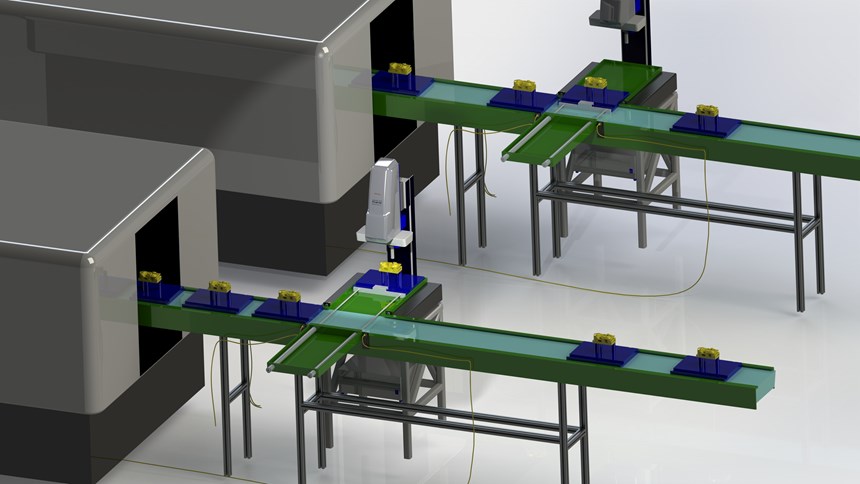
Shop floor inspection can be a tedious or relatively innocuous part of daily operations, depending on the measurement and analysis methods shops use. However, automated measurement equipment solutions, comprising a CNC coordinate measuring machine (CMM), flexible part fixturing, and automated part handling systems, enable operators to quickly and easily change the configuration in hours versus days to accommodate completely different or redesigned parts on the shop floor during production.
Flexible, automated inspection solutions are integral to smart manufacturing for keeping up with efficiency and productivity demands placed on the modern mold builder.
The automation also eliminates the need for dedicated measurement equipment for each mold, mold component, or even molded part, while simultaneously streamlining the analysis and storage of measurement data into smart systems. A smart system combines computer-integrated manufacturing, high levels of adaptability, rapid design changes and digital information technology to achieve a system that monitors the entire process.
For example:
- Equipment status
- Working time
- Idle time
- Maintenance
- Process stopped, the attention required
- Equipment condition
- Preventative maintenance
- Potential component failure predictability
- Measurement data management
- Monitoring for compliance with manufacturing design
- Process control for constant adjustment feedback
- Historical data archiving
Flexible, automated inspection solutions are integral to smart manufacturing for keeping up with efficiency and productivity demands placed on the modern mold builder.
Shops do not necessarily need to invest in a measurement machine on the shop floor, as some may have a minimal number of required dimensional inspections or a lower level of tolerance precision. However, for those shops that do, they should consider automated systems that have both easy setup and easy parts changeover capabilities.
Here is a breakdown of each benefit to help mold builders better understand how measurement equipment can coexist on the shop floor next to production equipment and improve the overall inspection process.
Flexible Inspection
Inspection is integral to providing part verification against design specifications based on product functional requirements. For mold builders, being able to accomplish measurement inspections on the shop floor instead of in a separate quality room eliminates part measurement backlogs, yields rapid turnaround of first article inspection for faster entry into production and avoids the need to physically take a part to measuring equipment not located near the production areas.
Using flexible inspection solutions for mold measurement instead of gauges that are dedicated to one specific mold or one machine to handle all parts, will reduce part changeover costs and save time in gauge modifications and measurement backlogs. These results are possible because it is not necessary to invest in new, dedicated gauges once “old” gauges become obsolete due to part redesign or replacement. Flexible inspection solutions that can be repurposed require only a fraction of the cost of dedicated gauges.
Inspection is integral to providing part verification against design specifications based on product functional requirements.
When investing in a flexible measurement machine, consider a system that can easily change from one part type to another in an hour or less, store inspection results and monitor its process and the machinery’s condition. All of this is accomplished by measuring multiple dimensions, typically 90% or more of the part’s total dimensions as compared to dedicated gauging that usually measures considerably less.
When an operator can see real-time machine status (busy, idle, stopped, down) and real-time machine conditions (hours of use on components, planned maintenance alerts, potential failures from weak components), he or she can improve production planning and use of the measurement equipment’s full capabilities. This data also reveals preventative maintenance needs, which heads off costlier repairs down the line and eliminates the unexpected downtime and loss of production associated with sudden machine breakdowns.
Elimination of Human Error
Mold builders run the risk lost productivity when measurements are inconsistencies due to human error and result in elevated costs per part. Flexible measurement solutions for parts inspection can help avoid any monetary repercussions as a result of this risk.
By adopting flexible, automated measuring equipment for inspection (such as a CMM with multiple sensor capability and programmable software), a mold builder can establish a measurement plan one time, then allow the measurement system to repeat the same routine on every part to achieve consistency across all parts produced. Also, mold builders can realize flexibility in part adaptation, consistent measurement without operator influence, greater speed, improved data management and tighter process control.
Mold builders run the risk of lost productivity when measurements are inconsistent due to human error and result in elevated costs per part. Flexible measurement solutions for parts inspection can help avoid any monetary repercussions as a result of this risk.
Smart Manufacturing Support
Smart manufacturing systems are gaining traction across all industries, but it takes the right technologies and equipment to accomplish. For example, flexible automated measurement that an operator can easily modify when responding to altered circumstances or conditions. Basically, the operator can let the machine make instant adjustments to production equipment, or he or she can perform the action. In either case, using smart technology means the process can be control-monitored to prevent an out-of-tolerance from occurring. This adjustment flexibility also eliminates the need to manually measure multiple dimensions or characteristics, which can take minutes, hours or days and lacks real-time feedback.
Also, even if a facility has embraced automated measurement, the use of only one measuring machine can still create backlogs if the ratio of operations to finished part is large enough. So, to truly support smart manufacturing throughout the manufacturing process, many shops are starting to use multiple automated measuring machines in one production room.
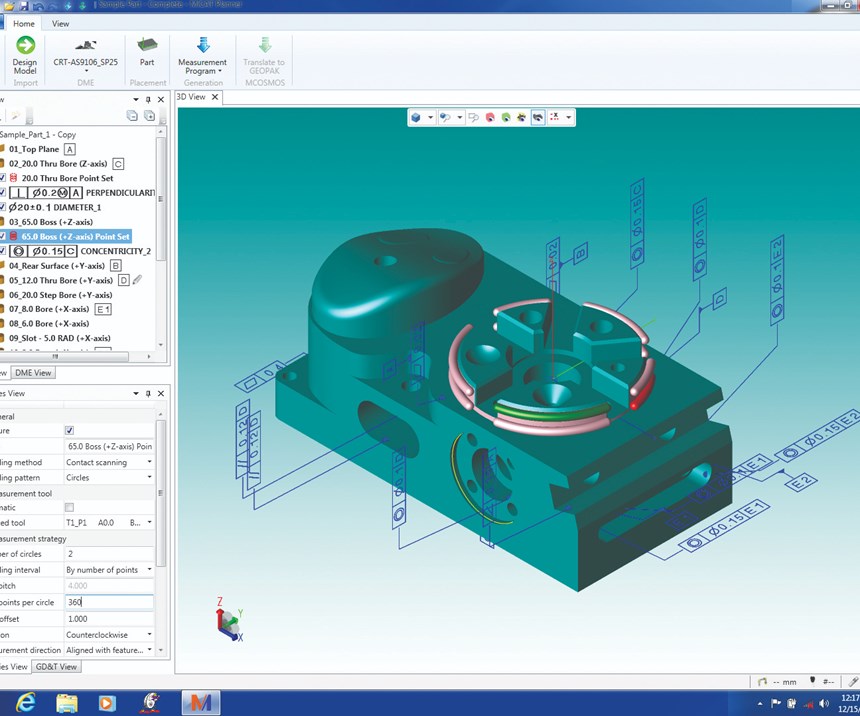
This move to multiple machines includes CAD that historically required the operator to select and input the points to measure, the order and the tolerances. However, most of today’s CAD systems support PMI (Product Manufacturing Information) and include embedded tolerancing as an integral part of the CAD file, which the computer can read beyond producing just an image or picture.
Given that most CAD files have a graphical representation for printing purposes (which is not readable by external systems that generate programs for measuring equipment), a CAD file with PMI for the tolerancing contains the information in an embedded database that the external system can easily read to obtain dimensional characteristics (the design nominal, upper and lower specifications).
The data is embedded in the CAD file based on pre-established rules by size, customer, etc., so the operator can now program this CAD in conjunction with the automated measuring machine. This further supports smart manufacturing and reduces operator errors due to manual input.
To truly support smart manufacturing throughout the manufacturing process, many shops are starting to use multiple automated measuring machines in one production room.
Until recently, CAD files contained design specifications only as an image or picture, which could not be read as dimensional data with an external system. While visually readable to humans, it was not possible to transmit or interpret the image electronically. Flexible, automated measuring machines support data collection for machine tool feedback and automatically adjust the process to reduce scrap and rework, which allows mold builders and molders to achieve the highest throughput for quality production.
These benefits allow the user to send the specified measured dimensional result to machine tool-capable machines that can make corrections to tooling. Also, integrated automated data collection means measuring machines can “talk” to all the production equipment on the shop floor, which not only benefits inspection and measurement but every operation that contributes to the creation of the final product.
For More Information
Gene Hancz is a CMM product specialist for Mitutoyo America Corporation.
888-648-8869 / mitutoyo.com/
Related Content
Revisiting Some Hot Runner Fundamentals
What exactly does a hot runner do? If you’ve been in the injection molding industry for any length of time, you might think the answer is obvious, but it is not.
Read MoreHands-on Workshop Teaches Mold Maintenance Process
Intensive workshop teaches the process of mold maintenance to help put an end to the firefighting culture of many toolrooms.
Read MoreHow to Eliminate Chatter
Here are techniques commonly used to combat chatter and guidelines to establish a foundation for optimizing the moldmaking process.
Read MoreLaser Welding Versus Micro Welding
The latest battle in finely detailed restoration/repair of mold materials.
Read MoreRead Next
Process and Measurement Data Aid Intelligent Moldmaking
Collecting and using measurement data ensures that mold components can meet customer specifications and reduces scrap and rework.
Read MoreInspection/Measurement Software Helps Hyatt Die Cast and Engineering Reduce Costs While Increasing Efficiency and Quality
Hyatt Die Cast and Engineering Reduces Manufacturing Costs While Increasing Efficiency and Quality with Integrated Inspection/Measurement Software.
Read MoreReasons to Use Fiber Lasers for Mold Cleaning
Fiber lasers offer a simplicity, speed, control and portability, minimizing mold cleaning risks.
Read More

