Inspection/Measurement Software Helps Hyatt Die Cast and Engineering Reduce Costs While Increasing Efficiency and Quality
Hyatt Die Cast and Engineering Reduces Manufacturing Costs While Increasing Efficiency and Quality with Integrated Inspection/Measurement Software.
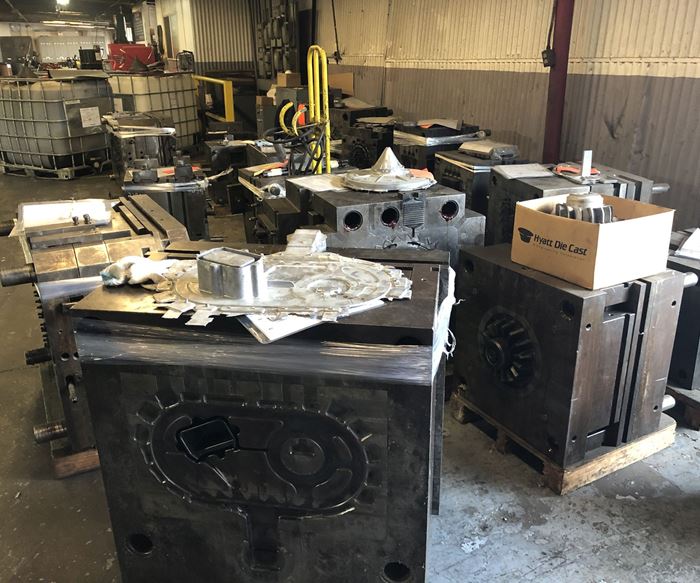
At Hyatt Die Cast and Engineering (Cypress, California), they measure the quality of the die-cast die by the castings (parts) it produces. But make no mistake, to get there requires a delicate dance between thermal dynamics, engineering precision, process, and quality verification. For this reason, Verisurf inspection and measurement software has become an indispensable tool for ensuring that this balance is not shaken.
Over the last 62 years, Hyatt Die Cast has perfected the art of high-pressure precision die casting of aluminum, zinc, and zinc-aluminum alloys (ZA) for aerospace, defense, medical, gaming, electronics and communications customers. The company’s casting size capabilities range from less than one ounce to over 75 pounds.
There are several considerations that go into specifying high-pressure die casting to manufacture parts, including weight, strength, application, part anatomy and more. But the number one consideration is cost. Precision die-cast production parts are typically a fraction of the cost of hogging out parts using a CNC machine for high-volume production. Yes, there is additional time and cost in pre-production for die-cast dies, but once in production parts come off the injection line at a rate of about one minute per shot, with very little waste as nearly all the material is used in the part.
Lower part cost does not translate to lower quality or ease of manufacturing; there are more critical processes involved in precision high-pressure die casting than in CNC milling or turning. These include more material variables, tooling considerations, thermal properties, and finishing steps that all have a bearing on the final parts produced. Precision and quality verification must accompany each process to ensure end-to-end quality.
Measurement and Monitoring Efficiency Keeps Part Costs Low
In high-pressure die casting there are no shortcuts to quality and ultimately, success is based on how the job is engineered and set up from the get-go. Any mistakes up front, designing or manufacturing the die-cast die, will have a negative effect on the entire production run. Since eliminating steps in the manufacturing processes was not an option, Hyatt Die Cast realized the way to save time was to be more efficient in the pre- and post-casting processes, including reverse engineering of legacy parts to aid in design and engineering of dies, and quality verification and reporting throughout the entire setup and production process.
Any mistakes up front, designing or manufacturing the die-cast die, will have a negative effect on the entire production run.
For quality monitoring, during the casting process, a combination of inspected certified material, spectrometer monitoring for chemical analysis, and real-time x-ray of parts to check material density maintains and confirms consistency. These are important verification steps to delivering a solid part, but the area where Hyatt Die Cast has realized the greatest improvement in quality efficiency is dimensional verification across the manufacturing process, which is where Verisurf comes in.
Common Platform Improves Inspection and Measurement Efficiency
Precision high-pressure die casting is a refined manufacturing process; once the job has entered the line a shot is a shot is a shot. Rough parts come off the line for post-processing, and the overwhelming efficiency promise of the die casting process has been realized. But there was a lot of work to get to this point and still a lot to do before the final part is ready for shipment to the customer.
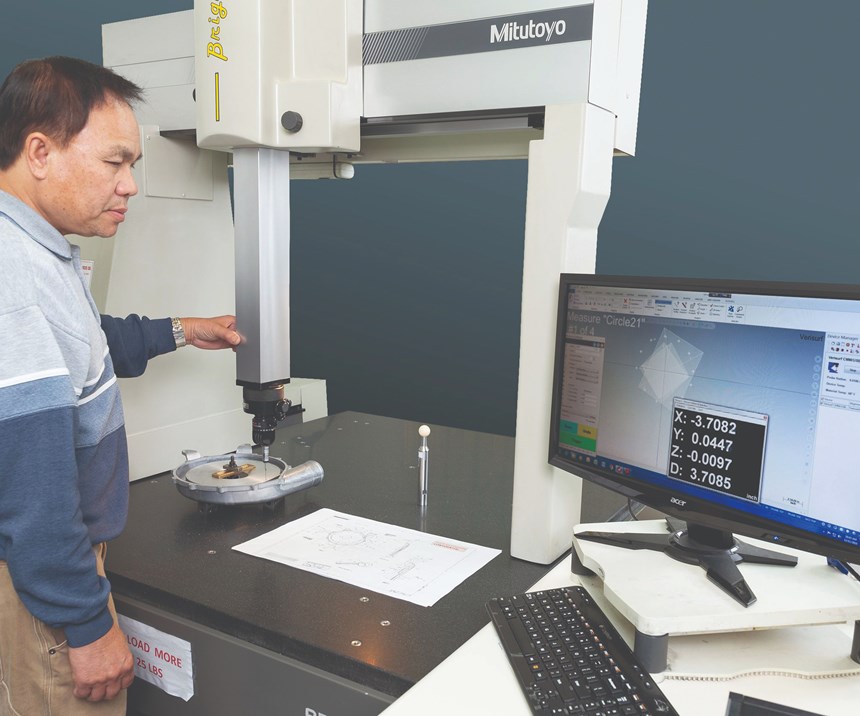
Verisurf quality inspection and measurement software was added to serve as a common platform, capable of interfacing with all coordinate measuring machines (CMM) and portable CMMs in the company’s quality lab. “Verisurf software was selected because of its ability to work with all CAD files, including 2D CAD, 3D CAD models, and paper drawings,” Alfredo Gomez, quality systems manager at Hyatt Die Cast and Engineering, says. “The software reads in intelligent CAD files, including nominal geometric dimensioning and tolerancing (GD&T) datums that we can edit or add additional annotations to when developing die-cast dies or creating inspection routines.”
Gomez says that before switching to Verisurf the Hyatt Die Cast quality team comprised seven individuals, each with local knowledge of specific measuring devices and supporting software. Three different inspection and measurement software programs were in use across multiple fixed CNC CMMs and portable CMMs, including the company’s Faro portable CMM, two Mitutoyo CNC CMMs and one Zeiss CNC CMM. This was due to incompatibility between the various hardware and software required to run the equipment. The result was stifled productivity and frequent bottlenecks waiting for a particular inspector or device to become available.
Verisurf software was selected because of its ability to work with all CAD files, including 2D CAD, 3D CAD models, and paper drawings.
Today, Hyatt Die Cast uses Verisurf to provide first article inspection and reporting, automated inspection, and reverse engineering for both pre- and post-casting processes, which include reverse engineering, first article inspection, post-production inspection, and secondary operations inspection. The software quickly and easily creates automatic and manual inspection routines and serves as a common software platform that is capable of sharing inspection plans across CMM devices.
“We have saved a lot of time and have seen improved workflow efficiency since switching to Verisurf software,” Gomez says. “The software’s model-based approach to inspection and measurement and its common platform capability has enabled everyone in our QC Department to inspect and verify die cast die components and casted parts regardless of the measuring device used. This has saved us time and money on training, data management, and software maintenance.”
Since implementing Verisurf Software, Hyatt Die Cast has realized a net gain in efficiency (time savings) of five times for first article inspections, production inspection, and reverse engineering. All existing measurement hardware remained in place and in-use, and is now driven by Verisurf, without requiring additional hardware, firmware or other software.
Software Facilitates Process Integration
Verisurf software was integrated within the bookends of the manufacturing process: pre-casting setup and verification, and post-casting cleanup, finishing and secondary operations. “The company’s basic processes and need for quality verification did not change, just the quality inspection and measurement software did, with its ability to work with all measurement hardware devices,” Ernie Husted, president and CEO of Verisurf Software, says. The resulting increase in efficiency was immediate.
Reverse Engineering: Customer part information usually arrives via an intelligent 3D CAD model or drawings, but occasionally only a legacy part or prototype is provided. In this case, Hyatt Die Cast uses Verisurf Software to reverse engineer the part to an intelligent 3D CAD model. The model is then used as the virtual part for all die-cast die design, inspection and reporting throughout the entire manufacturing process. Depending on the part size and geometry, the Faro portable CMM or Mitutoyo CNC CMM will be used with a contact probe or non-contact scan head to capture point cloud data.
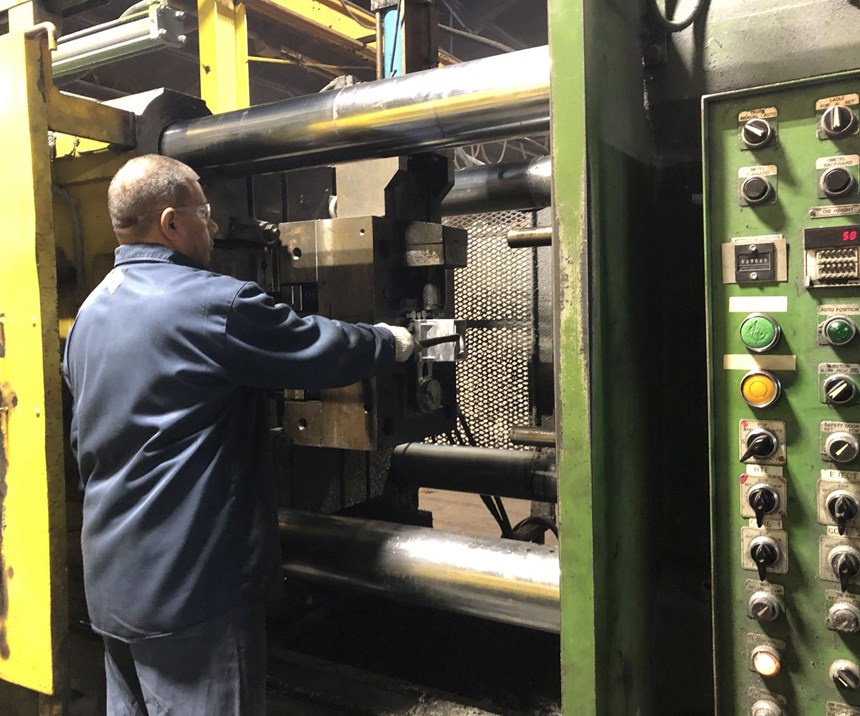
First Article Inspection: The die-cast die is designed and manufactured with required shrinkage calculated and added in. If engineered and designed correctly the finished die is assumed to be correct. After visual inspection, the die takes its place on the injection line and is set up for a test shot. After the test part has rested and is stabilized, it is returned to the quality lab for first article inspection and reporting. The quality lab and CNC shop are kept at a constant temperature and humidity level (ANSI 2540.3), control of measurement and test equipment) for consistency of part expansion/contraction during finish machining and inspection.
The company’s basic processes and need for quality verification did not change, just the quality inspection and measurement software did, with its ability to work with all measurement hardware devices
Precision high-pressure die castings can be shot to a production tolerance of +/- 0.002” - +/- 0.005”. If tighter tolerances are necessary, the die can be made oversize and finish machining can deliver the part +/- 0.0002.
Post Production Inspection: After casting, production parts can rest and stabilize. Then they are trimmed to remove flash and deburred before the final machining process to add any additional features and remove excess material to specification. The parts are then moved to the matching climate-controlled quality lab for final inspection using Verisurf Software. Based on the number of parts requiring inspection, either a CNC CMM running an automated inspection routine or manual portable CMM will be used. Regardless of which device is used, they will share the same Verisurf inspection program.
Secondary Operations Inspection: Hyatt Die Cast operates its own powder coating line in-house, but any time parts leave the facility for other outsourced operations, such as chem film or anodizing, they are inspected before they leave and when they return.
Conforming to Workflow
“Open CAD-based software solutions such as Verisurf Software provide the flexibility necessary to support die- and injection-mold-based workflows of all types. It is important that your measurement software be adaptable to your processes, not the other way around. Closed proprietary systems that fail to support unique workflows or other applications have no place in today’s rapidly evolving manufacturing environment,“ Husted says.
For More Information
Verisurf Software Inc. / 888-713-7201 / www.verisurf.com
Hyatt Die Cast / 714-826-7550 / www.hyattdiecast.com
About the Author
Robert Mooers is a writer and consultant in the manufacturing industry, focusing on practical implementation of products and services from the customer point of view.
Related Content
True Five-Axis Machine Yields More Throughput, Greater Productivity
CDM Tool & Mfg. Co. LLC increased shop capacity thanks to a versatile high-speed/high-accuracy five-axis Fooke mill capable of cutting very large workpieces quickly and accurately with fewer setups.
Read MoreHybrid Milling/Drilling Machine Reduces Total Mold Machining Time
MSI Mold Builders now squares, plus drills and taps eye-bolt holes on 50% of its tools in a single setup using a five-axis milling/drilling center with a universal spindle.
Read MoreLaser Welder Yields Fast, Precise Mold Repair
Intralox's integration of the Alpha Laser ALFlak has significantly improved their tool room efficiency when it comes to difficult welds and urgent repairs.
Read MoreCT Scanning Helps Micro Molder Reduce Cost of First Article Inspections
CT scanning services performed by 3D ProScan, a division of NyproMold Inc. provides MTD Micro Molding with accurate, high-resolution internal and external measurements performed about seven times faster and at significant cost savings.
Read MoreRead Next
How to Use Strategic Planning Tools, Data to Manage the Human Side of Business
Q&A with Marion Wells, MMT EAB member and founder of Human Asset Management.
Read MoreHow to Use Continuing Education to Remain Competitive in Moldmaking
Continued training helps moldmakers make tooling decisions and properly use the latest cutting tool to efficiently machine high-quality molds.
Read MoreReasons to Use Fiber Lasers for Mold Cleaning
Fiber lasers offer a simplicity, speed, control and portability, minimizing mold cleaning risks.
Read More
