Under the Scope: Cracking Demystified
Cracking in tool welding is a common challenge, but it is one for which risk can be minimized.
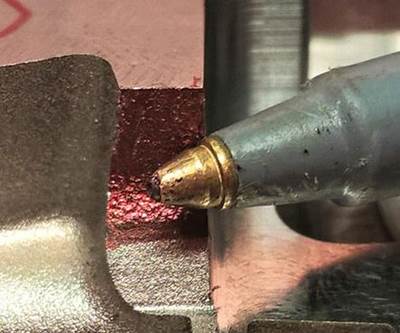
Cracking in tool welding is a common challenge, but it is one for which risk can be minimized. It all depends on the weld location, steel type and welding process. In simplest terms, cracking occurs due to the inability of the steel to handle the stresses of temperature fluctuations caused by the welding. Essentially, the steel will retract as it cools after welding. Oftentimes, cracks immediately become apparent, but sometimes they occur hours later. Essentially, welding improperly prepared steel always carries the risk of potential cracking.
Cracking can take many forms. For example, it can occur in the base steel next to the weld or in the weld itself. In order to address cracking issues, it is necessary to determine the origin of a crack. For example, did the crack happen while the piece was being welded (referred to as hot cracking), or did the crack occur hours after the piece was welded (referred to as cold cracking)?
Hot and cold cracks. In hot cracking, the crack occurs along the length of the weld and appears as the welding is taking place. Most often, this is the result of welding a hard material. Cracking also can happen if the welder is welding too fast and using more filler material than necessary.
Cold cracking happens as the material cools after welding and usually occurs in the weld’s heat-affected zone (HAZ), which is incapable of responding to temperature stresses. Cold cracking also can happen when a large buildup of material is required (1/8 inch or
more over a large area). As the repair cools, the weld’s HAZ contracts (shrinks), causing a crack. The crack may even reach a point hours later where the weld will break off from the base steel.
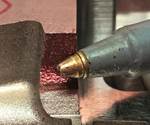
Microscopic laser-weld cracks. Laser welding steels with a high Rockwell hardness (D-2 or M-4) can cause microscopic surface cracking on the weld. Using a filler rod that is harder than the base material can easily cause this to occur. To reduce this problem, the operator should grind down a few thousandths in the repair area, weld with a filler rod that is softer than the base material, then top off the repair with a hard filler that matches the hardness of the parent material.
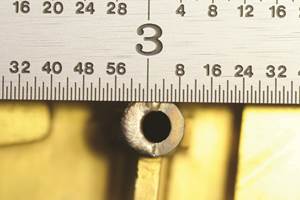
Cracks before welding. Cracks can also appear while welding. Sometimes an existing crack is made worse during welding, and that is what enables it to be detected. For example, molds that have crashed in service can have unseen cracks that become more pronounced when they are pre-heated before welding. During TIG welding, a crack can become noticable when the heat of the weld puddle gets close enough to open it. This is why every repair should begin with an inspection process that involves cleaning and viewing the damaged area under a microscope to check for existing cracks.
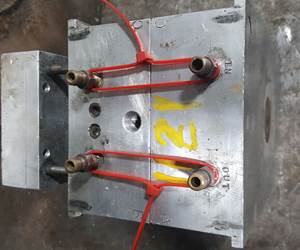
Heating for TIG welding. Pre-heating and post-heating molds for TIG welding is essential to avoid cracking. Properly heated molds have an easier time adjusting to the shock of drastic temperature changes. It is important for mold steels to be pre-heated, and it is an absolute necessity for die steels due to their hardness. Generally, mold and dies steels need to be pre-heated to 500-700°F before welding. Post-heating after welding helps control contraction in the weld’s HAZ. In all cases, adhere to steel manufacturer guidelines for pre- and post-heating.
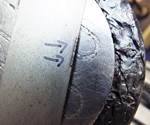
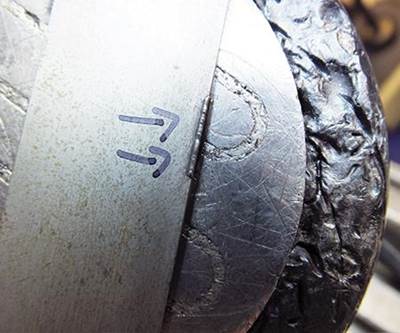
Peening for TIG welding. A welder can also peen the weld to reduce the effects of steel contraction during cooling. This involves periodically using a hammer and punch to beat into the welded area, reducing stresses (see image). This method should be used immediately following welding, while the weld is still hot and malleable. Peening is often used for TIG welding of large buildups. Micro-TIG welds are usually too small for this process.
Crack repair. Cracks always need to be repaired, but the method of repair is critical. Simply burning down the crack with a micro-TIG torch or a laser welder is not the proper way to fix it, even though this may have been requested by the customer. The correct way to repair a crack is to first grind it out, making a U-shaped channel to allow enough weld to enter the area. Keep in mind that you may not be able to see the entire crack. Once you start to dig it out, you may find that it acutally is larger and more widespread. In this case, decide with your customer how much you want to grind the crack to repair it.
Related Content
Laser Welding Versus Micro Welding
The latest battle in finely detailed restoration/repair of mold materials.
Read MoreWhat is Scientific Maintenance? Part 2
Part two of this three-part series explains specific data that toolrooms must collect, analyze and use to truly advance to a scientific maintenance culture where you can measure real data and drive decisions.
Read MoreWhat You Should Know About Injection Mold Safety Straps
Every mold should have one in order to be safe and OSHA compliant.
Read MoreHow to Use Scientific Maintenance for More Accurate Mold and Part Troubleshooting
Discover how adopting scientific maintenance approaches helps improve mold lifespan, minimize failures, and optimize production outcomes.
Read MoreRead Next
Under the Scope: Tackling Tool Welding Problems
This month, we break down common mold repair problems and recommend procedures that welders should consider for mold and die steels.
Read MoreUnder the Scope: Common Laser Welding Pitfalls
Four key trouble areas that can negatively impact efficient and effective laser welding are communication, removal of air pockets, edge technique and selection of filler rod size.
Read MoreAre You a Moldmaker Considering 3D Printing? Consider the 3D Printing Workshop at NPE2024
Presentations will cover 3D printing for mold tooling, material innovation, product development, bridge production and full-scale, high-volume additive manufacturing.
Read More
