ESSENTIAL READING
VIEW ALLHow to Overcome Complex Mold Texturing Problems
Key benefits when considering laser technology for mold texturing and repair.
Read More5 Hot Runner Tips for Moldmakers and Molders
Best practices for initial hot runner tryouts and effective preventive maintenance.
Read MoreWhat You Need to Know About Hot Runner Systems and How to Optimize Their Performance
How to make the most out of the hot runner design, function and performance.
Read MoreHow to Clean and Maintain Molds With Intricate Conformal Cooling Channels
A water-based, eco-friendly plastic mold cleaning system helps Rankine-Hinman Manufacturing restore flow rates and avoid big-ticket failures on complex and costly molds.
Read MoreQuestions and Considerations Before Sending Your Mold Out for Service
Communication is essential for proper polishing, hot runner manifold cleaning, mold repair, laser engraving and laser welding services.
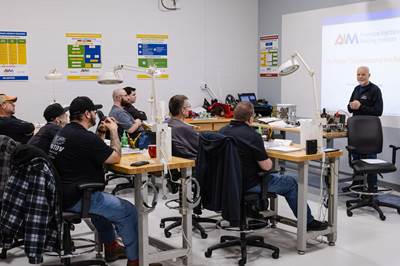
Read MoreMold Maintenance Continues to Matter: Enhanced Training Program in a New Facility
I attended a MoldTrax mold maintenance workshop in 2019 and shared my experiences, and despite changes in ownership, the workshop's remarkable value endures, as discussed in a recent Q&A with the current leadership.
Read MoreLatest Maintenance & Repair News And Updates
Think Safety: Eliminate Hazards Throughout the Shop
The tooling community is taking advantage of new products for safer mold shops and molding facilities.
Read MoreMold Cleaning System Assists Clogged Water Lines in Injection Molds
iD Additives Eco-Pro 360 Mold Cleaning System Provides Safe, Effective Cleaning of Clogged Water Lines in Injection Molds.
Read MoreStain Removal for Optimized Injection Mold Maintenance
Nanoplas offers its Zap-Ox stain removal for optimized injection mold maintenance.
Read MoreDigital Dry Ice Cleaning Technology Enables Mold Component Surface Preparation
Cold Jet highlights its PCS ULTRA, a digital dry ice cleaning technology to prepare substrates prior to coating.
Read MoreSpotting Presses: From Mold Spotting to Series Production
Milutensil SRL offers a diverse range of spotting presses to meet the precision demands of the moldmaking industry.
Read MoreElectroless Nickel Plating Benefits Plastic Injection Molds
Bales Metal Surface Solutions offers electroless nickel plating to benefit plastic injection molds in terms of mold performance, durability and product quality.
Read MoreFeatured Posts
Laser Welder Yields Fast, Precise Mold Repair
Intralox's integration of the Alpha Laser ALFlak has significantly improved their tool room efficiency when it comes to difficult welds and urgent repairs.
Read MoreHow to Use Scientific Maintenance for More Accurate Mold and Part Troubleshooting
Discover how adopting scientific maintenance approaches helps improve mold lifespan, minimize failures, and optimize production outcomes.
Read MoreWhat is Scientific Maintenance? Part 2
Part two of this three-part series explains specific data that toolrooms must collect, analyze and use to truly advance to a scientific maintenance culture where you can measure real data and drive decisions.
Read MorePrecision Meets Innovation at IMTS 2024
After attending IMTS, it's clear that the integration of advanced technologies is ready to enhance precision, efficiency and automation in mold manufacturing processes. It’s a massive event, so here’s a glimpse of what the MMT team experienced firsthand.
WatchWhat Is Scientific Maintenance? Part 1
Part one of this three-part series explains how to create a scientific maintenance plan based on a toolroom’s current data collection and usage.
Read More5 Ways to Improve Supply Chain Visibility and Efficiency
Mold builders play an important role in creating smart, connected and transparent supply chains.
Read MoreFAQ: Maintenance & Repair
What should I ask before sending out a mold for service?
Here are critical questions a mold builder should ask before sending a mold out for service:
Polishing
- How much material did you leave?
- Where are you finishing?
- What is the required finish and what does that finish mean to you?
- What areas have some leeway (e.g., do all cutter marks need to be removed)?
- What is the part making?
- Are parting lines finished?
- Does everything need to be sharp?
- What are the critical dimensions?
- What is more important: finish or size?
Hot Runner
- Does the job require the entire hot half or hot half components only (manifolds, drops, plates)?
- Are there any flow channel blockages?
- Is the system flooded or leaked? Is this routine maintenance?
- What is the resin and process temperature?
- Are all the heaters working properly?
- Are there any problems with temperature control?
- Will the manifold or drop heaters require rewiring?
- Will you need new thermocouples?
- Are any parts/components damaged?
- Do you want components replaced?
- Do you have spare parts?
Mold Maintenance
- What is the size of the mold?
- How many cavities are having an issue?
- When will the tool be ready to go out?
- When do you need it back?
- Do you have any pictures of the tool and/or the damaged area?
- Do you have any last shots or piece parts?
- Do you have drawings, prints or files?
Laser Welding
- How much weld do you need finished when you can’t see the physical damage and you need to build up a shutoff surface?
- What is the base material?
- Does the order need to be picked up or is it being shipped?
- Was a direct contact provided for the person responsible for answering questions?
- What amount of buildup is needed when finished machining?
- What location needs welding?
- Is blending and polishing to remove the weld needed?
Laser Engraving
- What material is it?
- Do you have a file?
- What is the depth of engraving (is it critical)?
- Will additional stock be removed?
- Do we need to go deeper than the print calls?
Source: Questions and Considerations Before Sending Your Mold Out for Service
What are steps to a mold maintenance program?
Properly treating the surface of a mold is the only way to ensure a high-performing mold that lowers the cost of ownership and increases the number of parts produced over time. However, proper surface treatment is not a one-time thing; it must be a part of preventative maintenance and includes more than coating a mold’s surface in a hard metal for wear protection. When a mold is taken out of production because a part run is complete or has a maintenance issue, perform a complete mold cleaning and surface treatment program.
This program includes a thorough cleaning of the mold, flushing the cooling channels, checking the cooling channels’ flow rates, performing a leak integrity check, coating the cavity, core, pins, and slides for wear protection and coating the cooling channels to prevent scale, rust and leaks. If you follow this program after the mold is taken out of service, or better yet, before a new mold is put into service, the mold will perform more efficiently and for a more extended period.
Source: Components of a Complete Cleaning and Surface Treatment Program
How can I repair a mold texture?
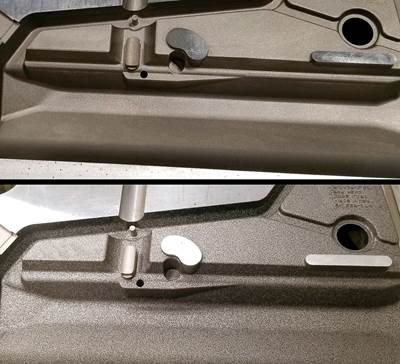
Texture damage is defined as an impact event on the textured tool surface that left a scar. The following methods (listed in order of effectiveness) are used for initial texture damage evaluation:
• Close-up photos of the damage.
• A molded part that shows the damage.
• A review of the damaged tool.
There are three degrees of damage: a scuff of the micro-texture, a scrape of the etched texture and a gouge that reaches down into the tool. Each of these requires a different repair procedure.
1. Scuff of the micro-texture. If the surface has received damage only to the micro-texture, then a re-gloss using the original sandblast media formula will remove the scuff and return the surface almost back to the original finish. The term “almost” is used to account for the wear that sandblasting can cause to an etched texture. This wear happens every time a texture is sandblasted or re-glossed, so it is a concern.
Most textures can be re-glossed at least once and still maintain 95 percent of the original profiles, as long as the technician is trained in the process. Overly aggressive sandblasting can and does damage textures.
2. Scrape of the etched texture. When the main etched grain is damaged, the repair will require acid etching to restore the original texture profiles. The area of repair may be prepped by stoning or polishing out the damage, followed by replacing the texture with etchants often engineered specifically for this application.
Many of today’s textures are achieved through multiple layers of etch applications. In the case of repairs, the layers will have to be reproduced. It is important to know the texture specification so that these layers can be reproduced as accurately as possible.
Some of the repair scenarios for damaged textures will require welding to replace the steel that was removed with the scrape or compression event. The tool’s exact steel type must be noted so the weld metallurgy matches as close as possible to the tool metallurgy. Tool steel manufacturers provide specific welding rod recommendations because differences in steel metallurgy will result in differences in texture profiles.
Weld hardness is another critical factor for successful repair. If the weld is too hard, the micro-texture finish will not match that of the parent steel. This will appear as a gloss differential on the part. Pre-heating the area to be welded and post-weld heating can help minimize this hardness.
3. A gouge that reaches down into the tool. The flatness of a surface is altered when a texture is damaged with a depression, and it is necessary to polish out the texture to facilitate the best texture replacement option.
Etched texture replacement always removes surface stock, which affects surface flatness. With texture repair, it also is common to face situations where stock is removed from a surface, thereby creating a dip or sink on the repair surface. Using a radius, fillet or parting line to tie in the new texture with the original texture is recommended. By using existing profile changes in the tool, the change in surface flatness is hidden. Oftentimes this means that complete texture removal may be recommended for an area much larger than the damaged area to facilitate texture blend.
Sometimes the blend has to be done in the middle of a flat surface because there are no radii or fillets with which to blend. In these cases, the metal removal will be kept to a minimum and the texture will be replaced with a slight dip in the surface. Even if the texture replacement perfectly matches the original texture, the dip on the surface may reflect light, highlighting the area. To eliminate the dip, a weld is applied. Then locally texturing the welded area and blending the repair into the surrounding non-welded area is recommended.
Source: Understanding Texture Repair


