Benefiting From Advanced Probing Technology
A progressive moldmaker uses the latest probing technology to attack downtime.Data Import Utility : Edit Content
Continuous improvement is the primary reason that executives at one of North America's leading suppliers of tools for plastic injection molding cite for the company's ability to flourish even in times of increasingly stiff competition and cost pressures. The company specializes in molds of all sizes for automotive exterior and interior plastic components - from intricate taillight lenses to fascias and instrument panel substrates.
Despite increased competition - including that from offshore moldmakers - the company has remained competitive by reducing the time it takes to build the complex, precision tools. Manufacturing engineers at the company point to improvements in technology that have improved productivity while maintaining cost and quality levels.
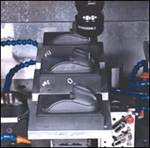
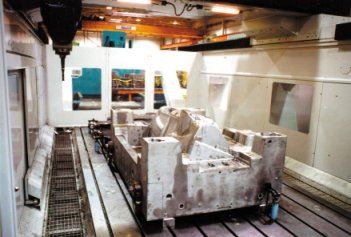
One such technology that is helping to reduce non-productive downtime on machine tools is the latest generation of probes - specifically MidaT touch-trigger spindle probes and laser tool setting systems supplied by Marposs (Auburn Hills, MI and Bentivoglio, Italy). Mida touch-trigger spindle probes are used to align workpieces on the machines prior to cutting. The Mida E86 probing system uses radio-frequency signal transmission, which is a real advantage on the giant CNC machining centers used to machine molds ranging from 25,000 to 95,000 pounds. finished weight. The company's machines have capacities up to 150,000 pounds. In addition to initial tool orientation and pickup, the touch-trigger probes are used to check the size of bores and pockets in the molds after machining to determine if further cutting operations are required to finish the features depending upon the required tolerances.
Checking Tools at Operational Speeds Improves Accuracy
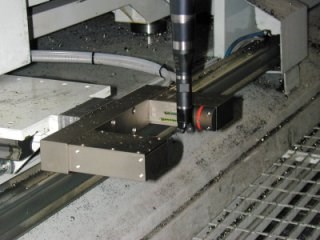
In addition to the spindle probes, Mida LaserT non-contact tool setting systems are used on the machines to automatically check tool diameter, length and run out tolerances of all cutting tools prior to machining, as well as for monitoring tool wear and catastrophic tool breakage. The system uses a laser beam that is transmitted to a high precision photo diode. When a moving cutting tool interrupts the laser beam, the machine control - using Marposs' Active Cutting Tool Control Macros - performs the necessary measuring functions, thereby automating the cutting tool-offset operation.
One of the advantages of using the Marposs Mida Laser non-contact tool setting system is the ability to check tools rotating at operational speed, which provides more accurate measurements. The mold manufacturer uses this capability to dynamically measure tools at speeds ranging from 3,000 to 10,000 rpm. Using the Mida Laser system, any tool length adjustment or other type of compensation on the machine is achieved within the accuracy of the machine. The Mida Laser system's precision is within a micron, so the overall accuracy of the tool compensation is limited only by the machine resolution, that is, in most cases, 0.0001 inch.
Automated Probe Saves Time
The Mida Laser system requires minimum operator intervention, which yields very consistent settings and significantly reduces setup time. The automatic tool setting cycle also facilitates unmanned, automated machining to help the mold manufacturer keep many of its machines operational around the clock, including weekends and holidays.
Prior to the laser systems, tool setting was totally dependent on the machine operators using manual aids such as wigglers, edge finders and pick-up chairs. According to company engineers, this was quite a lengthy process since it is done strictly by "feel" with some visual input from indicators. The company found that switching to automated tool setting from the manual process resulted in a minimum of three - but closer to five - times faster setups. That may not sound like much, but when one considers the type of work that this moldmaker does, it really adds up.
One example is a large mold that has more than 40 lifters and 40 lifter rods and boring pins - all on compound angles. Considering the rotary heads and indexing on the machine that are required to finish this particular mold, company engineers estimate that it would require five times longer to set the tools manually than it does with the Mida Laser tool setter. And it is unnecessary to have an operator at the machine doing the setup, which means the machine can be operated unattended at any hour of the day or night.
Flexible Functionality
Among the many flexible machines used by the moldmaker is an Italian-made Parpas gantry-type machining center with head changer and Selca CNC control. This precision machine, which is used for semi-finishing and finishing of large molds, has five meters of X-axis travel and the capability of cutting at 1,200 ipm feedrate. The Parpas machine can automatically exchange any one of three heads: a high-horsepower, direct drive conical spindle head with 35 hp and up to 6,000 rpm for use in semi-finishing and heavier stock removal; a five-axis positional universal head with 11 hp and a 30,000-rpm spindle; and a simultaneous motion five-axis, fork-style head with 15 hp and a 16,000-rpm spindle. On this and most of the other machines at the company, operators use the standard tool setting cycles that were supplied with the Mida Laser system. Company engineers have, however, modified some of the cycles to obtain additional functionality. This is accomplished using simple coding to change the cycles. Marposs technicians have supported the company's engineers with their knowledge of CNC controls and the Mida software functions.
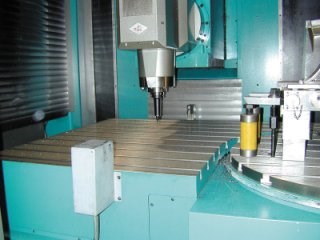
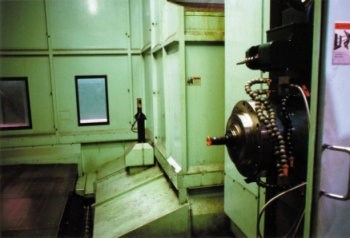
The company recently installed another exceptionally productive machine tool, a large Kuraki KBT-15B-A CNC horizontal boring/milling machine, which has two fully-enclosed indexing tables. The column can shuttle between the two tables, making it possible to set up the machine with enough material to run continuously even overnight or on a weekend. Adapting the Mida Laser tool setting system to this immense machine required a little ingenuity since there was no place to mount a standard bracketed laser system due to the traveling column.
Marposs technicians worked with Kuraki's engineering department to mount the separate Mida Laser transmitter and receiver units on two columns that are mounted directly to the machine foundation. This setup isolates the laser system from vibrations. And although the emitter and receiver modules are set at 6.5 meters distance - a very large sweep area - the Mida Laser's accuracy is well within the Kuraki machine's 0.0002 inch positioning accuracy. Marposs can mount the modular laser emitting and receiving units at a maximum eight meters from each other, if necessary.
A Mida spindle probe with an extended stylus for reaching into long bores also contributes to successful unattended machining using the Kuraki HBM. With unmanned operation, it is essential to have the probe. Company engineers explain that location could be out by as much as an inch since a dedicated fixturing system is used to hold the workpieces. The Mida spindle probe is used to accurately find the workpiece corners or tooling balls, and reset the origin offsets automatically.
The spindle probe also is used to verify bore dimensions, which typically are held to within +/-0.001 inch on the Kuraki. If necessary, a machining cycle can be reinitiated using cutter compensation to re-machine a bore that is outside of the required tolerance.
Considering that a complex mold for an instrument panel substrate, for example, may require 200 hours just in finish machining, the use of the most advanced probing technology is practically a necessity. The Mida Laser system verifies the tool and provides the ability to check tool length and diameter very accurately. So when a blending condition occurs that requires switching from one tool to another, for example, the operator is assured of a smooth blend with no steps in the part. Company engineers report a significant improvement in surface finishes obtained using the Mida Laser system, especially when combined with the high-speed, high-resolution machining centers available today.
Related Content
Mold Innovations Power Unique Auto Lighting Elements on Hummer EVs
Diamond machining, electroforming of micro-optical inserts and modified latch-lock system help injection molds produce unique forward lighting elements.
Read MoreTips for Tackling Mold Design, Machining, Cutting Tool and Wear Challenges
Tips for tasks ranging from reducing risk in part design and taking advantage of five-axis machining to refining cutting tool performance and reducing wear with guiding and centering systems.
Read MoreDevelopments in High-Speed Machining Technology
There have been many exciting developments in high-speed machining relative to machining centers and controls, tooling and CAD/CAM systems.
Read MoreSolving Mold Alignment Problems with the Right Alignment Lock
Correct alignment lock selection can reduce maintenance costs and molding downtime, as well as increase part quality over the mold’s entire life.
Read MoreRead Next
Machine Tool Probing for Moldmaking
It’s time to look at the probe as a device that can literally be used as a Virtual Operator to perform many of the everyday, time-robbing processes that eat into your profitability.
Read MoreReasons to Use Fiber Lasers for Mold Cleaning
Fiber lasers offer a simplicity, speed, control and portability, minimizing mold cleaning risks.
Read MoreHow to Use Strategic Planning Tools, Data to Manage the Human Side of Business
Q&A with Marion Wells, MMT EAB member and founder of Human Asset Management.
Read More
