Pairing GD&T with Industrial CT Helps with Moldmakers Part to Print Projects
Industrial CT scanning has become an integral part in GD&T and how the internal measurement of complex component parts should be facilitated.
In the 1960s Theodore Levitt said, “People don’t want a quarter-inch drill, they want a quarter-inch hole.” Levitt’s statement provided us with the understanding that people who buy products and services do so to accomplish a task or achieve a goal. These tasks or goals have less to do with the technology and more to do with the outcome—what has come to be known as “jobs-to-be-done.”
In order to provide you with a solid value proposition for GD&T through industrial computed tomography (CT) scanning, I won’t present you with what industrial CT is, how it works or a history lesson on the technology itself. I’d rather present the “jobs-to-be-done” approach. The notion is simple, “You don’t really buy products or services, you hire them to do a job.”
Jobs-to-Be-Done Approach
Turning to industrial CT scanning is an important and viable step. However, hiring the service providers who can handle such complex projects is taking that step toward the outcome of a jobs-to-be-done approach. Industrial CT scanning services have shown to help moldmakers based on three determining factors: (1) accuracy, (2) repeatability and (3) savings—both in terms of time and cost—when it comes to highly complex part to print projects, which require numerous GD&T points inspected.
Who really cares about the drill, give me the hole! What moldmakers want most is a smooth transition from part to print request to a part to print report. This is accomplished by scanning, analyzing and measuring your part, so that you can make a qualified decision within a shorter time frame and get to production faster. This allows you to receive a value-added solution because it increases the value in actionable data to drive performance improvement, and at the same time it upgrades standards in quality control.
Moldmakers who handle highly complex geometrical parts on a regular basis know all too well that anticipating such a highly complex GD&T project can be time consuming, difficult to measure and not cost effective at all.
Jobs-to-be-done + GD&T + industrial CT = successful internal complex geometry inspection
GD&T through Industrial CT
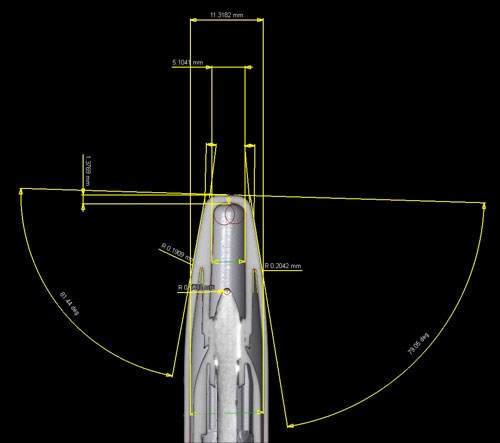
When it comes to GD&T, measuring for internal features on component parts has proven to be difficult. Industrial CT scanning has become an integral part in GD&T and how the internal measurement of complex component parts should be facilitated.
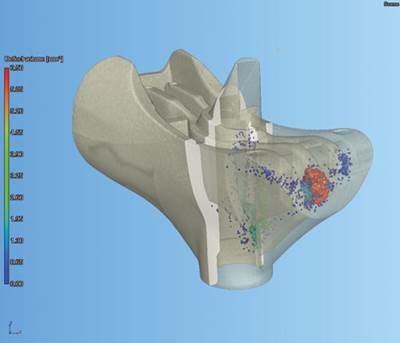
Turning to industrial CT for your GD&T projects is a viable measurement solution for obtaining a complete and accurate 3-D model of the part’s internal and external geometries. Complex parts are scanned in a free-state environment, allowing for both external and internal components to be validated quickly and accurately without destructive testing.
Once the scan is completed the GD&T program is written around the scan data set and referenced to the part print. From there, the GD&T program is instantaneously applied to future scans of the same or mirrored part.
Working off a Gaussian least squares model, repeatability is much higher and measurement programs can be applied to multiple parts. So once a program is written it can be applied to subsequent parts as well. Since the software is a virtual environment, a coordinate system can be created however the user wants. With its intuitive menu and its approach of applying sub objects for measurement, the computed tomography software provides the ability to adjust a sub object, which is then updated down the chain.
For example, cylindricity call outs are extremely difficult, time consuming and costly to measure with alternative methods. The cylindricity function through industrial CT’s software with a CT dataset makes performance calculations as easy as finding a standard dimension or radii.
Additional value-added features of measuring GD&T through industrial CT software include:
• GD&T with CT datasets can be performed on parts less than 1 millimeter in size
• GD&T with CT datasets can be performed on small intricate parts in 3-D as opposed to 2-D
• GD&T with CT datasets can be performed on different material densities inside a part of an assembly
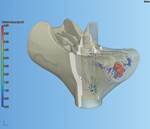
Industrial CT scanning works by taking several hundred to several thousands of 2-D x-ray images covering 360 degrees. Once the scan is completed the 2-D x-ray images are reconstructed in 3-D, giving you the opportunity to see the external and internal features of the part, inspect for defects, and capture exact geometrical measurements for comparison and metrology purposes.
Summary
GD&T has been an essential tool for establishing design intent, to make sure that parts meet the requirements of fit, function and interchangeability. Industrial CT scanning is setting a new standard in qualifying pre-production parts quickly and accurately while reducing inspection costs. This is achieved by using the right technology, expert analytical support, and scan data calibration to ensure accuracy.
The accuracy, efficiency and reduced turnaround time demonstrate that industrial CT scanning will continue its trend of becoming a required tool for inspection, as industry leaders are identifying both the value in inspection standards and the cost savings it offers.
Related Content
Four Micro Tooling Considerations
Issues involving gating, ejection, mold splits and direction of pull are of special concern when it comes to micro tooling.
Read MoreTechnology Roundup: New/Improved Technologies You Don't Want to Miss
With all the technology joining the market, moldmaking is a versatile, ever-evolving industry. As such, this technology roundup has no specific theme — it features a variety of products for applications and solutions across the industry.
Read More2024 Moldmaking Insights: A Year in Review Part 1
A look back at the top moldmaking trends of 2024, as revealed through MMT's analytics. This review highlights the most popular technical articles, case studies, tips and best practices that captured the industry's attention over the past year.
Read MoreQuality Control Technologies Geared for Injection Molds
These latest technology solutions, from noncontact gages to test probes and automated inspection systems, aim to minimize production risks and ensure optimal quality control practices for moldmaking.
Read MoreRead Next
Using Industrial CT Scanning to Reduce Preproduction Inspection Costs
A look at the analyses that have been found to benefit major automakers, tiered suppliers and moldmakers.
Read MoreAre You a Moldmaker Considering 3D Printing? Consider the 3D Printing Workshop at NPE2024
Presentations will cover 3D printing for mold tooling, material innovation, product development, bridge production and full-scale, high-volume additive manufacturing.
Read MoreReasons to Use Fiber Lasers for Mold Cleaning
Fiber lasers offer a simplicity, speed, control and portability, minimizing mold cleaning risks.
Read More

