Leadtime Leader Q&A: X-Cell Tool and Mold on Quality Assurance
The current Leadtime Leader shares an update on its continually advancing in-house quality processes and equipment.
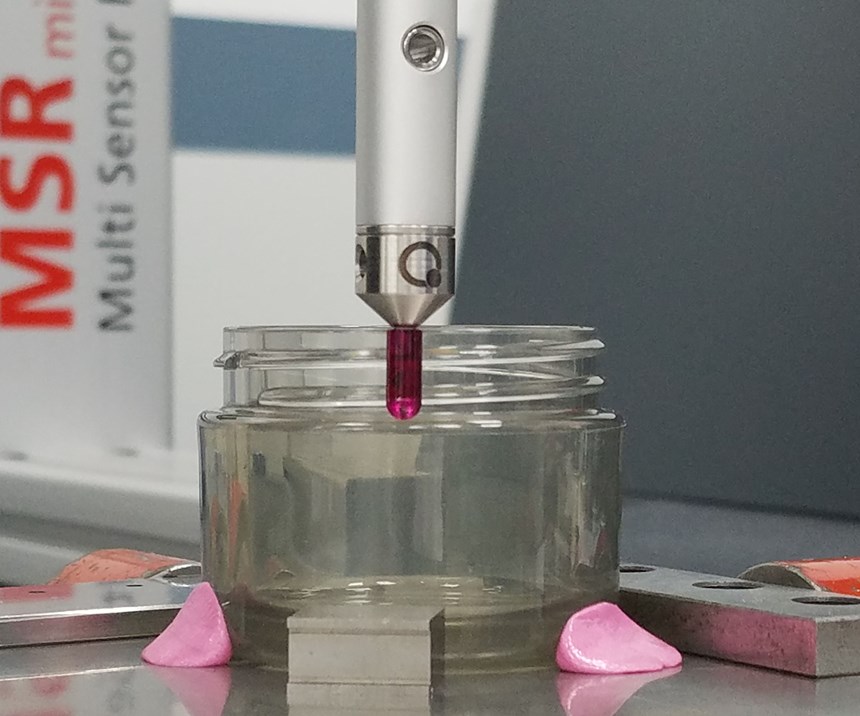
This short video shows side-by-side footage of a plastic jar being inspected on a Zeiss Contura coordinate measurement machine (CMM) at X-Cell Tool and Mold. One screen shows the actual part being probed while the other screen provides a digital view of the process. Videos courtesy of X-Cell Tool and Mold.
Since MMT’s feature on X-Cell appeared in the June issue, how has the company advanced its quality program?
Brian Dippel, operations manager: X-Cell has completed the internal audit and stage l of the AS9100D implementation process. Stage ll of the audit was completed in November and has enabled X-Cell to incorporate the AS9100D aerospace quality standard. With the actual certification on the horizon, X-Cell has already received P.O.’s from a new customer. We are working together to develop this new relationship, and the AS9100D efforts are supporting us through the process.
With the purchase of a second five-axis Yasda, combined with the requirements for the new standard, come tighter procedures for lot traceability, inspection documentation, documentation for material handling, material certifications, required job training for individuals X-Cell will be in a strategic position to take on the stringent requirements of aerospace work.
International Traffic in Arms Regulations (ITAR) registration is in the future, and X-Cell is taking the necessary steps to ensure we are compliant with the regulation. We are still working with consultants to help guide our implementation efforts because with this standard comes great responsibility and great liability.
Has X-Cell purchased any equipment that will support the new certifications and the overall goal of meeting customer requirements?
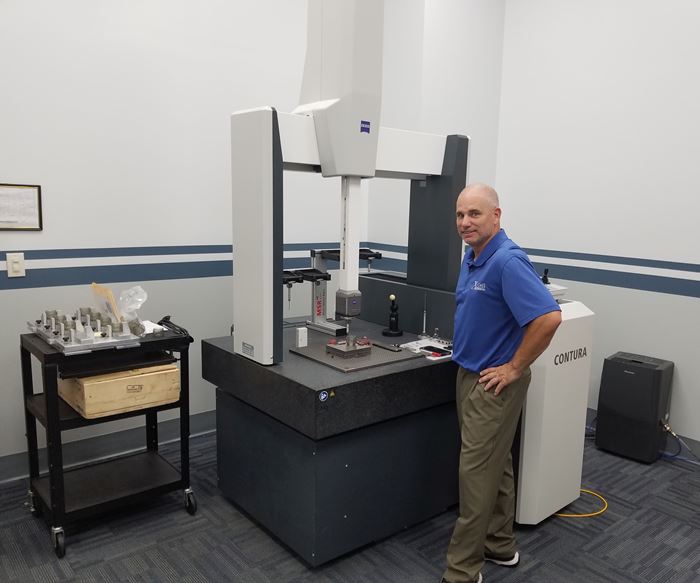
Dippel: We have added another coordinate measuring machine (CMM) to our quality lab in the form of a new Zeiss Contura with a Vast XT probe system and Calypso software for programming it. With the additional capabilities of this CMM, X-Cell will be able to bring more 3D reverse engineering jobs in house versus relying on an outside source to get it right. It is time consuming to have multiple phone calls, web meetings and re-scans to ensure the quality of reverse engineering supplied by an outside source. We can inspect and test the output results of the reverse engineering and focus on critical areas like shutoffs to ensure they are correct.
With the new CMM, the data collection is fully automated. Our next challenge is to create a translator, so to speak, that will be capable of taking the Zeiss output file and auto populate our own, conditionally formatted quality reports as well as our customer-supplied quality reports. This will all but eliminate the need to use a data entry clerk to prepare these types of reports before sharing with our customers.
Also, our new building addition is complete, and we have taken delivery of a new Wintec t-win 6500 (650-ton) servo hydraulic molding press with an iu 4800 injection unit for sampling our higher cavitation consumer product tools. The machine (Wintec is a subsidiary of Engel), is equipped with a five-axis NEXiA 800S robot from HYRobotics and is used for part removal to simulate the handling methods of our customers. We have already used this Wintec machine, robot and the Zeiss CMM to validate two higher cavitation consumer product tools.
What about personnel? Has X-Cell hired new employees to help manage these new capabilities?
Dippel: We hired John Zadorozny, a gentleman who is a 12-year veteran of running Zeiss CMM equipment. He will help us speed up the inspection process, automate it and make it more reliable in terms of accuracy and consistency. Additionally, with John running the Zeiss, reverse engineering is now completely managed in house, so those web meetings or phone calls are no more. Now it is a five-minute conversation with John at the CMM to review and plan the next steps needed to develop a useful, properly defined model from an existing piece of steel.
On the molding side, we recently hired another graduate from the Penn State Erie plastics program. He is now enrolled in the RJG Master Molder l & ll certification course and will begin training in December.
This further supports our efforts for a sound approach to developing centerline processes for molded parts to ensure accurate quality data and ultimately reduce rework or grooming timeframes.
Related Content
Questions and Considerations Before Sending Your Mold Out for Service
Communication is essential for proper polishing, hot runner manifold cleaning, mold repair, laser engraving and laser welding services.
Read MoreHands-on Workshop Teaches Mold Maintenance Process
Intensive workshop teaches the process of mold maintenance to help put an end to the firefighting culture of many toolrooms.
Read MoreLaser Welding Versus Micro Welding
The latest battle in finely detailed restoration/repair of mold materials.
Read MoreWhat is Scientific Maintenance? Part 2
Part two of this three-part series explains specific data that toolrooms must collect, analyze and use to truly advance to a scientific maintenance culture where you can measure real data and drive decisions.
Read MoreRead Next
Leadtime Leader Q&A with Maximum Mold Group
MoldMaking Technology invited the owner of this year’s Leadtime Leader winning shop to share his thoughts on the impact of winning the award.
Read MoreLeadtime Leader Q&A Graphic Tool Corp. and Concours Mold Inc.
We invited this year’s Leadtime Leader winner and honorable mention shops to share their thoughts on five-axis machining.
Read MoreLeadtime Leader Q&A: X-Cell Tool and Mold on Automation
X-Cell Tool and Mold discusses how automation is used to increase machine utilization and reduce costs.
Read More

