Badgering Mold Variability with On-Machine Gaging
Using unique on-machine metrology software helps to nail down injection mold machining consistency.
Badger Meter, Inc. (Milwaukee, WI) has always been a stickler about manufacturing water meters that consistently deliver high accuracy. They are constantly on the lookout for software and equipment that will help them eliminate inconsistencies from their manufacturing process.
It was this desire to be ahead of the curve that led them to make on-machine gaging (using PC-DMIS NC on-machine metrology software) an integral part of their manufacturing processes for producing injection molds. In doing so, they have eliminated a sometimes elusive source of variability in the manufacture of critical metering components. By reducing scrap and rework they are saving time and money. This has translated directly into improved service life and metering precision for their customers in this competitive market.
Injection mold designer Jay Prill describes it like this, “Historically, moldmaking has often been considered to be as much an art form as a manufacturing process. That is because many of the last minute adjustments to mold components that correct for shrinkage, warpage, flashing and part performance are based on the moldmaker’s experience and skill. Now, though, we have a software tool streamlining this process and eliminating uncertainty. Using PC-DMIS NC, we can both anticipate the corrections we will have to make ahead of time and then verify the changes we make by checking the parts on the machine as we make them. Using this more scientific approach Badger has gained a significant competitive advantage. We now have a faster, more consistent and predictable process for developing and maintaining injection mold components. And, that is one goal that never changes.”
Important Additions
An important step the company took in that direction last year was to order a Mikron HSM 400 high-speed machining center that could produce precision mold cavities and inserts from hardened steel and thereby reduce the tool shop’s reliance on EDM. About the same time, Prill was attending a toolmaking seminar where he learned about the potential benefits of on machine gaging for improving dimensional accuracy of CNC machined mold components.
Prill approached his boss who agreed that the new precision machining center and on-machine metrology software might make a powerful combination for nailing down precise mold component dimensions. The company began a market search for a product capable of performing sophisticated measurements and analyses without impinging on the CNC’s cutting time in any significant way.
It turned out that such a product was close at hand. For many years, Badger had been using Brown & Sharpe CMMs with PC-DMIS 3-D measurement software. A new version of this product, PC-DMIS NC Server, based on the same software platform, allows the user, in this case Jay Prill, to both create measurement probing routines and analyze the results off-line in the same CAD-based environment used by the CMM software. Having interoperable EMS (Enterprise Metrology Solutions) software will also make it possible to share programs and measurement data between the machining centers and CMMs on which PC-DMIS is installed.
How It Works
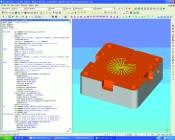
This approach, which minimizes any impact on cutting time, works like this. A post processor turns the measurement routines into sequences of G and M codes for driving a spindle probe. Prill loads the sequences onto his machine tool and executes them as he would any other program. During execution, the probe takes each point and sends the results to a file on the remote computer hosting PC-DMIS NC Server using a network connection. Once it has finished probing, the CNC machine resumes cutting. At that point, PC-DMIS NC Server opens the file and uses the PC-DMIS evaluation engine to analyze the point data and report on the features and dimensions of interest. It also stores the results in the DataPage SPC database for on-going process analysis and improvement.
Moving Right Along
Prill got a couple of days’ worth of training during installation of the PC-DMIS NC Server System. He found that the programming techniques used for PC-DMIS NC and his CAM software were similar. He had the additional benefit of having Quality Specialist Bill Kurz working in the same plant. Kurz has years of experience working with PC-DMIS on the company’s nine CMMs and was always available to provide programming advice as needed.
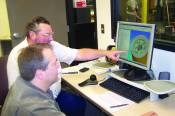
“It’s not that difficult,” says Prill. “The origins and the alignment are already there. I just use the same alignment I use for machining the part. So programming PC-DMIS NC is just a simple matter of asking it for what I want—measure a circle or a diameter, find how much machinable material is left on a surface and so forth.”
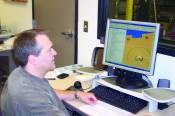
Prill typically generates his high-speed machining toolpaths with his CAM program. Then, while the part is being machined, he imports the CAD model into PC-DMIS NC and programs the measurement routine. It takes him less than a half hour to create a measurement program that will collect 10 or 15 measurement points from the critical area of a part. Prill said the five or 10 minutes it takes to run this program is nothing compared to the time it saves in keeping his manufacturing process moving.
On-Machining Metrology Goals
The goal of on-machine metrology at Badger is to make sure that the component matches the CAD model as closely as possible before the component leaves the toolroom. When it doesn’t measure up, Prill explains, “We have to find out why we are out of the band. Worn cutter? Maybe the toolpath is not right? Maybe we were a little too aggressive on step-overs or we left a little too much material on for the finish cut.” When the component does not measure up, adjustments are made to the manufacturing process immediately.
Once he got a little programming experience, this interactive machining process proved to be so simple and straightforward that Prill began to check critical features on almost everything he manufactured with the Micron CNC machine. He says, “PC-DMIS NC allows me to inspect the part as soon as it has been made. If something needs to be fixed, I do it then and there instead of sending it to the quality lab, explaining what I want and then waiting up to 24 hours to get measurement results back. What’s more, if I want to check some other dimensions based on what I learn from the measurement report, I just do it instead of having to send it back to the lab again.”
As a result of the capabilities Badger has gained using on-machine metrology, the company is realizing important short-term and, hopefully, long-term benefits. Consider the following.
Mold Shut-Off
Using PC-DMIS NC, Prill can now produce mating mold components that fit perfectly the first time they leave his shop. He explains that a lot of the molds have shut-off surfaces that must fit within .0001”. If these surfaces are too tight, they won’t allow the mold to close properly. If they are too loose, the plastic will flash between the mold halves. Today, Prill measures representative points from all the mating surfaces and reworks them immediately if they are out of tolerance. As a result, the toolbuilders are experiencing none of the typical problems with flashing or improper mold closing.
Although Badger relies heavily on high-speed machining, there are still a number of cavities that require EDM processing. The company now routinely checks the electrodes with PC-DMIS NC to determine how much compensation must be made for over-burn. This allows shutoffs to be EDM’d more accurately the first time and eliminates subsequent reworking of tool components.
Shrinkage and Warpage
Plastic parts always shrink and warp after molding. Experienced toolmakers compensate for this in their designs, but their tools often require fairly significant corrections after the first run. Theoretically, when cavities and inserts more closely represent the CAD model, shrinkage and warpage factors for a prototype tool will be less severe. So, making corrections for these with design compensations will be easier since manufacturing variability is no longer a big part of the problem. Prill says the theory is now proving to be true in practice.
Shrinking Product Development
There are three molded components most critical to assuring consistent, long-lasting water metering accuracy: an upper chamber, a lower chamber and a nutating disk that turns to meter the water as it flows through the chambers. The precision sculptured geometry and fit of these components has everything to do with the metering precision and durability of Badger Meter’s product line.
Arriving at the optimal geometry for long-lasting, metering performance is a time-consuming and expensive process. It involves methodical prototyping, followed by field trials, product refinements and more field trials until the design is right. By eliminating the guesswork, on-machine gaging has helped Badger to hone in on the ideal geometry for each component rapidly. The result has been a significant shortening of the product development cycle.
Mold-to-Mold Variability
The new high-speed machining/on-machine metrology strategy also is helping to eliminate mold-to mold variability. Producing virtually identical molds gives Badger Meter more manufacturing flexibility by letting them use parts interchangeably no matter what molding machine or tool produced them.
A longer-term concern should also be put to rest. “In two years—if sales are up and we need another set of tools—we’ve got the CAD models and a validated manufacturing process for making each component. We should be able to make the finished tool right to size without having to tune anything in. Or if one of these tools gets damaged in production, we know what size that feature was and we can just repair it and go right to size.”
Summary
So in addition to helping Badger get a better product to market faster today, using on-machining gaging technology will help reduce tool replacement turn-around time and costs for the long haul.
Wilcox Associates is part of Hexagon Metrology, which distributes and supports its products worldwide. In addition to Wilcox Associates, Hexagon Metrology includes: Brown and Sharpe, CE Johanssen, DEA, Hexagon Metrology Asia Pacific, Hexagon Metrology Services, Leitz, Mirai, Poli, Romer, Romer/Cimcore, Sheffield, and Tesa.
Related Content
Precision Meets Innovation at IMTS 2024
After attending IMTS, it's clear that the integration of advanced technologies is ready to enhance precision, efficiency and automation in mold manufacturing processes. It’s a massive event, so here’s a glimpse of what the MMT team experienced firsthand.
Read MoreFour Micro Tooling Considerations
Issues involving gating, ejection, mold splits and direction of pull are of special concern when it comes to micro tooling.
Read MoreHow to Achieve Automated Measurement With Advanced Touch Probes and Laser Systems
A combination of lasers, probes and software help moldmakers automate in-process cutting tool and workpiece measurement.
Read MoreThree 3D Scanner Investment Considerations
Mold builders taking advantage of laser and software advancements for portable 3D measurement tools can reduce inspection and measurement times.
Read MoreRead Next
Conformance, Traceability And Measurement Uncertainty In Coordinate Metrology
Customer-supplier disagreements over product compliance to specifications often are costly to the parties involved. Recognition of measurement uncertainty when determining conformance to geometric dimensioning and tolerancing (GD&T) specifications has risen in recent years. This article will focus on some important developments in this arena.
Read MoreHow to Use Strategic Planning Tools, Data to Manage the Human Side of Business
Q&A with Marion Wells, MMT EAB member and founder of Human Asset Management.
Read MoreAre You a Moldmaker Considering 3D Printing? Consider the 3D Printing Workshop at NPE2024
Presentations will cover 3D printing for mold tooling, material innovation, product development, bridge production and full-scale, high-volume additive manufacturing.
Read More


