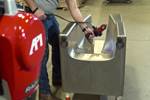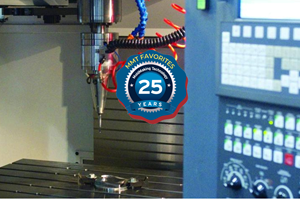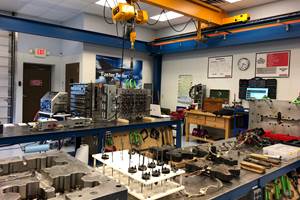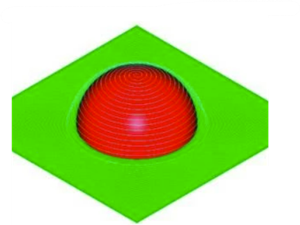
To optimize the power of a probe, pair it with measuring and automation software that provides automatic alignment of the workpieces and can provide an optimized measurement path to ensure the shortest measurement cycle time. Source (All Images) | Blum-Novotest Inc.
Automation is an essential part of machining and profitable manufacturing. Mold builders striving to compete at the Industry 4.0 level must focus on embedded sensors, software and other technologies to collect and analyze data to improve decision-making. These technological improvements lead to increased speed and efficiency, predictive maintenance and self-optimization of the manufacturing process.
Moldmakers, too, can streamline operations with automation, but the first consideration must be precise cutting tool and workpiece measurement that ensures repeatability within specifications. Lasers have been at the forefront of precision measuring for decades and continue to push the limits of what is possible for in-process tool and workpiece measurement.
The combination of lasers, probes and software enables mold builders to deliver accuracy, speed and communication in real-time under adverse shop conditions. These new, advanced systems provide extremely accurate and repeatable in-process measuring at exact tolerances to meet even the strict mandates of the automotive, medical and aerospace industries.
Modern probes and laser measuring systems play an essential role in unmanned production to ensure productivity. For example, a laser system can monitor cutting tools to detect tool breakage, wear or damage to the cutter’s edges and help prevent scrap material by providing automatic corrections or by replacing the damaged tool with a sister tool.

Measuring system for non-contact tool measurement and tool monitoring under harsh conditions improves speed, precision and in-process reliability of tool measurement in machines tools.
Laser Tool Measurement Systems
Laser systems can generate thousands of measurement values per second, which enables automated measurements of the cutter at cutting speed. Digital measurement provides one trigger signal per measuring block. Some systems provide a combination of digital and analog that delivers thousands of measuring values through progressive shading of the laser beam.
Scanning produces an enormous amount of information, equipping the user with enough data to make educated decisions on process improvements. Due to the volume of data, moldmakers should view the information through tool control or 3D software that provides measurement, analytics, visualization and compensation of form deviations for all measurable cutting edges.
Advanced programs can provide a single cutting-edge analysis for each blade and display runout and spindle analytics. This type of system can work with your automated system to trigger alerts, new tools and rejected workpieces and communicate with associated robots, cobots and other connected systems.
Advanced visualization and analysis software enables continuous contour measurement of the cutting tools, on-screen visualization and monitoring of spindle health, vibration, statistics and compensation.
Scanning touch probes can greatly increase accuracy. In-process measuring of completed parts against the master will help reduce the number of NOK parts that make it downstream into production.
Touch Probe Measurement Systems
Touch probes are often used with a laser system to place and measure the workpiece. These probes provide high-precision measurements and lightning-fast analog scans. The probes feature BRC radio technology and are particularly suited for moldmaking applications. The digital/analog probes provide a maximum probing speed (digital) of 3,000 millimeters/minute and a maximum scanning speed (analog) of 5,000 millimeters/minute. The maximum measuring speed is dependent on the measuring task and the precision needed (analog). The repeatability for both methods is 0.4 µm 2σ. (“Two sigma” represents a statistical concept related to standard deviation. It signifies a range within which about 95% of data points are expected to fall in a normally distributed dataset). Analog probing provides a data increase similar to laser systems, where it records variations and not just on/off signals.
Scanning touch probes can also greatly increase accuracy. A standard practice is to create a comparative measurement between the master part and the workpiece. In-process measuring of completed parts against the master will help reduce the number of NOK (Not Okay; quality management) parts that make it downstream into production. It is also possible to perform immediate rework in the original setting.
The integration of a context wizard makes job creation easy. With a click of the mouse, typical measuring points, evaluations or standard tolerances in a work piece can be set up.
The automation of the process is tool-specific. The measurement results can serve as a correction value and a basis for optimization, allowing for an unmanned, highly productive machining process. See below for an example of a series of complex measuring tasks that can happen in a typical workpiece.

Measurement and automation software enables the creation and evaluation of data series over time, providing operators with new insights.
The programmer defines the warnings and intervention limits. These settings can provide alarms to the operator and automatically reject NOK parts. The program provides easy visualization of measurement results and continuous documentation of final results. The screenshot shows the individual actions and labels with a green smiley face for well within tolerances, a neutral yellow face for approaching tolerances, and a red sad face for outside of specification. This enables the operator or manager to quickly check production from anywhere.
Analog scanning of each workpiece surface can quickly and reliably detect machining errors. Scanning touch probes provide a massive reduction of measuring time when evaluating surfaces. A probe variant using a face-geared measuring mechanism can also provide modularity and increase precision to cover special measuring tasks. The touch probes provide fast detection of workpieces for part pick-up and can deliver post-process measurement of critical features. They can also free-form measure surfaces as well as standard geometries.

Resulting measurement protocols can be easily and extensively customized.
Measuring and Automation Software
To optimize the power of a probe, pair it with measuring and automation software such as a client server-based solution that provides user-friendly measurement software in machining centers for automated quality control of workpieces in individual and series production. This combination enables maximum productivity and reduces scrap by monitoring measurements between and after machining, statistical process control based on the recorded measured values and reworking in the original clamping setup.
Measuring and automation software provides automatic alignment of the workpieces and can provide an optimized measurement path to ensure the shortest measurement cycle time. It can also deliver early detection of rejected workpieces and real-time production monitoring. The program can be configured and executed quickly. The jobs are created with a context wizard in the CAD model and then the software automatically recognizes geometry areas and suggests typical measuring points.
This software enables real measurement automation based on a modern client-server architecture. It moves away from pure logging and toward process integration and automation with the help of measurement data.
In this way, workpieces are measured directly after each machining operation and the results serve as a correction value and the basis for optimizing the current and upcoming workpieces. To do so, the user defines intervention limits when creating the project, which the software uses to make corresponding corrections. This step makes it possible to compensate for tool wear, for example. The software can be implemented in small, medium and large series production.
Pairing a probe with measuring and automation software can increase its power, enable maximum productivity and reduce scrap.
The user can access the evaluated data and results in a web interface. The server communicates with the machines on which measurements are taken, so an operator can run measurement projects on many different machines and have them evaluated automatically. Complex measuring routines, such as the alignment function, can be used to adapt the reference points of the machining program to the position and shape of the workpiece to ensure that machining runs optimally.
Another innovation in this program is managing measuring devices and machines. Since the data is now centrally located on the server, it is available for all machines. Thanks to a context wizard, the measurement definition is also very simple and intuitive.
This software also allows the operator to create and evaluate data series over time, offering a new way to gain knowledge. The protocols resulting from the measurements can also be adapted easily and extensively. Tolerance limits can be displayed as a number or image, as well as in red/green coloring.
Today’s measurement and automation software is another step toward integrating measurement results from machining centers into shop processes. It yields exact measurements, automated tolerances and warnings to streamline processes and produce more products at a faster rate and at a lower cost.
Related Content
Machine Hammer Peening Automates Mold Polishing
A polishing automation solution eliminates hand work, accelerates milling operations and controls surface geometries.
Read MoreWhat You Need to Know About Hot Runner Systems and How to Optimize Their Performance
How to make the most out of the hot runner design, function and performance.
Read MoreThe Ins and Outs of Hot Runner Temperature Control
A training checklist that explains the why and how of proper hot runner temperature control and system management.
Read MoreRead Next
Four Uses for Tactile Probing and Laser Scanning in Moldmaking
Laser trackers with their probing and scanning capabilities are embedded in almost every stage of the moldmaking process.
Read MoreAvoid Mold Reload and Rework with Machine Probes
Probing on a machine with ready-to-use probing cycles can help reduce setup times, increase machine usage time and improve the dimensional accuracy of the finished workpiece.
Read MoreThree Advances in Vision Measuring Technology for Moldmaking
Next-generation metrology solutions are streamlining shopfloor automation and quality control for mold builders.
Read More

