What Is the ROI Of 3-D Scanning?
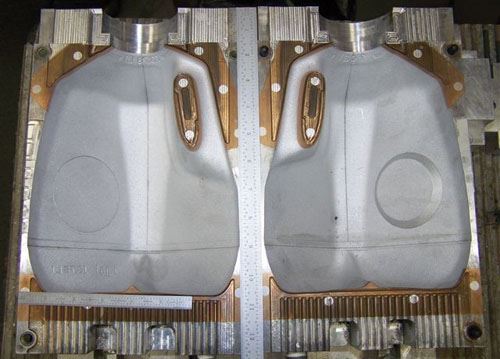
A moldmaker wanted to re-qualify used molds to see if they needed refurbishing, and if so, where to make the corrections.
Share
Project Analysis
|
Cost
|
Time
|
|
| Scanning |
Less than half
|
30 hrs
|
| Manual |
$10,000
|
200 hrs
|
Previous Method: Manual Hand Measurement
Time: 10 weeks to complete one part + production time
Cost: Approximately 200 hours at $50/hour = $10,000
Method: Gages and instruments are used to manually measure the mold’s dimensions and locations. The measurements are compared to the 2-D drawing and a report of discrepant items is generated. Then, engineers decide which of the discrepant items are due to processing of the mold and which had to be corrected in the mold tooling.
New Methods: High-Speed 3-D Scanning
Time: 2 hours to scan each part + time for generating inspection reports = 30 hours (3 - 4 days)
Cost: Scanning each mold, plus detailed iterative inspection and reporting process to final documentation = less than half the cost of the Previous Method.
Method: 3-D scanning expedites parts’ production exponentially. A color-coded inspection report (or point cloud data for CAD modeling) is quickly generated that provides more information about the mold’s acceptability.
3-D Laser Scanning Basics
Non-contact 3-D laser scanning captures everything on the surface of the objects, including free-form shapes and fine details. The technology works by projecting a line of laser light onto a surface while cameras continuously triangulate the changing distance and profile of the laser line as it sweeps along. The laser line passes back and forth over the area until the complete surface is captured. Irregular shapes are measured just as easily as prismatic ones, and they are instantaneously replicated daily on-screen.
The scanner measures very quickly, picking up tens of thousands of points per second, and generates huge numbers of data coordinates in a point cloud. Several scans are made to capture the entire part and then the point cloud data files are rotated into the same reference frame and assembled into an exact 360-degree representation of the scanned part.
Since laser scanning is a non-contact measuring method, there are no variations in practices or techniques from operator to operator, or pressure differences that may generate different readings in traditional touch-probe measurement. Laser scanning allows extremely consistent capturing of parts’ geometry by removing the human error factor.
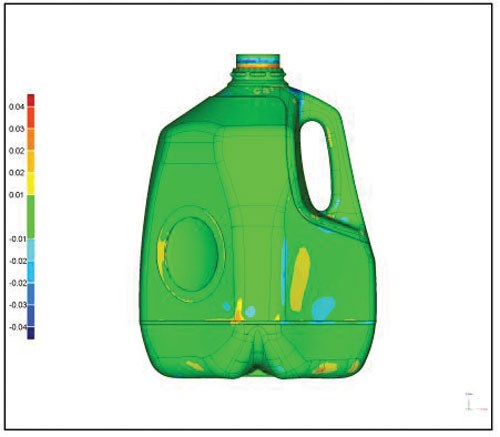
The point cloud data was compared directly to the molds’ CAD to verify their acceptability. A color-coded inspection report was quickly generated that provided more information about the mold’s acceptability and to find discrepant areas. The gradations of color show the extent to which the area is out of tolerance when compared to the CAD model: areas that are larger than spec appear in yellows and reds; areas smaller appear in blues and purples.
The scan data showed that the physical molds were not identical to the CAD model. However, once the discrepant items were looked at in more detail, there were only a few insignificant errors among them.
How Else Did the Company Benefit?
Based on the scan data, the moldmaker could quickly be certain that the new refurbished mold met the criteria of the 2-D drawing and the acceptable standards.
The digital scan data also allowed the moldmaker to correct the CAD model, so that it matched all the dimensions of the drawing. Future inspections will be fast and efficient because the scanning setup is saved as a template so when the same part is inspected, it is immediately available. Molds can be qualified in just hours and at regular intervals by laser scanning inspection techniques.
Not only did the customer save time with 3-D scanning, they also saved over half the cost of manual measurement.
Choosing the Right Laser Scanning Inspection Technique
Two main factors should be considered when scanning molds: size and accuracy.
1. Size consideration
- If you need profile data of your small to medium-sized part, laser scanning on a fixed system with a high-accuracy probe yields the best results.
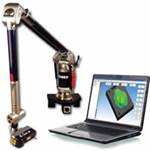
- If you need profile data of large parts or onsite scanning, a portable arm-based laser probe suits your needs.
- For internal cavity scanning on parts that cannot be damaged, CT scanning provides complete detailed external and internal data.
2. Accuracy consideration
- A service bureau should be able to provide cost-effective scanning options depending on the size and accuracy requirements of the job—using the highest accuracy system and probe is not always necessary. Lower accuracy scanning probes reduce the scan time while providing adequate and reliable data economically.
Service Provider Selection Tips
Selecting a quality service provider for your laser scanning project is essential in obtaining accurate, usable data for your inspection application.
- Experience counts: Look for a service provider with years of experience who guarantees their results and has successfully performed demanding, complicated projects. As the customer, you may not know exactly the best solution for your job and a service provider with a broad range of experience and tools can give you optimal results at the lowest cost.
- Equipment counts: Make sure your service provider uses high-end quality equipment and no low-end, low-accuracy scanners. Choose a provider backed by a broad range of portable and in-lab scanners and expert metrologists working in temperature-controlled labs who use the latest digitizing and software technologies available for both contact and non-contact measurement.
- Customer service counts: How fast is the turnaround time for projects? Are account managers easy to contact and return communications? Your supplier should provide fast turnaround on most projects—2 to 3 days—and project managers who answer queries within 24 hours.
- Understanding your project counts: The results of laser scanning run along a continuum of relatively simple to extremely complex model formats. Cost, time and level of communication required increase along with the complexity of the results desired. Building understanding between customer and engineer is an extremely important step in the scanning process. Customers should always be asked what they will be doing with their CAD files, so the service provider can offer the correct level of complexity and file format.
Related Content
Line Width vs. Depth Ratio in Laser Engraving
A laser does not produce 90-degree sidewalls. It requires a certain amount of draft in order to produce the required pattern.
Read MoreRevisiting Some Hot Runner Fundamentals
What exactly does a hot runner do? If you’ve been in the injection molding industry for any length of time, you might think the answer is obvious, but it is not.
Read MoreMold Design Review: The Complete Checklist
Gerardo (Jerry) Miranda III, former global tooling manager for Oakley sunglasses, reshares his complete mold design checklist, an essential part of the product time and cost-to-market process.
Read MoreMaking Quick and Easy Kaizen Work for Your Shop
Within each person is unlimited creative potential to improve shop operations.
Read MoreRead Next
3-D Laser Scanning Opens the Door to Inspection And Reverse Engineering for Moldmakers
Next-generation scanning technology precisely captures large and small molds.
Read MoreHow to Use Continuing Education to Remain Competitive in Moldmaking
Continued training helps moldmakers make tooling decisions and properly use the latest cutting tool to efficiently machine high-quality molds.
Read MoreAre You a Moldmaker Considering 3D Printing? Consider the 3D Printing Workshop at NPE2024
Presentations will cover 3D printing for mold tooling, material innovation, product development, bridge production and full-scale, high-volume additive manufacturing.
Read More
