Mold Cleaning Done Right Takes a Systematic Approach
Mold cleaning is just one part of a systematic and comprehensive approach to mold maintenance. Here’s one moldmaker’s strategy for injection mold cleaning and an explanation of where and why different techniques are employed.
Imagine being an injection mold. Talk about a rough life: Working under tons and tons of pressure in a miserably hot and humid environment. Every part you make must be perfect—often both in looks and measurement. And no matter how fast you work, someone usually wants you to work even faster. On top of all that, the folks working you so hard don’t want to pay a lot for you.
You’re often considered a necessary evil in the overall manufacturing scheme of things. The plastic part gets all the glory while you open and close, rotate and spin, slide and lift, collapse and unscrew, heat up and cool down — thousands of times each working day. Injection molds work very, very hard. They are the Navy Seals of the plastic molding world — the envy and the idol of thermoform, compression, blow, and extrusion molds and dies.
Maintaining the optimal condition of the tool steel is critical to this marathon performance. Every successful injection molding operation understands the value of a well-planned and managed mold maintenance and preventive maintenance program. In order to experience the greatest amount of productive uptime, an injection mold must have regularly scheduled downtime for proper evaluation and diagnostics, cleaning and any required refurbishment, replacement or repair. A systematic and well documented approach to mold care ensures long-term performance.
This article focuses on the activities of one phase of the preventive maintenance sequence — mold cleaning as part of a scheduled maintenance cycle. I suggest you visit MoldMaking Technology magazine’s website and access a great article on mold cleaning by my friend, Steve Johnson of Tooling Docs. Cleaning Molds: Part I and Part II (Oct. and Nov. 2004, respectively) discuss the various techniques and technologies in use.
Preventative Maintenance: Steady on the Steel
It is impossible to define the universal first step in mold preventative maintenance (PM) because this is not a “one size fits all’ scenario. Is it a newly constructed mold that has only been functionally sampled? Is this a fully qualified mold ready to kick off 5,000 hours per year production? Is the mold part of a transfer package from another molding facility? Has it run in production for several years and is now slated to run in a different press and different facility? Is it a new mold but a duplicate of one already in production? Is it a new mold creating a newly designed part without any past history to draw from? Are we running simple polypropylene or glass-filled nylon with its abrasive and gassing characteristics? Each set of circumstances provides its own set of challenges and the resultant need to plan, execute and document a comprehensive preventive maintenance plan.
The following procedures are based on the day-to-day activities of the MGS Manufacturing PM shop in Germantown, Wisconsin. Our team is staffed with 12 toolmakers; many of them came through the ranks of our tool-build shops. They are experienced moldmakers. The shop has its own section of our production molding facility to call home where, just like in every great tool shop, it is always sunny and 72°. They have the equipment and technologies they need to keep molds rocking.
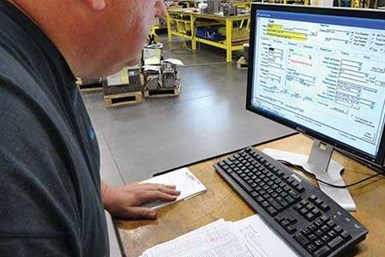
Every production mold in MGS inventory has a corresponding multi-tabbed log sheet tracing its entire history since it first began running production in the facility. Every feature, component and maintenance activity is documented. Photo Credit, all: MGS Manufacturing
We have over 2,000 injection molds in our production inventory. Those molds are so important to us that we make sure each one of them has regularly scheduled visits to their steel doctor — an MGS PM toolmaker (who makes house calls as well). The two scenarios I will explain use an existing production mold as an example.
Two Cleaning Scenarios
Let’s consider the two types of mold cleaning situations or environments — in press and on the bench. In press refers to the cleaning activities taking place while the mold is still fully assembled and mounted in the injection molding machine. In press PM is sometimes referred to as parting line PM (although parting line PM is also done on the bench — it’s all about access). This type of cleaning happens most frequently and is based on a predetermined number of cycles or production hours. In many cases, the maximum cycle count before the first scheduled in press cleaning event will be set by an experienced PM toolmaker who will base the initial run count on the resin being used, the nature of the core and/or cavity surfaces and the general mold construction techniques employed. Molding activities will be halted, but the mold will remain in the press. The mold may need to cool down prior to handling, depending on the nature of the cleaning technique to be used.
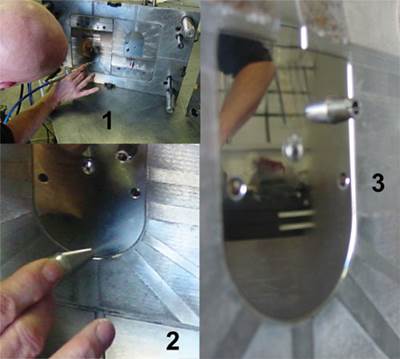
Parting line preventative maintenance does not necessarily occur with the mold in the press. It also involves more than a simple wipe-down. As part of the MGS preventative maintenance tool shop’s best practices, some molds require partial disassembly for an appropriate parting line preventative maintenance, including removal of any slide and other mother components.
The first step is a visual inspection. The PM toolmaker examines the mold, looking for any undue wear, gassing or accumulation of residue. These observations and the resulting actions are noted and logged as part of the injection mold’s electronic PM journal. After a complete visual inspection, the toolmaker wipes down the exposed mold surfaces with a cloth of appropriate material (cotton on highly polished surfaces) using a standard industry degreaser. This general surface cleaning and inspection is followed by an examination and greasing of parting-line locks, pins and bushings. Air blasting is used as needed.
Even though we call it a parting line PM, we go beyond the parting line. It is part of our best practices approach that has the PM toolmaker remove the slides (and any easily accessed moving components) and thoroughly degrease, clean, inspect and regrease as required.
The PM toolmaker may decide to use a portable dry ice blasting method during an in press PM. The use of dry ice blasting does not require the mold to be cooled down — in fact, the heat of the mold actually enhances the effectiveness of the dry ice blast method. This technology uses compressed air and shaved dry ice to clean mold surfaces and remove residue without introducing any contaminants. The effect of small particles of ice hitting the mold surface at high speeds with the extreme temperature difference between the hot mold surface and the dry ice (-109 F/-78 C) makes for an effective scrub without leaving any residue behind. This cleaning method process is approved by the EPA, USDA and FDA.
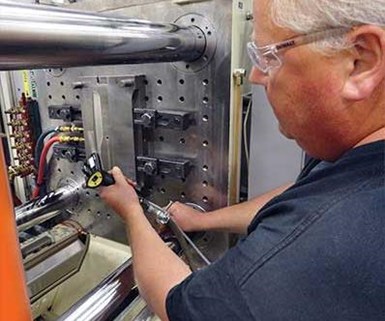
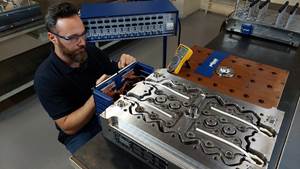
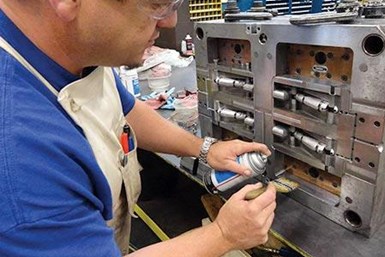
The portability of dry ice blasting systems makes them good for in press preventative maintenance cleaning. Mark Hennecke, MGS preventative maintenance toolmaker, is shown here using the system to service the production mold safely and effectively.
While the setup of the dry ice system initially adds a small amount of time to the event, it significantly reduces overall PM time (which is downtime) by keeping the mold in the press and out of the shop. Dry ice cleaning is used for both in press and on the bench PM. It is an effective and safe cleaning method for all steels, including polished surfaces.
“We have documented a significant reduction in mold downtime since we deployed the dry-ice system. We run a wide range of engineered resins in both conventional and highly engineered tooling systems and this technique has proven to be effective on many in press applications,” says Mike Welnak, MGS Germantown’s tooling engineering manager.
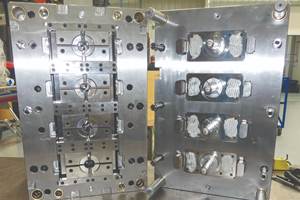
When the PM schedule calls for a full preventive maintenance event, the mold will be taken out of the press and into our PM shop. Here, it is treated like the celebrity it is — greeted warmly and made to feel relaxed and at ease. Depending on its size, it is split into its A and B halves and elevated to an appropriate table or work platform. This enables the toolmaker the appropriate access and facilitates the ability to work comprehensively and, most importantly, safely.
As stated earlier, we are considering an existing production mold for our examples. In that case, each of the individual mold components has already been identified and labeled, ensuring the ability of the toolmaker to maintain organization during the cleaning process through reassembly. In the case of a 64 cavity mold or a mold with multiple cavities and multiple actions, readily discernable component identification is especially critical.
In the event we are performing the initial pre-launch PM on a transfer mold (a mold not built by MGS and never run in our facility), the PM toolmaker determines the existence and location of eye bolts and the existence and condition of parting line safety straps. Very often, some shops do not design in eye bolts or include parting line safety straps. When required, we will add or modify these features.
The next step is to identify and tag all components, bases and plates that are accessible prior to opening and disassembly. Once the first phase of component identification is complete, the mold is taken apart and the internal components (slides, core and cavity blocks, ejector pins, core pins, etc.) are tagged and evaluated. Observations on general condition, construction techniques and specific wear areas are noted and addressed as required and then the appropriate cleaning steps are taken.
The PM toolmaker will remove as much grease from the mold components as possible using traditional methods (cloth of appropriate material, standard degreaser and some human muscle) and will then utilize our ultrasonic machine. The individual components are usually organized by logical grouping or by size before being placed into our ultrasonic cleaning system.
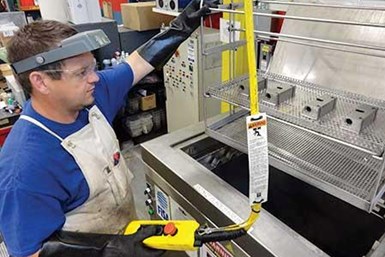
MGS preventative toolmaker Marcus Keidl lowers four mold components into the ultrasonic cleaning bath. Ultrasonic is more effective and time efficient than traditional cleaning methods.
Cleaning mold components using the ultrasonic method effectively removes contamination from the surfaces of the mold and also from difficult or impossible areas to clean by hand, such as vent paths, ejector pin holes and cooling channels. The ultrasonic process is non-abrasive and efficiently removes the residue from burnt polymers and mold releases from mold surfaces. Aside from the involvement of a PM toolmaker or technician in the setup and takeout of the mold components, the ultrasonic cleaning process is hands free, so the toolmaker can devote his energies to projects that make the best use of his time and talents.
The process of cleaning injection mold components via ultrasonic bath offers significant advantages over traditional manual scrubbing. The use of abrasive techniques of any kind is detrimental to the tool surface, especially those that are highly finished. The ultrasonic method does not invade the surface of the steel the way conventional friction based methods do. Ultrasonic cleaning uses a system called cavitation — the rapid forming and collapsing of millions of very small bubbles in a bath of water and suitable biodegradable cleaner. Although tiny, these little bubbles are tenacious fighters and will work their way into and around all mold component surfaces — crevices, grooves, channels and blind holes. You name it; they go in it and after it. The ultrasonic process has proven itself to be extremely effective in removing the residues and contaminants from mold releases, burnt resin and vent outgas without harming the surface of the steel.
The ultrasonic cleaning cycle takes 20 minutes for most applications — with additional time or cycles required for molds running high-temperature or gassy resins. Certain performance-enhancing additives (flame retardants or talc filler, for example) can also be detrimental to good mold-steel health without regular cleaning. Certain grades or durometers of TPE can also be challenging to remove and require additional time and effort. Colorants can sometimes stain steel and resist cleaning efforts.
Overall, the two primary cleaning technologies used at MGS — dry ice blasting and ultrasonic — are effective and reliable for most of our applications. There are a few exceptions and special considerations. Aluminum molds, for example, will be damaged by some of the solvents used in ultrasonic cleaning, so more traditional methods must be employed.
Now that the injection mold is thoroughly clean, it will be regreased and reassembled. All activities performed and all observations regarding wear and component performance are noted in the mold’s electronic journal.
The production mold is often the single most expensive piece of dedicated equipment in an injection molding cell. The argument that it is the most important piece of equipment could certainly be made. The injection molding machine costs more, but its work life can be applied toward more than one mold or product. If the press breaks down, you can temporarily move the mold to another machine — even another facility or to another molder, if need be. A robot, a conveyor or most any piece of ancillary equipment can be replaced.
But, when the mold goes down, production stops — there is no substitute. Who has the budget to build double the tooling capacity needed, just in case? Taking good care of the production mold is a priority and requires the efforts of dedicated and well trained professionals. A formal and regimented maintenance and cleaning plan must be in place to ensure a long and repeatedly productive mold life.
Related Content
5 Hot Runner Tips for Moldmakers and Molders
Best practices for initial hot runner tryouts and effective preventive maintenance.
Read MoreHow to Use Thermal Management to Improve Mold Cooling
A review of common mold cooling issues and possible solutions, including 3D printing applications.
Read MoreWhat Is Scientific Maintenance? Part 1
Part one of this three-part series explains how to create a scientific maintenance plan based on a toolroom’s current data collection and usage.
Read MorePrecision Welding Services Offer Rapid Turnaround Mold Repair and Reduced Molder Downtime
X-Cell Tool & Mold relies on outsourced, high-quality welding repairs from Lewis-Bawol Welding to ensure its customers' molds are back in production quickly and affordably.
Read MoreRead Next
Cleaning Intricate Molds
A look at non-destructive cleaning processes for complex molds that require the removal of tenacious surface contamination to ensure surface quality and longevity of precision mold and molded part surfaces.
Read MoreReasons to Use Fiber Lasers for Mold Cleaning
Fiber lasers offer a simplicity, speed, control and portability, minimizing mold cleaning risks.
Read MoreHow to Use Continuing Education to Remain Competitive in Moldmaking
Continued training helps moldmakers make tooling decisions and properly use the latest cutting tool to efficiently machine high-quality molds.
Read More
