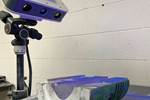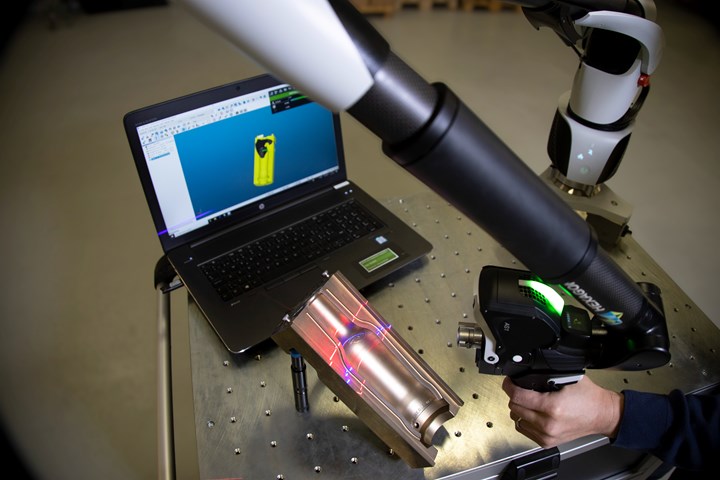
This new ultra high-speed scanner operates with both laser trackers and portable measuring arms. Photos Credit, all images: Hexagon Manufacturing Intelligence Division.
A major cultural shift is underway in an industry where technology users of the past were expected to master software, no matter how complex or challenging to navigate. Manufacturers are in the process of attracting and engaging a new generation of workers who cut their teeth on smartphones, tablets and iPads. User experience, ease of use and a short learning curve have been the main focus for developers of consumer-oriented software and hardware products for decades. However, applying user experience lessons learned to manufacturing technologies has progressed at a much slower pace. The emphasis on digital transformation in this industry has prompted OEMs and software providers to confront that we have a new, growing workforce with reasonable expectations of how software and hardware should work together for quality control.
Over the past decade, laser trackers have progressed in line with other computer industry advancements, making in-place inspection of large molds far more efficient.
Inspection Software Enhancements
Re-envisioned inspection software has been long overdue for the metrology industry. However, a new generation of portable metrology users has introduced a different mindset to the field and new expectations of how technology and software should work in tandem. First and foremost is the assumption that a user should have immediate access to functionality that intuitively makes sense for the measurement or inspection task at hand. In legacy software, features can reside layers deep in an interface after years of added enhancements and upgrades.
Today, a new software program takes complexity out of the equation so companies can realize greater productivity in their quality processes. The software works with any portable arm or laser tracker for probing and scanning applications through a straightforward interface. The streamlined structure of the software interface renders a short learning curve for a broad swath of users with novice to expert skill levels. The arduous task of developing software from scratch would have to address every aspect of the measurement, analysis and reporting for various applications.
For moldmakers, quality inspection is not limited to small- and medium-sized molds that are easy to access and handle. They also need to scan and inspect larger molds typically found in industries like aerospace, marine and naval vessels, satellite and wind-power generation. Large-volume measurement devices are required for these jobs.
For example, a direct scanning laser tracker can be automated to scan a large mold or component without any operator involvement. This new multifunctional inspection software simplifies the process into three steps: (1) align the direct scanning laser tracker, (2) select the appropriate CAD surfaces and (3) press a button to begin the scanning process. In addition, when scanning must occur outside in the elements, the software has implemented even more advanced Industrial Internet of Things (IIoT) features, such as using integrated weather station data found inside these scanning devices to accommodate for temperature gradients and material scaling.
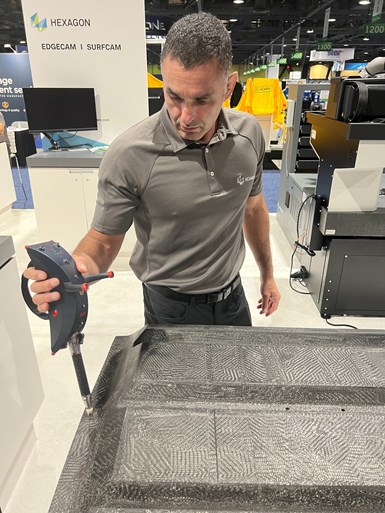 Re-envisioned inspection software drives this laser tracker line used for large-volume measurement. The scanner and other innovative technological advances over the past two decades have been the standard for portable laser trackers, like the one shown here, making in-place inspection of large-scale molds far more efficient.
This software was developed with an end-to-end mindset. The software would have to integrate comprehensive toolsets to address metrology applications ranging from simple measurement tasks to very complex projects. The interface presents a full slate of measurement tools for mold and die inspection, including colorized comparisons and accommodations for variable material thickness. Users can perform edge and feature inspection and any alignment process types if required—all with ease of access and top-level navigation of the functionality needed for these tasks.
Inspection Hardware Evolution
Mold and die makers rely on dimensional measurements to check and verify their equipment and products before the final article goes into production. One widely popular segment of the mobile metrology industry is the portable arm measurement system used to help design mold and castings, reverse engineer molds, verify or refurbish molds and perform final inspection. Portable arms can be used with a wide range of tactile sensors and extensions, including probes and laser scanners to qualify tools, molds, jigs and fixtures in-situ and check the all-important tooling for damage or wear.
One significant advantage of a portable 3D measurement system is moving the measuring tool directly to the object to be measured. Instant measurement is a key user experience factor, as there is zero warm-up time for this portable device with optional Wi-Fi capability. It is a switch-on-and-go measure option in the portable metrology category that can acquire 3D data from parts or assemblies in a 1.2- to 4.5-meter measurement volume.
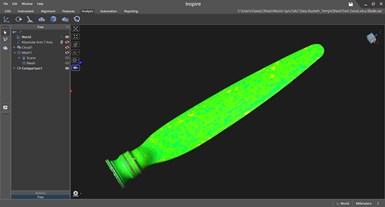
Enhanced inspection software gives users rapid access to functionality that intuitively makes sense for the measurement or inspection task at hand.
A portable arm performs like a human arm, as its six or seven axes of rotation allow the user to reach and measure around and inside a mold or die. Equipped with various mounting options, the users can position this arm directly inside a CNC machine to inspect a mold or mold component before removing it. This process ensures the conformity of the part before moving it to the shop floor environment.
While the molding and foundry industries have used the portable arm for decades, recent advancements have generated quantum leaps in usability and capability. For example, just this year, a new noncontact 3D scanner was introduced to improve the user experience further. It is the first cross-platform scanner that can be swapped between a portable arm and a laser tracker. So, an operator can essentially use the scanner to acquire data in tight, hidden recesses of a part using a portable arm and larger volume applications with the laser trackers.
Combining noncontact 3D scanning with drag scanning and touch probes improves the result and increases inspection accuracy. Overall, the amount of data a user can obtain is boundless and moves inspection to even higher tolerance levels. As this multifunctional inspection software guides the actual data acquisition process in a streamlined manner, an equally important feature is revealed. The software provides a well-designed pathway for any user to enter the geometric dimensioning and tolerancing (GD&T).
Combining noncontact 3D scanning with drag scanning and touch probes improves the result and increases inspection accuracy
Large Mold Measurement Benefits
Multifunctional inspection software has wide-ranging implications for large-volume mold metrology, too, including adjustment, assembly, reverse engineering and more. In this context, “large” is often a mold or tool that is a few feet to hundreds of feet in size, typically with tolerances as little as 0.010 inch.
This new software drives precision devices for large-volume measurements such as laser trackers for reverse engineering old molds or infrequently used molds that take up valuable warehouse space. The user can then apply the resulting digital model of the mold to reproduce a replica of the part later when needed.
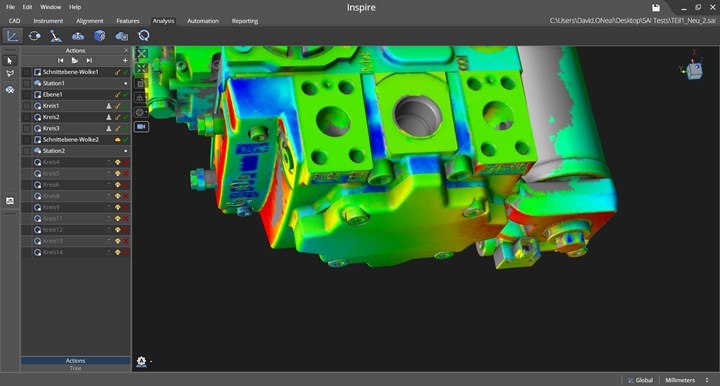
This enhanced inspection software was designed to make the complex simple, resulting in greater quality productivity and a short learning curve for those with novice or expert skill levels.
Portable measurement is also used to determine whether material will need to be added or removed from a mold surface to meet the original design intent. Other applications include in-place leveling of large molds, final inspection of large molds for initial certification and recertifying large molds on a scheduled frequency or after mold repair adjustment. Another task for laser trackers is to inspect large parts produced by their parent mold to determine whether the molding process is yielding the part dimensions and process capability desired by the manufacturer.
Improved user experience features for portable laser trackers exceeded the call for a simpler interface. The real story started two decades ago when inspection and measurement equipment engineers challenged the idea of measuring only in 3D. They wanted to push laser tracker technology from just X, Y, Z coordinate data to include i, j, k (pitch, yawl and roll) rotational data. So, six degrees of freedom (6DoF) was born, increasing the tracker’s measuring flexibility and capability.
They then developed tracker accessories based on 6DoF, starting with an innovative armless wireless handheld probe. The laser tracker only needs line of sight between itself and the probe body to perform optimally in a large area. The user can place the probe stylus on an extension into hard-to-reach, hidden areas of a mold or part to perform measurements. Other 6Dof innovations include a wireless handheld scanner and a wireless control sensor. Using the 6DoF laser tracker to monitor this device allows the user to employ a commercial, off-the-shelf robot as a large-scale, high-precision measurement device.
Next, an automated lock-on process to the system’s laser reflector or target was added to the laser tracker in 2009. As a result, the laser tracker automatically searches for the reflector or accessory if the laser beam is broken by a passerby or obstacles in the measurement volume, like the wing of any aircraft. Again, this automated, dynamic process greatly improved the user experience while improving efficiency on the shop floor or in the field.
Multifunctional inspection software has wide-ranging implications for large-volume mold metrology, too, including adjustment, assembly, reverse engineering and more.
Over the past decade, laser trackers have progressed in line with other computer industry advancements, making in-place inspection of large molds far more efficient. In addition, these measurement devices can operate under battery power, communicate via wireless operation, operate in harsh industrial environments based on an IP54 protection rating and provide world-class leveling capability.
Other technology developments include laser trackers that offer noncontact scanning as they track the position and orientation of a handheld scanner. These laser trackers can scan large-part molds in an automated mode within a range up to 60 meters (196.85 feet) and support a cross-platform noncontact 3D scanner for rapid, precise data acquisition.
Future of Inspection
Digital transformation has accelerated the need for better software interfaces to drive highly intelligent hardware, all of which enhance collaboration and information exchange between systems and departments across the shop. Modern software development is focused on structured interfaces delivering features and tools directly to the user’s fingertips. Portable measurement systems have experienced their renaissance and are well-positioned to support user expectations, whether scanning is performed manually or used for low-volume assessments to high-volume automated inspections. The future of inspection for moldmakers will be driven by continuous process improvements and heightened user experiences.
Related Content
Four Micro Tooling Considerations
Issues involving gating, ejection, mold splits and direction of pull are of special concern when it comes to micro tooling.
Read MoreMachine Hammer Peening Automates Mold Polishing
A polishing automation solution eliminates hand work, accelerates milling operations and controls surface geometries.
Read MoreWhat is Scientific Maintenance? Part 2
Part two of this three-part series explains specific data that toolrooms must collect, analyze and use to truly advance to a scientific maintenance culture where you can measure real data and drive decisions.
Read MoreRead Next
Simplify a Mold with Reverse Engineering
The advantages of various reverse-engineering solutions include process and product improvements from data collection and modeling through manufacturing.
Read MoreReasons to Use Fiber Lasers for Mold Cleaning
Fiber lasers offer a simplicity, speed, control and portability, minimizing mold cleaning risks.
Read MoreHow to Use Strategic Planning Tools, Data to Manage the Human Side of Business
Q&A with Marion Wells, MMT EAB member and founder of Human Asset Management.
Read More

