where cycle time hides
Many mold builders and tooling engineers are in pursuit of the perfect tool for trying conformal cooling when in fact, the perfect mold is the one which they are currently struggling with, or the one simulation data determines will be a struggle. Then there are the processors who slow down mold cycles because of a hot spot in the mold or who decide to process around a quality defect by increasing cooling time, which depletes expected profits or eats up machine capacity. Mold builders and processors must work together to identify molds with which they are constantly struggling and apply additive tooling that will eliminate persistent cycle time and defect issues.
Concerning Cycle Time
Cycle time likes to hide in areas in a mold that we cannot cool effectively, resulting in a hot spot that requires more time to cool the part to the ejection temperature. The difference in cooling rate leads to defects like warp that can create fit, form and function issues, as well as out-of-spec dimensions.
There are tools that shops can use to pinpoint the when and when of cycle time and defects that cause deformation, giving the shop time to create a countermeasure to cool the area effectively.
1. Mold simulation. Using simulation software, a designer can carefully review the cooling channels and see where any remaining hot spots will develop. Frequently, designers simulate the mold design and assume that they can achieve proper cooling in the desired areas. However, once the mold design begins, features such as split lines, ejection, venting and mold actions take precedence over cooling. Additive tooling enables shops to integrate critical cooling and any necessary mold functions in areas where conventional cooling lines cannot be milled or drilled.
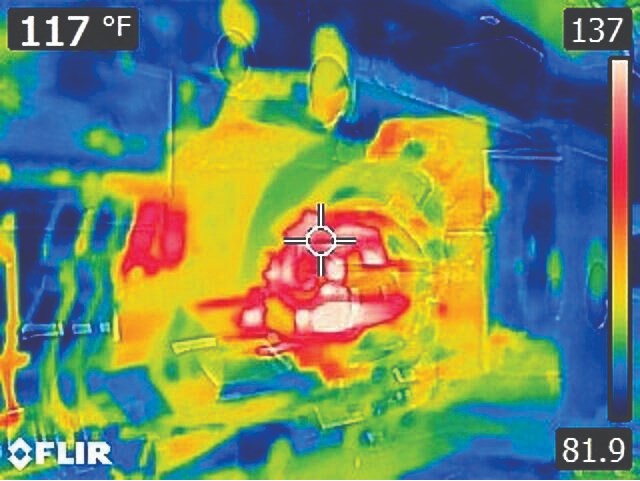
2. Thermal imaging. Shops can use this tool to observe the actual temperature of the molding surface and part temperature at ejection. This powerful tool reveals hot spot locations in existing tooling. It also balances the cooling temperature, determines where additional cooling is required to obtain consistent mold temperatures and cooling rates, and eliminates cycle time and molding defects.
If your shop does not have access to a good thermal imaging camera, rent one for a day at your local tool rental store. Your mold simulation and thermal images will identify the areas where cycle time likes to hide and help you implement cost-effective solutions to eliminate defects and run your molds at the cycles quoted.
Balancing Heat Load to Cooling
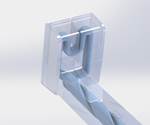
Lifters help to remove an undercut in a mold. They are one of the most difficult parts of a mold to cool because they are often mounted on a rod, have minimal space for cooling lines and the surface area forming the plastic is quite high compared to the mass of steel in the lifter.
A common solution for cooling lifters is to use a highly thermally conductive material, but this material type in a high-wear environment does not hold up to the rigors of production molding or filled resins, increasing maintenance costs over the life of the mold.
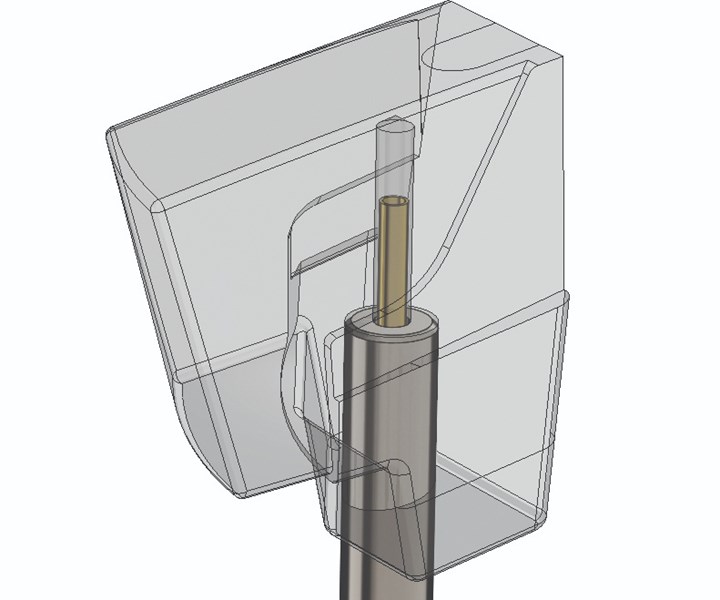
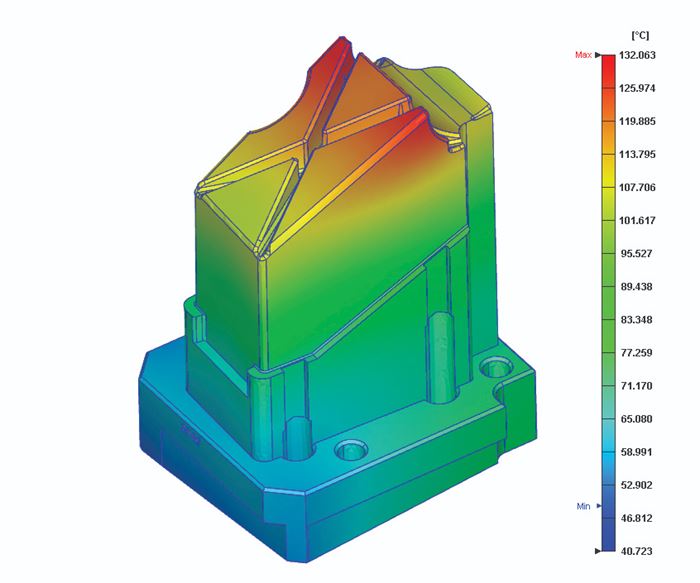
Figure 1. A lifter with a cascade cooling line before conformal cooling optimization.
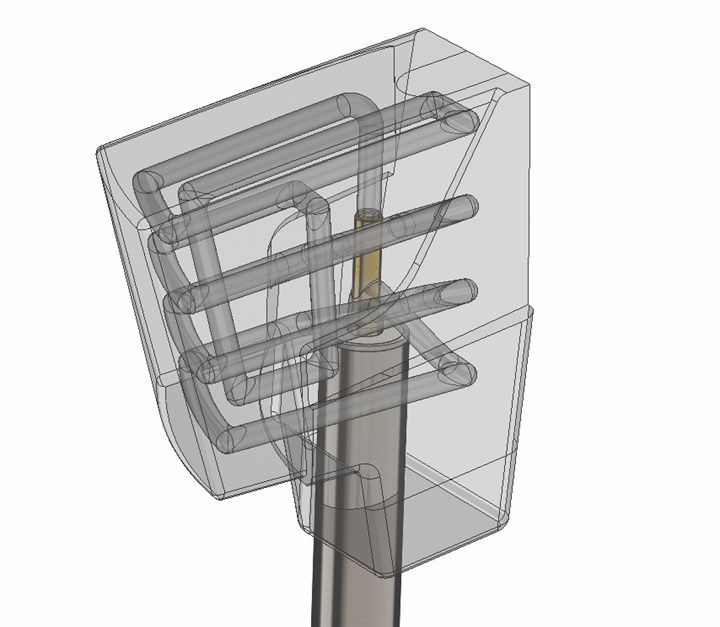
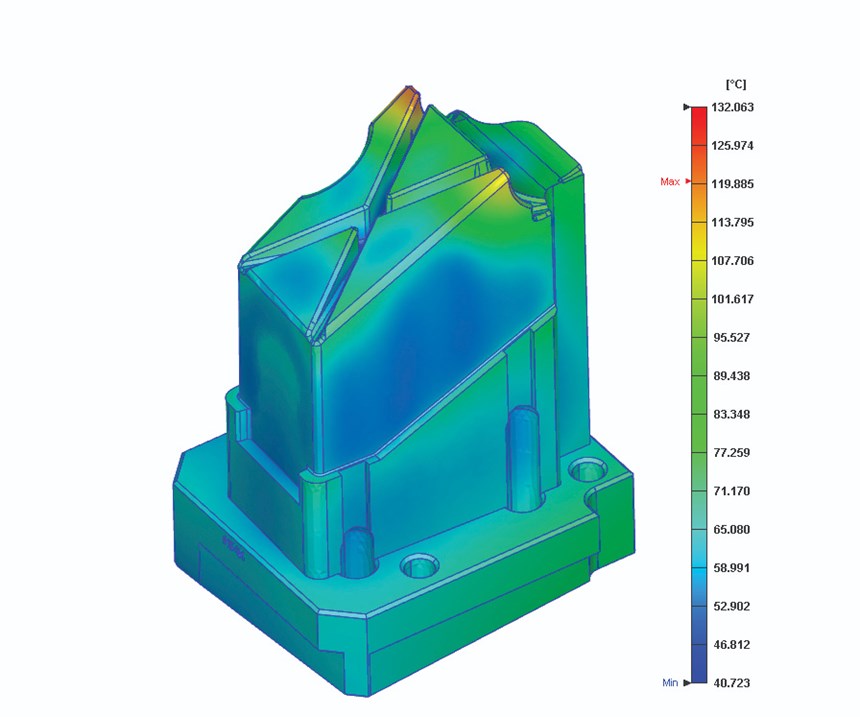
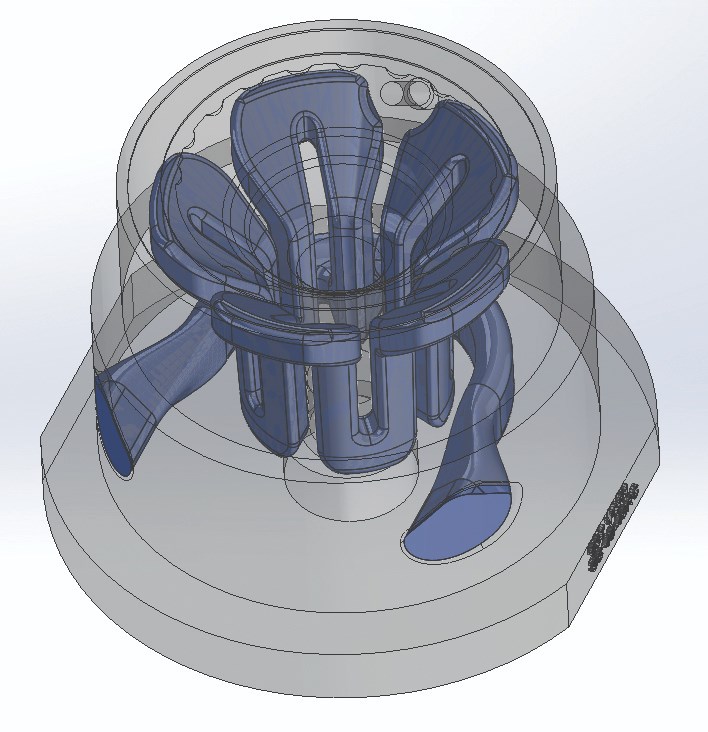
Figure 2. A lifter after conformal cooling optimization to balance cooling to latent heat buildup.
The images above (Figures 1 and 2) show an example of a difficult-to-cool lifter with five molding surfaces. Note that reaching ejection temperature demanded a longer cycle time due to the part’s critical tolerances and warpage requirements. A solution was to use a cascade where the inner feed supplied cooling to the conformal cooling circuit inlet, which produced a consistent steel temperature on the molding surface. The circuit exited the lifter below the inlet using the outer diameter of the cascade bored into the lifter rod. The lifter was 420 stainless and hardened to 48-52 HRC to provide corrosion resistance, high wear durability and efficient cooling.
Direct mate the cooling lines in the core block to the cooling lines in the insert to maintain proper flow while using O-rings to seal the top and bottom. This approach is cost-effective because the cooling circuit covers the entire part surface, reducing cycle time and improving part quality by eliminating warp.
Cooling Loses Out
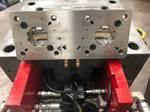
Slide actions in molds pose a different set of cooling challenges. While slides offer more access to provide cooling to the outside of a mold, there are more obstacles such as sub inserts, core pins, screws and O-rings that have limited options to route water conventionally. This scenario leaves slide actions under-cooled and ineffective, robbing the mold of precious seconds of cycle time waiting for the part to cool without warp.
Part design drives many mold elements, so design in fixed areas, such as parting lines, cores and sub inserts. Once those details are fixed, then evaluate where cooling is required and add circuits that achieve the most efficiency. It does not take a massively sized circuit to achieve the effective cooling of thin steel areas. In most cases, you can model cooling to fit between fixed components in areas as small as 0.25-inch wide by changing the cooling circuit’s profile without limiting flow. This approach enables the required components to remain in place and adds effective cooling to reduce cycle time to the quoted expectations, and in some cases, much lower.
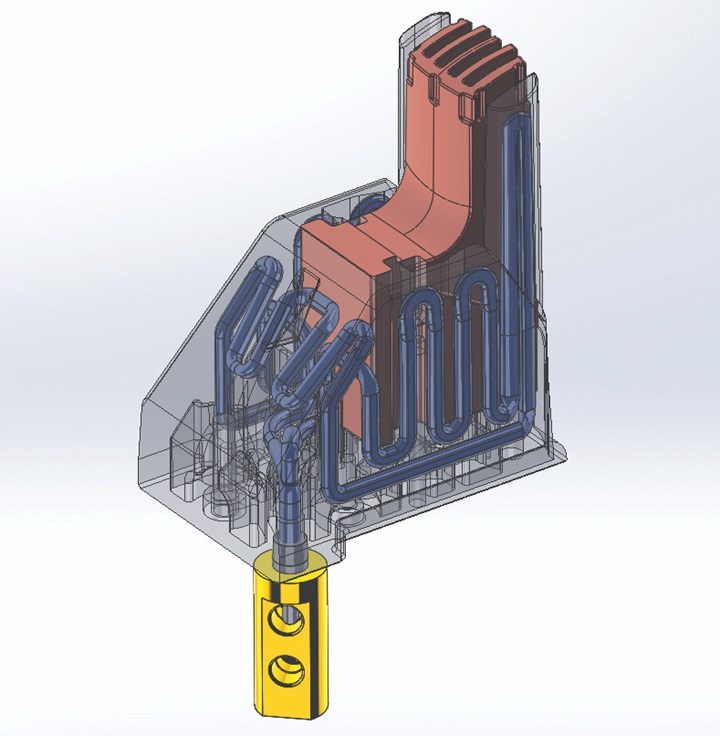
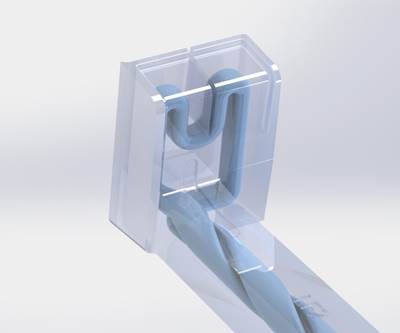
Figure 3. Slide optimized with conformal cooling.
This slide above (Figure 3) uses steel for the main body, and a high thermal conductivity insert in the center with a simple U-shaped cooling circuit that comes in, across, and back out the other side. The slide also includes vent pins for venting deep ribs in the sub insert. The cooling for the slide was ineffective, given the massive amount of surface area. When the mold fully soaked out, the latent heat buildup caused sticking and lengthened the cycle time necessary for making a good part.
The solution was to use the main slide body as the carrier and use the water ins and outs to feed the thermally conductive insert. We created a separate conformal cooled insert for the slide face, as well as long outside standing cores to add cooling to the entire molding surface. This achieved an even cooling rate and reduced cycle time by 40%, resulting in a payback of just three months. We direct metal laser sintered (DMLS) 420 stainless steel 48-52 HRC for its corrosion resistance and high wear for filled resin.
The goal of every mold builder is to make a mold that produces parts by the most efficient means despite the unique geometry and construction of each mold. The most effective method is to reduce the cooling time to ejection, which is the largest portion of a molding cycle.
High Wear Solutions in Steel
A mold’s core is typically the side with more plastic structural features, such as ribs and bosses for added strength and reduced plastic material mass. These core side features have more surface area, which requires more cooling and minimal draft. Additional challenges include features that require extra venting without gas traps or more ejection to effectively demold the plastic part.
For example, consider material savers (standing steel with machined ribs) that demand cooling the standing steel and ejector pins at the bottom of the ribs, which prevents the use of baffles or bubblers. Another example is a round core around which many shops cut a channel and add O-rings to the top and bottom to route water. The part contour can extend beyond the parting line, so this can be an ineffective method for the core side as it leaves no room for cooling in the cores. The insert’s perimeter was cooled but not the standing steel areas.
An alternative is to direct mate the cooling lines in the core block to the cooling lines in the insert, which maintains proper flow while using O-rings to seal the top and bottom. This approach is cost-effective because the cooling circuit covers the entire part surface, reducing cycle time and improving part quality by eliminating warp. These modifications reduced cycle time by 40%.
The goal of every mold builder is to make a mold that produces parts by the most efficient means despite the unique geometry and construction of each mold. The most effective method is to reduce the cooling time to ejection, which is the largest portion of a molding cycle. Use these examples to evaluate the challenges your shop faces and then start identifying critical areas where cycle time hides, so you can implement a solution to deliver molds that efficiently cool parts, lead to satisfied customers and sustainable business.
Related Content
Mold Design Review: The Complete Checklist
Gerardo (Jerry) Miranda III, former global tooling manager for Oakley sunglasses, reshares his complete mold design checklist, an essential part of the product time and cost-to-market process.
Read MoreLaser Welding Versus Micro Welding
The latest battle in finely detailed restoration/repair of mold materials.
Read MoreHands-on Workshop Teaches Mold Maintenance Process
Intensive workshop teaches the process of mold maintenance to help put an end to the firefighting culture of many toolrooms.
Read MoreHow to Correctly Size a Hydraulic Cylinder
This week Randy shares steps for correctly sizing a hydraulic cylinder on a mold.
Read MoreRead Next
Additive Tooling Goes Beyond Conformally Cooled Inserts to Simplify the Mold Build Process
Three ways that additive tooling is moving past conformal cooling to bring speed and efficiency to the overall tooling process.
Read MoreSelling the Value of Additive Tooling in a Mold
Gaining molder buy-in for a conformal-cooled mold insert requires communicating the mold’s total cost of ownership over the life of the project.
Read MoreReasons to Use Fiber Lasers for Mold Cleaning
Fiber lasers offer a simplicity, speed, control and portability, minimizing mold cleaning risks.
Read More

