Getting the Most Bang from Your Metrology Buck
These strategies can help maximize the life of your metrology equipment while minimizing the total cost of ownership.
Quality metrology equipment is not cheap, but when you’re working with a mold that might be worth five or even six figures, cheap metrology equipment just isn’t worth having. Once you have made the investment in quality equipment, it becomes a question of how to maximize its life while minimizing the total cost of ownership.
The answer to this question is simple: maintain your equipment. If that seems like a common-sense solution, it is. But as an experienced metrology engineer, I will tell you that common sense can be a rather uncommon commodity, and, more often than not, “maintenance” only happens when something finally breaks.
Every manufacturer provides a list of recommended maintenance procedures for each piece of equipment it sells. Those recommendations are based on real-world experience, and following them will prolong the life of your equipment and minimize your total cost of ownership.
Basic Maintenance Steps
Clean the equipment and keep it clean. Precision metrology and dirt don’t get along well together. Follow the manufacturer’s recommended cleaning procedures, paying special attention to any do’s and don’ts. Remember, these recommendations are based on real-world experience. Don’t forget to clean the filters on the electronics boxes, too. Those air/air heat exchangers are designed to keep the components inside cool. Hot electronics tend to have short lives, and failing components will often produce erratic results as they degrade.
Check the calibration frequently. The best metrology system in the world is not worth much if it’s not properly calibrated. Environmental factors, age, accidents, operator error and lots of other elements can, and do, impact calibration. Set up a schedule and a procedure, and then follow them.
Lubricate when necessary. If the equipment requires lubrication, by all means keep it lubricated. Here again, the manufacturer’s recommendations should be followed. The specific products and procedures are recommended for a reason, and “just as good as” very often isn’t.
Status Tracking
Once the equipment is clean, lubricated and calibrated, your maintenance concerns are all covered, right? Well, no; routine maintenance is just the beginning of an ongoing process that should continue until you finally retire the equipment. Even well-maintained equipment becomes more susceptible to damage as it ages, so it’s important to track the status of your metrology systems over time. Maintenance records provide valuable insights into the health of the equipment.
Here are some areas to consider in evaluating older metrology devices:
1. Contact wear. Even though most contacts are made from very hard materials, they can, and do, wear over time. Calibration problems or inconsistent readings are frequently caused by worn contacts.
2. Contaminant infiltration. Over time, particulate and liquid contaminants can work their way into so-called “sealed” components. Schedule detailed inspections of older equipment that include areas not normally subject to routine cleaning.
3. Loose fittings. Heat cycling and vibration will eventually loosen threaded fittings on cables and other connections. Check them periodically. If loose fittings are found, check for contaminant infiltration in the attached devices.
4. Cable damage. Cables are routinely cut by dropped objects, pinched, abraded and otherwise damaged. Cable insulation also can be damaged by coolants, particularly synthetic coolants, and other common shopfloor chemicals.
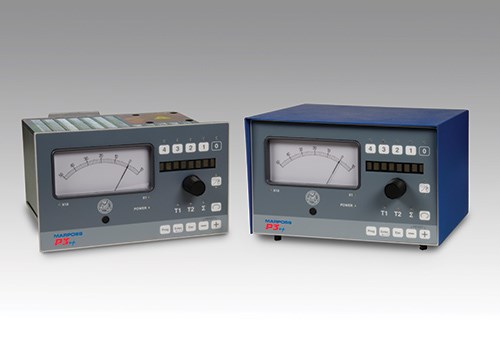
Cables on devices that are sensitive to impedance (the effective resistance of an electric circuit or component to alternating current) need to be checked frequently with the appropriate instruments. These devices include eddy current detectors used to identify flaws in conductive materials via electromagnetic induction. Internal damage and time-related deterioration can change their conductivity or permit signal-to-ground cross talk, which will degrade the accuracy and sensitivity of the devices connected to them.
Nothing Lasts Forever
Mechanical devices wear out, technology becomes obsolete and performance requirements change over time. Sooner or later, you will need to repair and then replace your metrology systems and devices. The time to start planning for those events is right now.
First, consider the continuing availability of spare parts to support your maintenance program. Metrology technology is changing rapidly and so is the regulatory environment. That means that some of the parts you need simply won’t be available in the future because it will be illegal to produce them. Gas plasma displays, for example, were state-of-the-art not so long ago. Today, they are listed as environmental hazards that cannot be used at all, even as a like-for-like replacement part. If your system depends on them, you have a problem.
Components that contain lead or other heavy metals were quite common in electronics produced just a few years ago but are not anymore. Today, electronics manufacturers voluntarily eliminate these elements from many of their products. Tomorrow, their use may well be banned by law. So even if your supplier can find the parts you need, it may be illegal to use them. If it isn’t, it soon might be.
Intel 486 chips are a good example of other components that aren’t made anymore and are in increasingly short supply, as are component-mount transistors and a number of specialized chips commonly used in metrology equipment. You can ignore this trend at your own peril. Instead, it might be wise to inventory everything on your floor today and then check the maintenance records to find out what parts need to be replaced regularly. Any critical components that fall into the categories mentioned above should be added to this list. Pay particular attention to electronics, because that technology is changing more rapidly than any other. Then talk to your suppliers and ask them to warn you if anything critical to your operation is expected to become obsolete or unavailable.
With that information in hand, you can make an informed decision about stockpiling key components while they’re still available and start planning to replace the equipment that uses them down the road. As a rule of thumb, a piece of well-maintained metrology equipment ought to have a service life of 10 to 15 years, and those are good numbers to use in your plans and projections. Prioritize the systems on your floor, and plan to replace the oldest first, since they’re the most likely to break down and the least likely to have critical spare parts available. Don’t throw those systems away, though, because they probably contain parts you can cannibalize to keep slightly newer systems running. Here again, maintenance records are invaluable sources of information to support good decisions.
You also should expect the OEMs you deal with to put forth an effort to ease the transition to new technology. New electronics, for example, should be pin-for-pin compatible with legacy systems whenever possible. This will take some effort to achieve, but it can be done. The same compatibility should be expected of mechanical features such as hole spacing and mounting arrangements. Changing such features without a compelling reason ought to be actively discouraged among your customers. Let your suppliers know how you feel.
As I said in the beginning, good metrology equipment is not cheap, but with regular maintenance it should deliver many years of service. Maintenance data will also give you valuable information to support good repair/replace decisions down the road and a rational plan to cope with inevitable obsolescence. That’s the best way to get the most bang for your metrology buck.
Related Content
Navigating Economic Resilience and Consumer Trends
Consumer behavior provides mold builders insight into the evolving market dynamics of goods and services that helps strategic planning.
Read MoreMaking the Circular Economy a Reality
Driven by brand owner demands and new worldwide legislation, the entire supply chain is working toward the shift to circularity, with some evidence the circular economy has already begun.
Read MoreWhat You Should Consider When Purchasing Modified P20 Steel
When buying P20 steels that have been modified, moldmakers must be aware of the variations and key issues that affect delivery, cost and lead times.
Read MorePrecision Micro Finishing Tools Supply Machine, Mold and Die Operations
Titan Tool Supply has made available 100+ products for immediate online order or shipment from stock, supporting advanced manufacturing requirements.
Read MoreRead Next
Improve Input Quality with the Right Tool Inspection and Monitoring System
Integrating efficient tool inspection before and after the cut with optimized tool performance in the cut improves mold manufacture’s efficiency and profitability.
Read MoreAre You a Moldmaker Considering 3D Printing? Consider the 3D Printing Workshop at NPE2024
Presentations will cover 3D printing for mold tooling, material innovation, product development, bridge production and full-scale, high-volume additive manufacturing.
Read MoreReasons to Use Fiber Lasers for Mold Cleaning
Fiber lasers offer a simplicity, speed, control and portability, minimizing mold cleaning risks.
Read More
