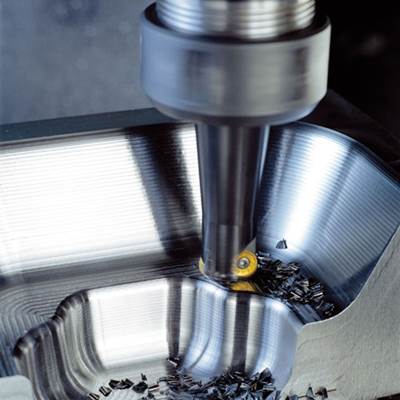
Essential Cutting Strategies for Mold Machining
Without the right application techniques, even the best tools can fall short of their potential. Here’s a look at a few key cutting strategies—thick chip, roll-in technique, radial ramping, helical interpolation, cutter positioning, conventional vs. climb milling and constant cutter engagement.
Roll In Technique
We have all been guilty of reaching for whatever tool is closest to us to complete a basic milling operation, thinking we can get by without optimizing the process. We have also all experienced the resulting poor finish, and that horrible sound—an audible chastisement of our having cut corners. However, the go-to corrective method of turning down the feed only masks the real problem, and slows productivity.
When entering into a cut directly, vibration is introduced into the machining process. This vibration leads to shortened tool life, poor surface quality and a process that has to be constantly monitored because tool life cannot be predicted confidently. Figure 1 shows how the thick chip exists when the cutter leaves the machining area as it rotates. Also, the tool is under the highest load—or tool pressure—when this occurs. This tool pressure is then very quickly released and causes the milling cutter to have a slight wobble as the next insert in the cutter body comes back into the machining process; and, the tool pressure again increases and loads up the machine spindle bearings again.
All this happens at a very high rate of speed and the result is a rattling sound until the center line of the cutter is past the edge of the mold being machined. Once the cutter has moved to this position, a thin chip on exit occurs naturally. There you can easily see the difference in thickness of the lines at the furthest point on the right side.
When using the roll-in technique (see Figure 2); however, thin chips will exit the cutter from the very start of the machining process, regardless of milling cutter center line position. This eliminates the tool pressure fluctuation, and loading and unloading of the machine spindle bearings.
So in the end, the rolling-in technique not only eliminates the vibration problem to increase the tool life; and therefore, the productivity of the machining process, it also reduces machine spindle bearing wear and yields a more predictable machining process. Such predictability allows the machine operator to walk away from the process with confidence, knowing there will not be any surprises while his/her back is turned.
Another option for generating thin chips on exit is radial ramping. If the milling cutter is introduced into the machining process on a 20° to 30° angle, the same effect takes place as does with the roll-in technique. This is an option for simplified machine programming.
Helical interpolation (see Figure 3) is a technique that is used for machining a pocket or creating a hole in the mold with a milling cutter. The milling cutter starts out above the mold and is moved in a circular path as it is lowered into the mold and begins the machining process. It’s a bit easier to get the thin chip when doing this operation because all it requires is one additional circular movement of the milling cutter from above the mold. The cutter will just start a little higher above the mold and move in a circular pattern as it is being moved into the surface of the mold itself. Many people don’t perform this extra step and experience the same negative effect of vibration, shortened tool life, etc.
Cutter positioning over the mold goes a long way in getting the precision you need. For large engagement face milling, 70-percent engagement is optimal. It gives the carbide inserts time to compress with the tool pressure, and the thin chip on exit allows this compressive state to be released on a gradual basis. Again it all happens very quickly, but carbide inserts are not good at releasing the compression of a thick chip all at once—the sudden change in load from compressive to tensile causes carbide chipping on exit. Meanwhile, for a small engagement typically found in profiling operations, 25 percent of the cutter diameter in cut is optimal for tool life and productivity.
It’s important to keep in mind the potential effects of thick chips on exit due to cutter position over the mold. Most manufacturers center the cutter over the center of the part and thick chips result on exit. Instead, the process should be optimized to ensure the lowest chip thickness.
It’s also important to distinguish between climb milling and conventional milling. Both are a direct result of the position of the cutter over the mold. With conventional milling, the cutter is offset to the right side, again resulting in thick chips on exit. When using a climb milling pass, the cutter is offset to the left and chips are thin on exit. This process is referred to as climb milling because the cutting action is actually pulling the cutter through the machining process. When conventional milling, the cutter is being restricted by the compressive forces.
Constant cutter engagement is another path to optimized productivity. This is to say that the width of cut (width of material being machined) remains the same throughout the machining process. Most often in moldmaking, the milling cutter is moving around the mold creating different features. This should be done using programmed radius movements of the milling cutter, and not a series of straight line moves (see Figure 4).
This is what many manufacturers do, but this is not a good situation because it loads and unloads the spindle, introduces the vibration, shortens tool life and greatly reduces overall productivity. When the roll-in technique is used to enter the component and then the cutter is moved in a series of radius movements to turn corners, this keeps chips thin on exit, keeps the cutter engagement equal (even in the corners) and provides stability to the process.
Machining over slots or holes will result in an insecure process, so re-position the cutter and program to ensure thin chip on exit at all times. Again, many manufacturers program directly over the voids (see Figure 5, top). Not only does this introduce the vibrations and instability discussed earlier, it also introduces conventional milling and climb milling in the same path, magnifying these undesirable conditions. Instead, they should be using the paths on the right. Roll-in, keeping constant engagement and thin chip on exit (see Figure 5, bottom).
For moldmaking there is a lot of profile work done to create the intricate features of the molded component. The same techniques of roll-in and constant engagement by programmed radius movements of the cutter create the thin chips on exit that maximize productivity (see Figure 6). There are also many internal corners in moldmaking, and anyone can tell you the cutter will normally vibrate when reaching the corner. The arc of engagement when approaching the internal corner should be about 50 degrees to remain problem-free. However, as the milling cutter enters the corner that arc of engagement increases to 140 degrees due to the material that exists in front of it, where it hadn’t been before. Then, many manufacturers will make a 90-degree change in direction to start machining another area of the mold. This causes vibration because the arc of engagement has increased beyond 90-degrees and the cutter has unloaded.
This means the programmed change in direction has actually caused the machine to stop moving the cutter altogether, so tool pressure is lost and vibration starts. Then the cutter takes off in another direction and the tool pressure and load are increased once again. During the increase in tool pressure and spindle load, the cutter will continue to vibrate until the load level is high enough to stabilize the spindle. The correct process would be to use programmed radii to maintain constant engagement, spindle and cutter load and to avoid stopping the machine (see Figure 7).
Summary
Without the right application techniques, even the best tools can fall short of their potential. However, by keeping the golden rule of milling in mind–aiming for a thick chip upon entry and a thin chip upon exit of moldmaking applications—these processes should ensure the smallest chip thicknesses possible when exiting a cut. Proper cutting action and chip formation save time, money and ensure a stable process.
Related Content
Machining Center Spindles: What You Need to Know
Why and how to research spindle technology before purchasing a machining center.
Read MoreHow to Eliminate Chatter
Here are techniques commonly used to combat chatter and guidelines to establish a foundation for optimizing the moldmaking process.
Read MoreRevisiting Some Hot Runner Fundamentals
What exactly does a hot runner do? If you’ve been in the injection molding industry for any length of time, you might think the answer is obvious, but it is not.
Read MoreThe Ins and Outs of Hot Runner Temperature Control
A training checklist that explains the why and how of proper hot runner temperature control and system management.
Read MoreRead Next
Smart Machine Investment Planning
The steps to take to fully unlock the potential of your new technology investments.
Read MoreHow to Use Continuing Education to Remain Competitive in Moldmaking
Continued training helps moldmakers make tooling decisions and properly use the latest cutting tool to efficiently machine high-quality molds.
Read MoreReasons to Use Fiber Lasers for Mold Cleaning
Fiber lasers offer a simplicity, speed, control and portability, minimizing mold cleaning risks.
Read More


.png;maxWidth=300;quality=90)

