Avoiding Common Mistakes Made During Part Design
For moldmakers considering adding additive manufacturing to their portfolio of value- added services—whether in-house or outsourced—here are some tips to provide your customers with effective, upfront product design collaboration.
Design for Manufacturability (DFM) is the general art of creating new designs in such a way that they are easy and inexpensive to manufacture. Anyone who has ever designed a product to be injection molded likely learned along the way that small changes to the design could significantly impact the cost, time frame and overall success of the manufacturing project.
This is true for any additive manufacturing project as well. Being aware of a few common mistakes made throughout the design process can help minimize costs and delays, and help prevent the creation and delivery of unsatisfactory parts that require further changes and rebuilds in order to meet the needs of the customer.
Pay close attention to not only the native CAD design of what is to be produced through additive manufacturing, but also the converted .STL version, which is often required. The .STL file format is the standard data interface between CAD software and most additive manufacturing machines. A .STL file approximates the shape of a part or assembly using triangular facets.
Even well-conceived designs with the best of intentions can present a potential problem when coverted to .STL format and submitted for additive manufacturing. This is why the files customers submit should be reviewed, and any issues found should be addressed before parts are built, rather than after they are delivered.
Before submitting a design for any additive manufacturing project, keep an eye out for these seven common mistakes concerning part design and file conversion.
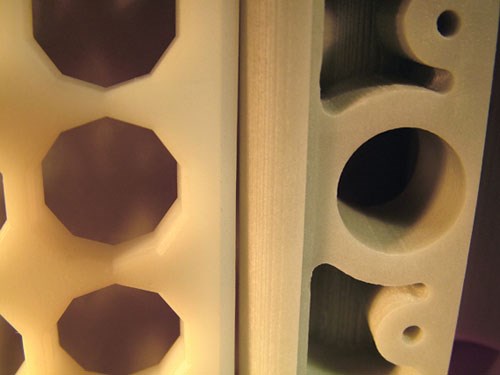
1. The part design has thin features or walls that are less than .030” for standard resolution or .015” - .020” for high resolution machines. Due to the “layer by layer” approach of the additive manufacturing process, anything smaller or thinner that this will oftentimes not build and will not be present in the final model. Pay very close attention to raised or recessed logos and areas of small text, knife edge features that taper down to zero thickness and curvy sections of any design where thickness can fluctuate.
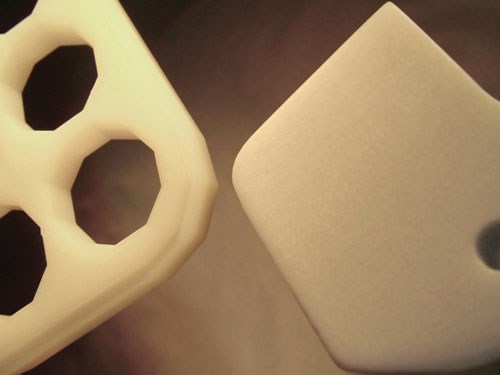
2. The native CAD model is converted to .STL format with a very low resolution, resulting in heavy faceting in the model. If the resolution of the .STL file is too low, the model will be faceted instead of having smooth surfaces and curves. This can be quite common and produces unattractive parts. Typically, to achieve a smooth finish on a model there should be an edge-to-edge distance of less than .020” between facets on the .STL file. Check the parameters on the native CAD program being used to determine the best method of exporting acceptable .STL files.
3. The original CAD data has numerous unstitched surfaces (rather than solids), resulting in errors when converting to .STL format. Make sure that the surfaces in the original CAD model are water tight, in that only solids are modeled. The .STL file can also be inspected to ensure that all dimensions, part volume and surface area appear to be correct.
4. The part design has an enclosed hollow space from which support and build materials cannot be removed. Any enclosed hollow void in the design will contain support materials that cannot be removed through the finishing process. This area may also be filled with unused resin or powder depending on the selected prototyping process. Consider filling in voids to be solid, building the design in halves to allow access to the enclosed space or adding a hole of some kind in the model to allow for the removal of the support materials.
5. Assemblies, threads and mating features are designed with improper clearance. The standard tolerances for most additive manufacturing processes start at +/- .005” and compound from there as the design increases in size. It is not uncommon for first-time customers to receive parts that—while within the published tolerances of the manufacturing process—do not fit together or mate up as intended. Typically, there should be a .015” - .020” clearance between mating parts, which is different from what is required for traditional injection molding. This is an important point to remember when the success of the project depends on how well different designs mate up or assemble with one another.
6. The design includes a living hinge that needs to function. Living hinge designs on most parts produced via additive manufacturing don’t typically function as intended. The build material involved is often too rigid, especially in such a thin section, and will break. While there have been a few materials developed that look to address this need, expect limited usage from a living hinge design produced via additive methods.
7. The units of measurement for the .STL file differ from what was intended. Double check the .STL file properties to ensure that the correct unit of measurement is selected. This is especially true when there is more than one design with varying units of measurement being built together. Some CAD packages also have default settings where .STL files may be exported in a different unit of measurement from what was used during the design process. When there is a tight timeline and the project is on the line, it can be difficult to see the comedy in dramatically oversized or undersized parts as they come out of the box.
Keep these seven common mistakes in mind when considering any additive manufacturing project. Be careful to confirm the integrity of the original CAD data, and be mindful of living hinge designs, enclosed or trapped hollow spaces, clearance between mating features, and any features or walls that are smaller or thinner than .030”. After exporting the .STL file from the native CAD file, take time to confirm that the overall resolution of the file is sufficient and that the selected units of measurement are correct.
Related Content
6 Ways to Optimize High-Feed Milling
High-feed milling can significantly outweigh potential reliability challenges. Consider these six strategies in order to make high-feed milling successful for your business.
Read MoreRevisiting Some Hot Runner Fundamentals
What exactly does a hot runner do? If you’ve been in the injection molding industry for any length of time, you might think the answer is obvious, but it is not.
Read MoreFundamentals of Designing the Optimal Cooling System
The right mold components can help improve mold cooling and thereby produce higher-quality parts.
Read MoreIt Starts With the Part: A Plastic Part Checklist Ensures Good Mold Design
All successful mold build projects start with examining the part to be molded to ensure it is moldable and will meet the customers' production objectives.
Read MoreRead Next
Additive Toolmaking Process Cuts Cycle Times
Layer-by-layer LENS technique makes wear-resistant, feature-rich production molds.
Read MoreHow to Use Strategic Planning Tools, Data to Manage the Human Side of Business
Q&A with Marion Wells, MMT EAB member and founder of Human Asset Management.
Read MoreAre You a Moldmaker Considering 3D Printing? Consider the 3D Printing Workshop at NPE2024
Presentations will cover 3D printing for mold tooling, material innovation, product development, bridge production and full-scale, high-volume additive manufacturing.
Read More

