Avoid Mold Reload and Rework with Machine Probes
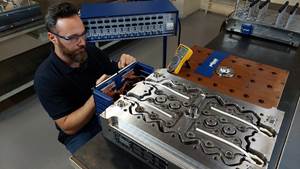
Probing on a machine with ready-to-use probing cycles can help reduce setup times, increase machine usage time and improve the dimensional accuracy of the finished workpiece.
It’s hard to imagine quick, accurate mold measurement today without the use of workpiece touch probes directly on the machine tool to help moldmakers perform setup, measurement and inspection during a mold build. This is one way to ensure a mold is in tolerance before it is removed from the machine, but it is critical that users select the correct probe type with the control features and options they need.
When it comes to inspection, most high-end controls have standard probing cycles for workpiece measurement that will allow users to update the tool offsets for length and radius, as well as record the results to a file for printing. The inspection program can be created on the machine, although most CAM systems already support machine probing cycles and allow users to verify the program for collisions. If an inspection result is out of tolerance, the user can force the tool path to be run again with updated tool data.
Before an inspection program using a probe can be run on a machine, the user must first calibrate the probe. The calibration routine should be run first on a tooling ball located on the mold. This can be part of the inspection program. He or she should make sure the probe is in good working order, and check for wear and minimal runout of the stylus. Also part cleanliness should be ensured by incorporating a cleaning program using high-pressure coolant, such as when a probe blows compressed air through the spindle to finish cleaning the probing point.
Many high-end controls also feature a number of measuring cycles for checking the geometry of the machined workpieces. This enables the user to recognize a workpiece, call an appropriate part program, verify that all machining operations were conducted correctly, and detect and compensate for tool wear. For example, some controls provide cycles for a wide variety of applications in automatic mode, including surface, hole, length, width, bolt pattern and vector. These automatic measurement cycles are all valuable during mold manufacture and inspection.
Crash protection is another important probe feature for workpiece inspection. Touch probes should offer a large deflection path and additional safety with rated breaking points in the stylus or a connecting pin to the probe contact. For expanded collision protection, users should consider a mechanical adapter between the touch probe and the taper shank. This will allow the touch probe to absorb the shock in the event of a light collision against a fixture or workpiece. At the same time, the integrated switch will deactivate the ready signal and the control will stop the machine. The collision protection adapter also functions as a thermal decoupler that can protect the touch probe from being heated by the spindle.
Probing on a machine with ready-to-use probing cycles can be an important part of manufacturing a quality mold. It can help reduce setup times, increase machine usage time and improve the dimensional accuracy of the finished workpiece. All of these factors impact a mold’s productivity and profitability by eliminating the need to reload and rework molds.
Related Content
Think Safety: Eliminate Hazards Throughout the Shop
The tooling community is taking advantage of new products for safer mold shops and molding facilities.
Read MoreThe Ins and Outs of Hot Runner Temperature Control
A training checklist that explains the why and how of proper hot runner temperature control and system management.
Read MoreFour Micro Tooling Considerations
Issues involving gating, ejection, mold splits and direction of pull are of special concern when it comes to micro tooling.
Read More5 Hot Runner Tips for Moldmakers and Molders
Best practices for initial hot runner tryouts and effective preventive maintenance.
Read MoreRead Next
On-Machine Probing Technology for Mold Manufacture
Decision points to help you select the right probing system.
Read MoreAre You a Moldmaker Considering 3D Printing? Consider the 3D Printing Workshop at NPE2024
Presentations will cover 3D printing for mold tooling, material innovation, product development, bridge production and full-scale, high-volume additive manufacturing.
Read MoreHow to Use Strategic Planning Tools, Data to Manage the Human Side of Business
Q&A with Marion Wells, MMT EAB member and founder of Human Asset Management.
Read More


