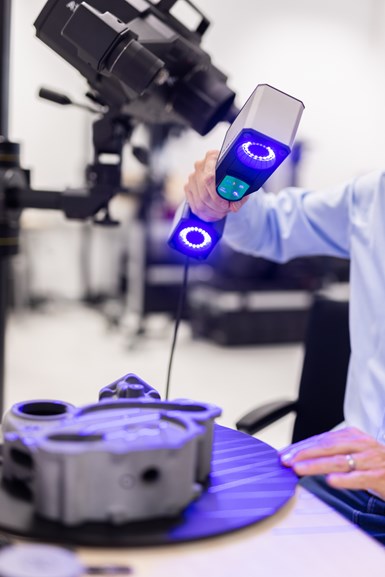
Handheld Laser Scanning Technology Designed for Ease of Use, Efficiency
Zeiss T-Scan Hawk 2 is a lightweight scanner with hyperscale calibration and satellite mode for metrology-grade precision.

Photo Credit: Capture 3D
The Zeiss T-Scan Hawk 2 from Capture 3D is a handheld 3D laser scanner engineered to maximize ease of use and efficiency. The lightweight, handheld 3D scanner includes a satellite mode, red laser marker for distance control, GOM Inspect 3D inspection software and hyperscale calibration to deliver metrology-grade precision across many applications, including product design, quality control, reverse engineering and moldmaking. Designed for companies producing products within industries like automotive, aerospace, consumer goods, power generation and mold manufacturing, the Zeiss T-Scan Hawk 2 also comes with acceptance testing certified to the highest industry standards.
Technical features intending to improve user experience include a workflow assistant that guides users through various workflows and template creation to increase efficiency in reoccurring scanning jobs. Scanning with the device is also intuitive, smoothly collecting data following the movement of the user’s hand with a visual aid that helps establish and monitor working distance. Push button operation on the device helps start and navigate the workflow using four buttons on the scanner rather operating the software separately on a laptop.
The Zeiss T-Scan Hawk 2’s satellite mode benefits mold builders working with large molds by enabling them to scan large areas without coded markers, collecting accurate 3D measurement data from molds up to multiple meters in size. With preset exposure mode options that automatically set the correct exposure time for the part material, the Zeiss T-Scan Hawk 2 also supports mold builders working with a range of materials and surfaces. For example, adjusting the exposure mode to the dark surface setting helps capture more data from dark or shiny surfaces. Users can switch between these preset options for different exposure time settings when scanning parts with different surface finishes. The handheld 3D laser scanner also features adjustments for resolution and field of view, making it simple to switch between collecting data from small parts, fine details, larger objects or deep pockets, confined spaces or hard-to-reach areas.
Related Content
-
What is Scientific Maintenance? Part 2
Part two of this three-part series explains specific data that toolrooms must collect, analyze and use to truly advance to a scientific maintenance culture where you can measure real data and drive decisions.
-
What You Need to Know About Hot Runner Systems and How to Optimize Their Performance
How to make the most out of the hot runner design, function and performance.
-
Machine Hammer Peening Automates Mold Polishing
A polishing automation solution eliminates hand work, accelerates milling operations and controls surface geometries.


