Under the Scope: Lessons Learned in Welding
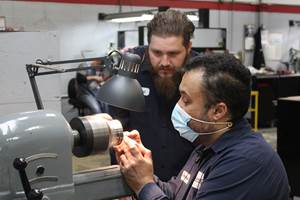
Many of this mold welder's lessons learned were as a result of questions asked by customers regarding training, processes and welding theory.
Mold welders use their years of experience to develop techniques that can accommodate a variety of mold materials. In addition to being skilled in our profession, we need to keep pace with new information about materials and welding technology. Here are some lessons I have learned over the years as a mold welder. Many of these were as a result of questions asked by customers regarding training, processes and welding theory.
Mold welding is learned by repetition and by challenging oneself. Proficiency in mold welding is only achieved through repetition. Repeatedly welding edges and inside corners helps the novice welder to become faster and better at his or her skill. In addition, constant challenges are necessary to help refine current techniques and learn new ones. Most importantly, acknowledging that every job, even if the welder has seen it before, needs to be approached as if it were new prevents poor weld preparation or welding technique.
TIG welding is the best technique with which to begin your welding training. Many operators who learn to laser weld today have never picked up a TIG-welding torch. When I was becoming a mold welder, laser welding was a generally unknown technology. Shops used either TIG or micro-TIG welding. I learned how to TIG weld first, without a microscope. In this environment, I developed the technique to effectively manipulate a weld puddle and create welds that were ascetically pleasing. Most importantly, I learned how to weld an edge without creating an undercut.
I then progressed to micro-TIG welding, which allowed me to capitalize on my TIG-welding skills, but under a microscope. From there, learning to laser weld does require new skills and techniques. It just uses a pulse of light instead of the constant weld puddle of TIG welding. Many of the same principles, such as feeding techniques and positioning a workpiece under a microscope, can be applied to both processes.
Making mistakes under the guidance of a mentor develops a proficient mold welder. Customers are reluctant to have a novice mold welder work on their projects. This is when having a welding mentor becomes invaluable to a shop. This makes the novice welder’s role very similar to that of a mold-building apprentice. I learned to weld by having someone skilled in the trade teach me the basics. I made mistakes practicing on molds and parts that were no longer used. I learned how to position my torch and filler rod, and properly manipulate a weld puddle. Sound advice and a demonstration from an experienced professional can save a novice welder weeks of frustration when he is learning a particular skill.
Laser welding is a game changer, but it cannot completely replace TIG welding. In my shop, both processes have their niche. For example, laser welding is excellent for use on molds and components that require a light weld buildup. On the other hand, TIG welding can be used for larger buildups and in areas with deep, rough damage. Laser welding greatly reduces heat and distortion, but the process can be slow in some applications, because larger, heavier blocks must be properly positioned, and this can be a challenge. Oftentimes, the two processes can be used together on the same job. For example, the technician can use a TIG welder to create a buildup and then laser weld around the perimeter of the weld to fix any sink problems.
Aluminum and copper-based materials can be laser- and TIG-welded, but not micro-TIG-welded effectively. Welding aluminum and copper-based materials is considerably different from welding steel, because the machine needs to be capable of very high amperage (in either laser or TIG) to melt these materials and form a weld puddle. Typically, a micro-TIG machine is air-cooled and designed for low-amperage work. Most micro-TIG welders would quickly overheat if used on an aluminum or copper-based repair. This is why these materials typically are welded on a high-amperage (400 amps or more) TIG machine that is water-cooled and capable of creating the necessary power to melt them.
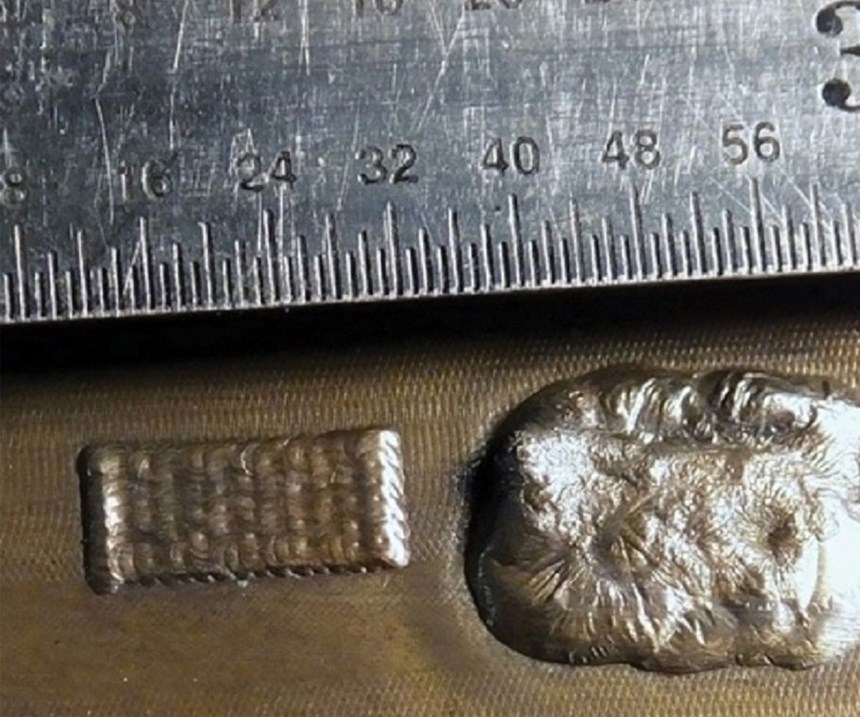
For laser welding, the same rule applies. A high-powered laser welder (at least 120 watts or more) and proper cooling are needed to efficiently create a weld. A TIG-welding buildup will look very large compared to a laser buildup in these materials. No middle ground exists in weld sizes for aluminum or copper-based materials. Figures 1 and 2 compare the weld sizes in these materials in both laser and TIG welding.
Welders always have questions. Asking repeated questions may seem redundant, but direct communication between the welder and the customer is essential for achieving a proper weld. Welding can change a mold structurally and chemically, so absolute clarity in the instructions is a must. If there are risks and considerations, the welder wants the customer to know them before he begins welding. A welder also needs to know from the person responsible for the job exactly how much weld is needed and where it is required.
Welding is not always the solution. Although I am confident in my skills, I am very aware that welding cannot fix every problem on a mold. Having a good relationship with the customer in these situations is crucial. Every day, I am asked to do something different. If the customer’s expectations cannot be met according to the welding parameters, then the customer must be informed before the job is started. For example, I may be asked to fill a long section on a very small insert, but I know the heat distortion might cause warping. There might also be damage so deep in a hole or a detail that I cannot gain access without creating additional damage. Welding is not always the answer. Perhaps using an insert to fix the damage is a better solution to a problem. Communication is key to finding the right solution for a specific problem.
Related Content
The Ins and Outs of Hot Runner Temperature Control
A training checklist that explains the why and how of proper hot runner temperature control and system management.
Read MoreWhat You Should Know About Injection Mold Safety Straps
Every mold should have one in order to be safe and OSHA compliant.
Read MoreQuestions and Considerations Before Sending Your Mold Out for Service
Communication is essential for proper polishing, hot runner manifold cleaning, mold repair, laser engraving and laser welding services.
Read MoreHands-on Workshop Teaches Mold Maintenance Process
Intensive workshop teaches the process of mold maintenance to help put an end to the firefighting culture of many toolrooms.
Read MoreRead Next
How to Use Strategic Planning Tools, Data to Manage the Human Side of Business
Q&A with Marion Wells, MMT EAB member and founder of Human Asset Management.
Read MoreAre You a Moldmaker Considering 3D Printing? Consider the 3D Printing Workshop at NPE2024
Presentations will cover 3D printing for mold tooling, material innovation, product development, bridge production and full-scale, high-volume additive manufacturing.
Read MoreReasons to Use Fiber Lasers for Mold Cleaning
Fiber lasers offer a simplicity, speed, control and portability, minimizing mold cleaning risks.
Read More


