Strong Design and State-of-the-Art Equipment Gives Omega Tool a Competitive Edge
Design expertise, supported by cutting-edge CNC, materials, software and inspection enables Omega Tool Inc. deliver notably robust molds.
What competitive advantages does Omega Tool bring to the table when working with customers?
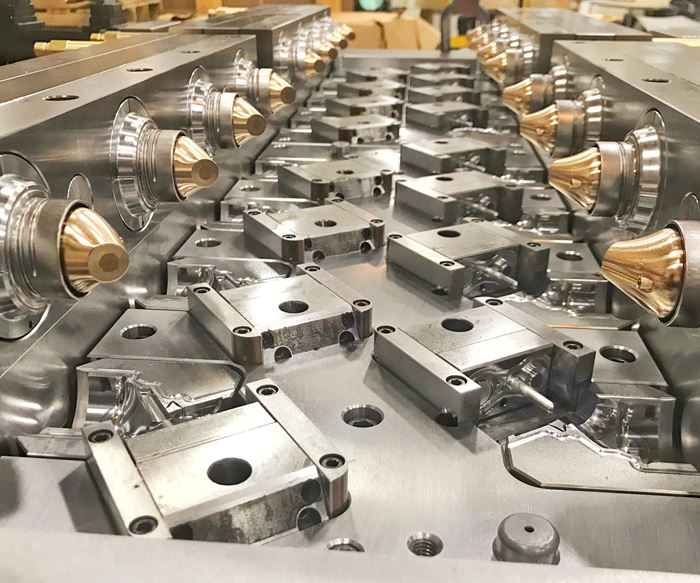
Jed Weber, vice president: We excel at creating robust tool designs. From these tool designs we build precision molds that have been known to run in excess of 20 million shots with very little maintenance. Our design team has nearly 60 years of combined experience designing plastic injection molds. We have learned what works best over the years for specific applications. For example, we pay close attention to cooling to help customers’ molds run faster and more efficiently, and more specifically, we ensure the precision fitting and guiding of moving components. Most of the molds we manufacture utilize high-end mold materials, including unique, new “hybrid” tool steels, as well as mold coatings that are engineered for specific applications. Approximately 80 percent of our molds get coatings, and it appears there are new ones being developed every week. All these things contribute to molds that can last for years if properly cared for.
What equipment or technologies enable your company to maintain this level of quality and robustness in the molds you build?
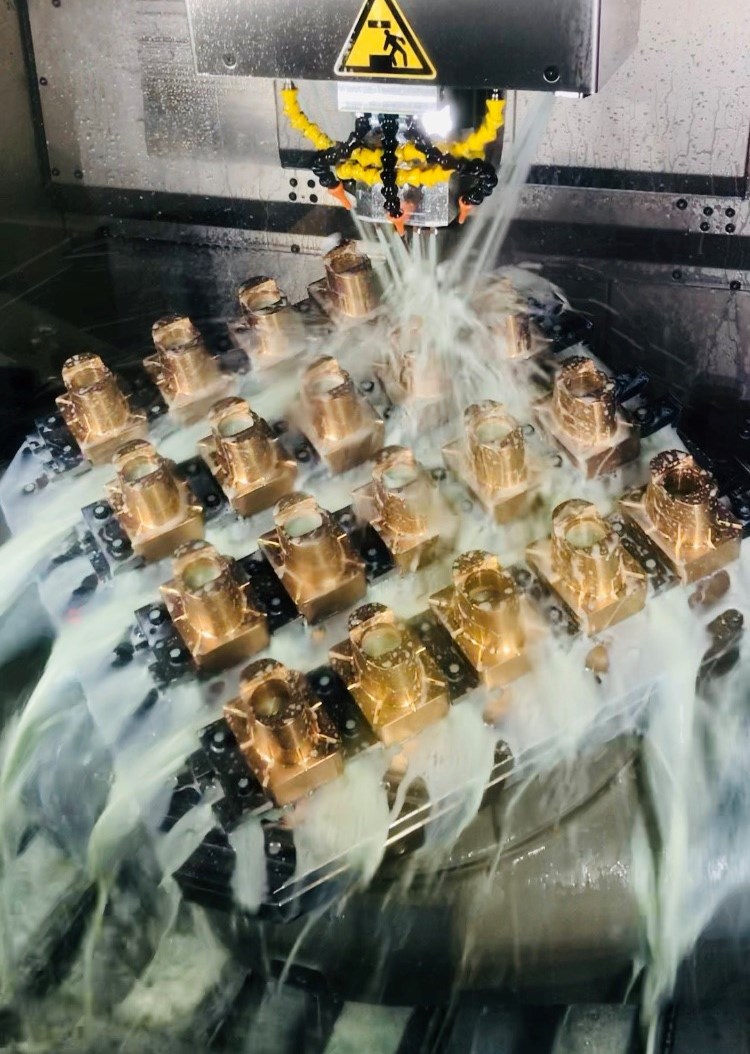
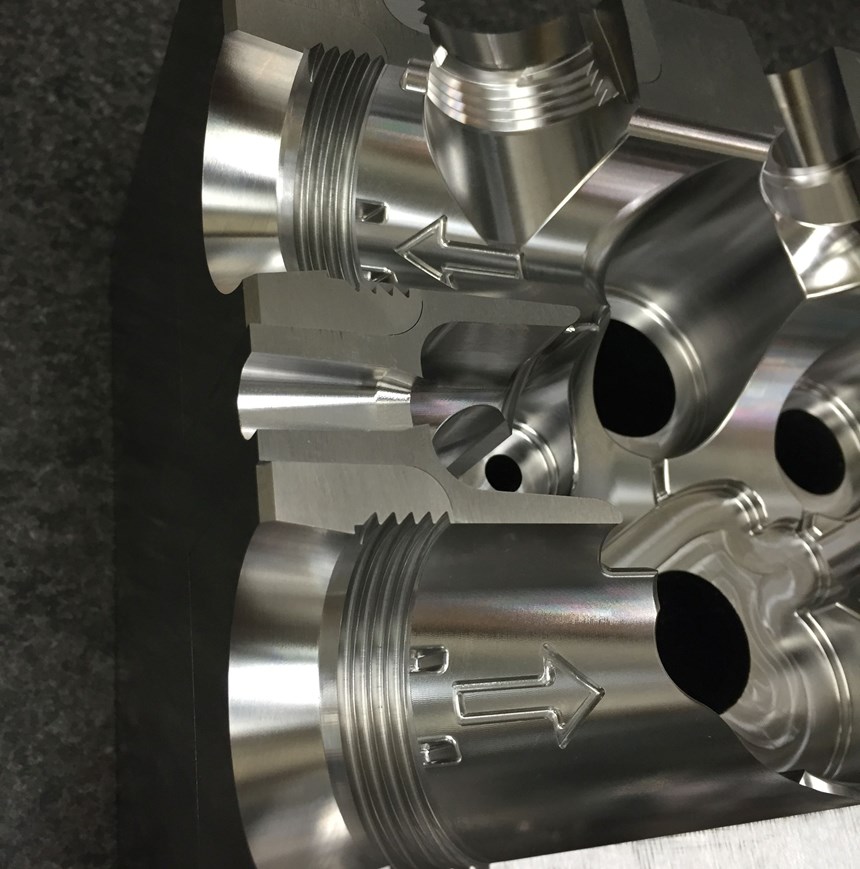
Weber: For one, programming software technology is crucial for creating flawless tool paths on the high-end machine tools throughout our facility. Some key pieces of equipment include a Hermle C42 five-axis CNC with pallet changer, a Mikron 600U five-axis CNC with pallet changer and a Fidia K199 five-axis CNC. We have been utilizing five-axis machining centers for more than a decade, but with the recent advancements in the technology of these machines, such as speed, superior accuracy, reliable performance and superior surface finishes, we have been able to push the limits of what they are capable of. An example of this is a cavity block we recently cut with numerous intricate details including threads. This was a duplicate job for us. The first time we manufactured it a few years back, we machined the cavity, made electrodes, burned the details in the sinker EDM and polished it. This time we machined 100 percent of the details in our Hermle, and the finish was so superior, it didn’t require any hand polishing. It reduced our machining time by more than half versus what it took to manufacture the cavity block the first time. This capability has helped tremendously with efficiency as well as quality and has been instrumental in keeping us ahead of the competition.
We currently use Autodesk PowerMill and PowerShape, Mastercam and Esprit CAM software. We are continuously seeking out new tooling and software to help us improve. For example, using high-end cutting tools and shrink-fit toolholders to minimize runout — the latter of which we have used for well over a decade. Recently, we have also been utilizing hydraulic slim-line holders for applications where vibration may be a problem. But even more than that, I feel that “thinking outside of the box” has been instrumental in Omega Tool’s current success. Something we say quite often around the shop is that our mold components should look and function like they came out of a catalog as a standardized component. Nothing leaves scratched. Every component has machined chamfers. We do very little hand work, if any, on our tooling. You’ll rarely see hand grinders or pencil grinders in our shop. If you need those, it just means you didn’t machine or design something correctly.
Looking more closely at Omega Tool’s focus on quality and accuracy, how does the company go about evaluating and purchasing its high-performance equipment?
Weber: With customer lead times being dramatically shortened, Omega Tool has sought out the most sophisticated machine tools available. From automated five-axis milling machines to robotic EDM burning, we continue to push the envelope of what true precision, unattended machining is.
For example, the process of purchasing our first trunnion five-axis machine took a little more than a year. When a company our size spends in excess of one million dollars on a single machine, it can be very nerve racking. We wanted to make sure we were making the right choice for what we had envisioned. We visited six of the world’s leading machine tool manufacturers. We spent countless hours, days and weeks on this project and even developed a test cut that would really push the machines to their limits. We made the programs and each manufacturer had to run our program with our tooling. We then critiqued each machine’s performance based on three categories. Accuracy was the most important. Surface finish was second, and time was third. Some of these machines were holding a tolerance of a few tenths of an inch over a six-hour cut where the machine was moving simultaneously in all five axes.
What does true precision, unattended machining look like at Omega Tool?
Randy Meissner, plant manager: We don’t currently have a second shift. We always say we have one very creative first shift. Years ago, we started out just trying to keep a standard three-axis machine running for an hour after we left the building. Now we can run our five-axis machines through an entire weekend using automation to change pallets and run multiple jobs.
We invest heavily in automation. As mentioned earlier, both our Hermle and Mikron five-axis CNC machines have pallet changers. Our latest sinker EDM cell consists of a Mitsubishi EA12V and EA28V. We have the capability to change electrodes and workpiece pallets. They are all equipped with touch probes and laser tool setters as well as kinematics verification programs to keep everything precise.
Omega Tool has an advanced inspection department. How has this helped you to deliver the precision molds you build?
Weber: Omega Tool’s quality relies heavily on detailed inspection. We have a temperature-controlled inspection department where all our mold components and electrodes are verified and documented for accuracy. This is done with a Brown and Sharpe coordinate measuring machine and is a vital step in ensuring consistent accuracy.
Related Content
Tips for Tackling Mold Design, Machining, Cutting Tool and Wear Challenges
Tips for tasks ranging from reducing risk in part design and taking advantage of five-axis machining to refining cutting tool performance and reducing wear with guiding and centering systems.
Read MoreThree Good Reasons to Switch from Three- to Five-Axis Machining in Moldmaking
Five-axis machining technology is a great tool in the moldmaker toolbox.
Read MoreCAM Code Is Key to Precision Mold Machining
The intuitiveness of Mastercam’s CAD/CAM interface streamlines training and advanced programming for intricate fishing tackle products from Venom Outdoors.
Read MoreHow to Analyze and Optimize Cutting Conditions to Reduce Cycle Time
Plastic injection mold design and manufacturing company puts NC program optimization software module to the test. The results were surprising.
Read MoreRead Next
Are You a Moldmaker Considering 3D Printing? Consider the 3D Printing Workshop at NPE2024
Presentations will cover 3D printing for mold tooling, material innovation, product development, bridge production and full-scale, high-volume additive manufacturing.
Read MoreReasons to Use Fiber Lasers for Mold Cleaning
Fiber lasers offer a simplicity, speed, control and portability, minimizing mold cleaning risks.
Read MoreHow to Use Strategic Planning Tools, Data to Manage the Human Side of Business
Q&A with Marion Wells, MMT EAB member and founder of Human Asset Management.
Read More
