Six Best Practices for Mold Design
A few key mold design strategies can go a long way in improving your mold building operations and customer support.
The success of a mold manufacturer boils down to its ability to deliver high quality products at the shortest possible time and the lowest possible cost. Following are some mold design best practices that will help you achieve these goals.
1. Think Process Not Features
All too often, companies invest in a new technology just to find out that their new “toy” merely moved their production bottlenecks from one stage of the process to another. To really make a difference in business outcomes, companies must first establish a streamlined process that covers all deliverables and milestones— from the initial price quotation to the finished product. Inputs and outputs for each step in the process need to be clearly identified, along with quality expectations and the value added to the finished product. Once the entire process has been laid out, specific technologies and methods can be considered based on their impact on the process outcome, not the latest bells and whistles.
"The design process is 30 to 40 percent faster than it used to be and as much as two to three times faster on some molds. The flow from design to manufacturing is much smoother, shortening our delivery dates, making us more efficient and improving quality. I know it has impacted our bottom line. We can take on more business, because we are not spending as much time in design,” says Kent Smith, President of Diamond Tool & Engineering (Bertha, MN and Englewood, OH).
2. It All Starts with the Quote
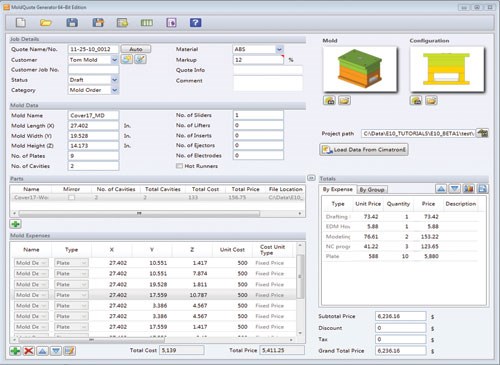
Quoting is the lifeline of the business. It is also the first time the part data is being handled at the shop. Incorporating common design standards and strategies into the quoting process—for example, material shrinkage parameters, part rotation and tip positions, and what standard components are going to be used¬—will ensure the quote reflects how design and engineering will approach the job.
“The person performing tooling quotations at EIMO is an experienced designer of 20 years. When we receive an RFQ, we evaluate the data and look for anything that will cause problems with the tool manufacturing or could lead to cosmetic problems with the part, so we can provide immediate feedback to the customer,” shares Rob Stewart, business development at the Tooling Technology Centre for EIMO Americas (Vicksburg, MI).
3. 3-D or Bust
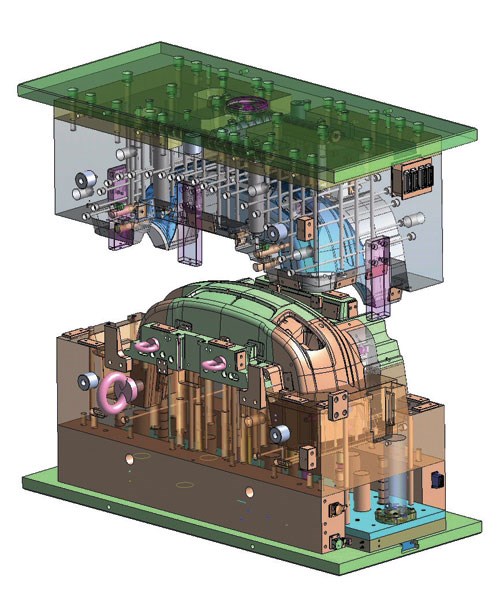
Using 3-D solids design makes it substantially easier to achieve standardization and synchronization across design and manufacturing, resulting in fewer errors, speeding up delivery, and obtaining more reliable results. Working in 3-D solids enables many of the manufacturing issues to be identified upfront, allowing the designer to detect potential collisions, verify correct shrink values and determine whether parting surfaces are manufacturable. With 3-D, a fully detailed and consistent model is maintained throughout the design and manufacturing processes, so changes can be quickly and reliably incorporated from design to manufacturing and assembly.
“Nobody wants to look at a 2-D model anymore. The people on the shop floor want to see exactly what they’re building, and the customers want to see exactly what they’re getting. Some of the very large and extremely complex molds we make today have more than 800 components and can weigh over 40 tons. We probably couldn’t even handle these types of jobs in a 2-D environment,” explains Doug Draca, Lead Design Engineer for Proper Tooling (Warren, MI).
4. Concurrent Engineering
Concurrent engineering can drastically shorten mold design time, as multiple design tasks can be performed simultaneously. For example, one designer may work on the cavity side while another works on the core side or one designer can finalize ejection while another designs the manifold and hot drops or one designer is finishing waterlines while another begins pulling electrodes. Manufacturing and assembly work can start while the design details are still being worked out, further compressing product delivery times.
“Since there is no need for translation between design and manufacturing, changes in design are automatically updated and toolpaths are flagged to show any changes. Machine operators can view the toolpaths and clearly understand the production process, eliminating the need for excessive documentation. In the assembly area, toolmakers can access the data online to do preliminary checks and verify dimensions, saving valuable engineering time,” notes Gary Neeley, Project Manager at Moules Industriels (Sherbrooke, QC).
5. Repeatability Not Repetition
Standardization goes a long way towards increasing the quality of work and reducing delivery time and cost. Creating a rich library of mold bases and related components that can be readily reused in new tools will streamline the design process and leave far less room for errors. Standard components and user-defined templates that can be applied with a single click will minimize time spent on repetitive tasks, promoting consistency across jobs and uniformity among designers.
“There are still some unique characteristics to each mold, but if we can get to the point where 60 or 70 percent can be standardized or automated, then we are focusing our time on the high value added for the customer,” says Mike Pavlica, VP of Operations for Omega Plastics (Clinton Twp, MI). “Milling templates allows us to make only minor changes during the machining of a new part, which greatly streamlines the process. Now, we can create a mold in just a day or two,” adds Pete Mathis, moldmaker at Rifton (Rifton, NY).
6. Put Your Design in Motion
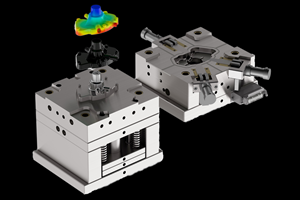
Designing a moving object in a static CAD environment is a challenge that mold designers have grappled with for ages. Nowadays, advanced motion simulation technologies provide designers with the benefits of complete visual representation of mold kinematics and comprehensive collision detection, including automated recognition for mold components like lifters, sliders and ejectors. With a realistic view of the tool in motion built into their CAD environment, designers are able to prevent common errors and improve communication with customers.
Final Words
While these best practices have proven to help other shops, the key to your success is applying the strategies and processes that are right for your business. Remember, these are best practices, not silver bullets!
Related Content
Tips for Tackling Mold Design, Machining, Cutting Tool and Wear Challenges
Tips for tasks ranging from reducing risk in part design and taking advantage of five-axis machining to refining cutting tool performance and reducing wear with guiding and centering systems.
Read MoreHow to Fix Predicted Warpage Before It Happens with Windage and CAD Model Morphing
Applying windage and model-morphing techniques saved toolmaker/molder Sturgis Molded Products the time, cost, headaches of multiple part/mold design iteration loops, cumbersome cooling fixtures, and long molding cycles.
Read MoreThree Good Reasons to Switch from Three- to Five-Axis Machining in Moldmaking
Five-axis machining technology is a great tool in the moldmaker toolbox.
Read MoreFour Micro Tooling Considerations
Issues involving gating, ejection, mold splits and direction of pull are of special concern when it comes to micro tooling.
Read MoreRead Next
Learning the Key to Gaining Control over the Entire Production Process
Optimize your tool shop processes by bringing design in-house.
Read MoreHow to Use Strategic Planning Tools, Data to Manage the Human Side of Business
Q&A with Marion Wells, MMT EAB member and founder of Human Asset Management.
Read MoreHow to Use Continuing Education to Remain Competitive in Moldmaking
Continued training helps moldmakers make tooling decisions and properly use the latest cutting tool to efficiently machine high-quality molds.
Read More

