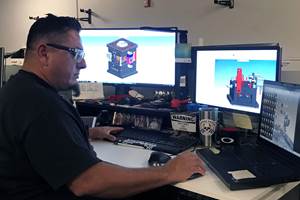
Minimizing Costly Tooling Issues
Properly reviewing a mold design before manufacture can help avoid new tooling issues.
How many times have you come up against issues that are inherent to mold design when trying to resolve a production problem? If the issues are bad enough and the production volumes allow, you make a new mold or modify the existing mold—both of which are expensive solutions. To be proactive and avoid new tooling issues moving forward, the answer is simple: conduct a review of the mold design before cutting the steel.
The mold design review must be properly applied, however. Issues missed in this review often may not be realized until the mold has completed qualification and is in production. Then, weaknesses in the design begin to surface via mold breakages, the need for excessive cleaning or maintenance difficulties. A key aspect of effective mold design review is properly integrating the issues and recommendations identified in the design–for-manufacturing (DFM) and simulation phases, and then ensuring the tool meets the specifications set forth from the review process. In the end, however, a mold’s ultimate performance can only be as good as the part design.
The following sequence is recommended as a best practice for creating a mold design that is an effective manufacturing solution for an injection-molded part.
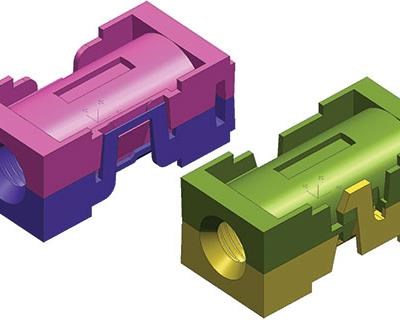
1. Conduct a DFM review of the part design. A DFM review conducted by an experienced tooling and processing engineer ensures that the part design adheres to common plastic part design “rules” and injection molding process constraints. After a DFM review, it is not unusual for a part’s predicted cycle time to be reduced by 50 percent, and for cosmetic appearance and yield to improve.
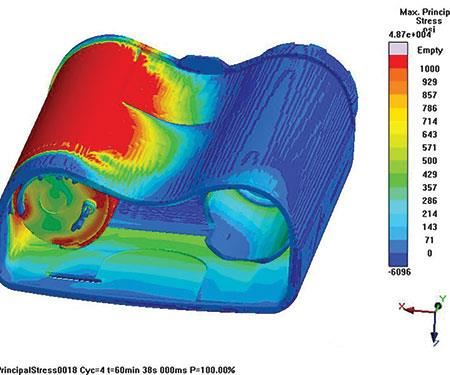
2. Perform a flow simulation. Tooling simulations have become more popular as companies continue to push the envelope with ambitious part designs. A flow study based purely on the component geometry enables designers and engineers to strategize best-case gating locations and runner layouts, and optimized water placements. The needed level of simulation depends on the complexity of the component and the tool. It can range from a fill-pack and warp study to full tool-simulation studies. Hot runner systems are also being incorporated into these types of analyses, as are the cost and performance values of conformal cooling and variotherm technologies.
3. Establish mold specifications that define and communicate to the mold designer all necessary requirements for what the mold will do and how it will function, and that are critical for meeting the buyer’s requirements. The mold design review should be completed based upon this document. The mold specification should also address all of the issues identified in the DFM and simulation reviews. Including the relevant output of those reviews within the exact mold specification is most effective.
This preliminary work can influence material selection and tooling requirements; gate location, size and type; cosmetic constraints; ejection requirements and constraints; venting requirements; warpage-risk prediction, and specific core and cavity temperature-control requirements; cycle-time prediction and basic processing-setting sheets.
Mold Design Review
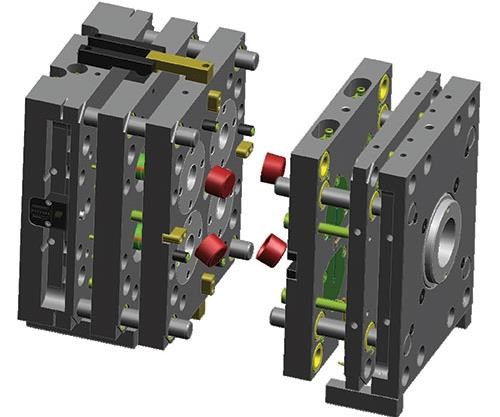
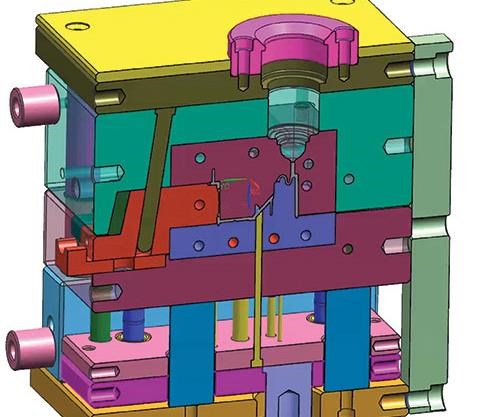
The mold designer then uses the information gathered for him from the previous steps to generate a mold design and submit a tool assembly drawing to the mold buyer for approval. The next step is mold design review, which ensures that the mold will meet specified requirements and comply with proven industry best practices. Despite pressure to complete this step as fast as possible, conducting a poor mold design review is not cost-effective. As the mold progresses through the manufacturing process, the cost of correcting errors climbs rapidly. Instead of rushing, consider each of the following factors during your next mold design review:
Structural integrity. Is the mold appropriately designed to withstand the forces it will encounter in handling and operation? Consider general alignment from pillars and bushings, not just the fixed and moving halves, but also any moving elements. Is the proposed guidance sufficient to ensure proper alignment and long life? Are the bearing elements accessible for mold maintenance? Are proper straps and lifting points for safe handling included in the design?
Mold splitting and alignment control. For many molds, wear at the split lines greatly influences mold life and part quality, so accurate control of the split lines during final closing is crucial. On the main mold halves, alignment locks are an effective way to ensure consistent mold closing. Locks need to follow manufacturers’ recommendations for loading and should be incorporated into the mold to minimize thermal expansion effects.
A good mold design review considers the alignment of all moving cavity-forming sections. Side cores and rising cores must be designed to consistently and accurately locate when the mold is new and as the mold wears. To accurately predict which surfaces will wear and how that wear will impact the moving mold element location, assess how well the element is guided and located in its closed position. It is also important to consider the influence of melt pressure. Too often, a rising core does not make a hard stop and an undercut feature moves in position, depending on the molding conditions. Alignment issues rarely crop up when the mold is new, but, as the cycle count goes up, problems creep in.
Gating/runner system. Ensure that the gating solution implemented in the mold design is consistent with what was used in the simulation. The most common problem that is identified in troubleshooting a mold is that its actual performance does not match what was predicted in the simulation. The first element to check is gate size. It is surprising how often the gating specified in the mold design does not match what was used in simulation. Other factors to consider include the gate scar blemish (again, this should be considered in the DFM phase), and the ejection or separation of the runner system.
Venting. A common approach to venting is “venting equals metal off,” whereby the mold is built and the venting is added after trialing. This is a lost opportunity. Simulation should show where specific venting is required, which should then propel venting to be incorporated at the design stage. Selecting appropriate vent size is based on understanding the smallest gap into which the chosen resin will flash. So, as part of the mold design review, verify that all shut-off faces are vented, that all end of fills are properly vented and that each venting solution can be adequately cleaned. Ideally, vents will be self-cleaning by the actions of the components as the mold operates.
Cooling/temperature control. Local hot or cold spots do not yield a stable processing window for mold optimization. For small, complex tools with rising cores and ejectors, the challenge is to get the cooling close enough to the part-forming surfaces. Many techniques and products are available to facilitate thermal mold management. New technologies enable complex conformal cooling circuits to be added, for example, but care must be taken not to sacrifice channel diameter for the perfect channel location. Oftentimes, a compromise must be made to ensure a sufficient flow rate for removal of the required amount of heat from the tool. A mold design review can identify the presence of cooling, then determine if that cooling is sufficient for keeping the entire mold at an appropriate processing temperature. It also can ensure that the cooling channel locations do not impact the tool’s robustness by intersecting other features.
Another thermal management consideration is differential thermal expansion, whereby different elements of the tool structure expand at different rates as the tool heats up. This can cause bearing wear due to the varying temperatures between a mold’s plates. To ensure proper cooling, it is now possible to simulate the thermal profile of the mold design, and consider all materials and cooling channels to yield a precise prediction of mold temperatures and how they will differ across the core and cavity.
De-molding/ejection. The sequence of mold opening and part removal needs to occur as efficiently as possible. The ejection solution must ensure that no unwanted marks are created on critical surfaces. This should have been identified at the mold specification phase. Any undercut features also need to be cleared as part of the de-molding sequence. The actual mechanisms for de-molding may be driven by mold opening and plate movements and can reduce the risk of damage during production. Alternatively, externally powered actuators operating in a specific sequence need to be carefully controlled to avoid collisions that can cause costly tool damage.
The mold design review must assess each moving mold element for location repeatability, risk of damage during operation and maintainability. It can achieve this assessment by working through the de-molding sequence and ensuring that the undercuts release in the correct order and do not pull the part to one side as the final ejection stroke occurs.
Materials. Typically, mold materials are detailed in the tooling specification. The reviewer of the mold design must ensure that the correct materials have been specified (in proper metallurgical condition from heat-treatment) and that mating materials forming a sliding pair are not the same and/or have different hardness levels.
Finishes/coatings. Any special finishes and coatings should also be defined in the mold specification. Finishes include textures or patterns that will leave an imprint on the molded part’s surface. Coatings reduce wear either at the bearing surface or on the cavity surface. The mold design reviewer must ensure that the specification has been correctly interpreted in the tool.
Each of the aspects of mold design review presented here is essential to ensure that a robust mold will be produced that can support the process capability of the part design and provide long, trouble-free performance.
Related Content
Three Good Reasons to Switch from Three- to Five-Axis Machining in Moldmaking
Five-axis machining technology is a great tool in the moldmaker toolbox.
Read MoreMold Design Review: The Complete Checklist
Gerardo (Jerry) Miranda III, former global tooling manager for Oakley sunglasses, reshares his complete mold design checklist, an essential part of the product time and cost-to-market process.
Read MoreHow to Analyze and Optimize Cutting Conditions to Reduce Cycle Time
Plastic injection mold design and manufacturing company puts NC program optimization software module to the test. The results were surprising.
Read MoreFour Micro Tooling Considerations
Issues involving gating, ejection, mold splits and direction of pull are of special concern when it comes to micro tooling.
Read MoreRead Next
Common Sense Innovation and Moldmaker Collaboration
As I walked the aisles of NPE last month, taking in all the plastics-related technologies and solutions on display, two obvious trends emerged: logical innovation and moldmaker collaboration.
Read MoreThink Big
Simply accessing monitoring data online, in real time, can help you address underperforming tools and build new ones when needed.
Read MoreHow to Use Continuing Education to Remain Competitive in Moldmaking
Continued training helps moldmakers make tooling decisions and properly use the latest cutting tool to efficiently machine high-quality molds.
Read More
