Micromoldmaking: It’s a Small World After All
A great deal of attention needs to be paid to the design and build process—as well as post-moldmaking processes—when making molds for tiny parts.
The mantra for moldmakers today is to diversify and specialize to stay in business. Finding a niche, sticking with it and becoming an expert is a time-proven formula for continued success. A virtually untapped market is micromoldmaking, which is used to produce miniature parts in industries like medical, pharmaceutical and electronics.
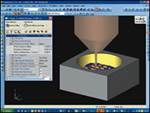
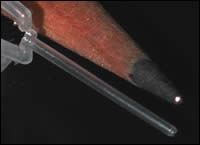
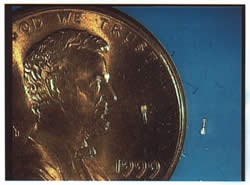
While there are many definitions of how small is small, Dennis Tully, vice president of engineering at Miniature Tool & Die, Inc. (Charlton, MA)—a mold builder specializing in miniature mold building and micro EDM’ing—states that a micro part is a part with features not seen without magnification, wall thicknesses under .010 inch, part weights measured in 1/1000 gram units, and tolerances measured in microns. “Micromoldmaking creates micro parts or parts with micro features,” Tully explains. He notes that these parts are typically produced in special mold frames that have the following features:
- improved registration capability in order to more accurately align the two halves of the mold
- smaller footprints to fit in smaller machines
- smaller water lines
- lighter weight (can mover faster without wear on machines)
- reduced flow path sizes using custom sprue bushings
- tighter tolerances for components
- stack heights held to 1/10,000 inch (2.5 micron)
- better fit tolerances to accommodate up to 40,000 psi injection pressures
- maximum venting to allow injection times under 0.1 seconds
- exact component registration across parting lines
Specialized Tool Design/Build
Miniature Tool & Mold has spent eight years testing, developing and learning to apply technology. Tully notes the company is “very protective” of its intellectual property. “We have used non-conventional processes to create cavities and inserts for micro molds,” he states, “including processes created for use in other industries. We also have worked with outside resources at Universities and R&D facilities to adapt existing technology for use in making cavities and inserts.”
Additionally, the company has worked with existing moldmaking equipment manufacturers to modify their equipment to achieve smaller features, tighter tolerances and better surface finishes.
“A successful micro mold is one that produces a successful micro part,” Tully notes. “You need a solid understanding of micro molding to build a successful micro mold. What has helped us tremendously in our ability to build micro molds is understanding what happens when the molds go into the press to be run. Without feedback from the molding side that would be nearly impossible to do. The mold builder needs to spend as much time as possible with the molder to see what happens when one tries to run these molds.
“We have created several flow standard molds to evaluate for different materials or fillers,” Tully continues. “We need to know how well they flow relative to the mold. There really aren’t any standards available so we created our own. We have a mold that we use to evaluate flow that has the ability to go from 9 thousandths to 2 thousandths thick to mold test coupons. We’ve also created a micro spiral flow that lets us test if the materials flows well. If it flows well we want to know how far it will flow. The more you understand about how a particular material is going to react in a mold, the easier it is to design those molds to work properly the first time out. Most materials suppliers don’t have this information.”
The company also has developed molds for testing material flow at under .010 thicknesses; and the data from the flow testing is used to help predict feasibility of product features when looking at new part designs. “We also spend a great deal of time helping customers refine the design of their parts for micro molding applications,” Tully notes. “There is a lot of passing files back and forth. With today’s technology, a lot of face to face isn’t usually required. We want to get their part in a more manufacturable state before they start. In some cases they can live with the changes we suggest—sometimes they can’t. We ask for as many of them as we can upfront to give the part the best chance it can to be working coming out of the chute.”
Addressing Challenges
There are a plethora of issues that need to be addressed when designing and building micro molds: surface finish, part handling, degating and gaging/inspection.
Surface Finish
Tully points out that a flawless surface finish is vital for the release of parts from the mold. “Many parts are too small for ejector pins to be located (on the part) in the cavity,” Tully explains. “When that is the case, the part must be ejected from the runner and edge gates. It is easy to imagine that the amount of lift from an edge gate is much less than direct ejection from pins, so surface finish has to be superb to allow release.
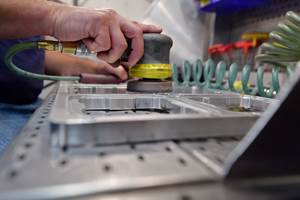
“Also, with small parts, you get less shrinkage,” he continues. “Typically a part shrinks away from a cavity and onto the core—helping to transfer from the cavity side to the ejector side of the mold. With smaller parts you get less shrinkage; therefore, you get less transfer forces, meaning release from the cavity is significantly affected by surface finish.” With a macro part, surface finish of the machined cavity can generally be stoned and polished. But, when a micro part has features under .010 inch (254 microns), it becomes nearly impossible to do hand work to improve the finish.”
Thus, Miniature Tool had to explore alternative methods to improve surface finish capabilities of micro molds—a process that is ongoing. “Find a way to modify the process you’ve been using,” Tully stresses. “Work with your equipment people and over time you can get there. Look at the world of EDM and what the equipment manufacturers are up against. They are mostly concerned with speed and minimizing the amount of time that a piece is in a machine, while we are interested in advances made in the areas of finer detail, tighter tolerances and less power to create better finishes. A few manufacturers are starting to pay attention to that now. In some cases surface finish of the machined cavity features cannot be altered due to loss of dimensional control,” Tully says.
Part Handling
As micro parts and part features get smaller, so do the corresponding cavity details and inserts. Handling of inserts during construction, assembly molding and mold maintenance need to be planned carefully. “Conventional handling during mold construction is not always effective,” Tully states. “Some inserts are too small or too irregular to hold in traditional moldmaking vises, chucks or magnetic holding devices. In many cases, special custom fixtures must be designed and constructed to hold inserts during manufacturing.”
According to Tully, it is not unusual to have to design special devices and mechanisms that allow assembly/disassembly of delicate inserts into and out of a mold. It is important to factor this cost into the process. “It’s an expensive lesson learned,” Tully states. “As you get experience in this area, you will look for it. It is now on our design checklist. We have to make sure we can assemble, disassemble and clean the components. It’s not rocket science, but it does take some time and effort. Some molds have been so complicated that the company has had to produce a DVD to show how to assemble and disassemble a mold to prevent damage.
Tully adds that mold maintenance for a micro mold also can require special care. “Most people would not know how to clean a .0030 inch (70 micron) diameter pin,” he says. “Establishing proven techniques for general cleaning and assembly is essential to keep maintenance costs reasonable over time. At the end of a run, you are going to take the mold down, clean it and inspect it visually. In a macro world that is generally done by the lesser skilled people than moldmakers. In our business, that doesn’t really apply. It is done by the most skilled of our moldmakers to ensure everything happens properly.” The company has established proper methods to do this and created work instructions so that employees can follow them.
Degating
When parts are removed from a mold with an edge gate, that part must eventually be removed from the runner. “Degating fixtures are often designed in the early stage of mold design to ensure the best opportunity for a clean gate disconnect,” Tully explains. “In many cases, the size and shape of the runner are held to very tight tolerances to allow them to be used as fixturing points during degating.”
Gaging/Inspection
“Inspecting the steel dimensions of a micro mold is generally far easier than inspecting the part since steel can be mounted,” Tully notes. “It generally has orthogonal attributes—square edges, some length and something you can hold onto, set up and orient very precisely using standard toolroom equipment so that you can get a look at any particular segment of the piece from almost any orientation. With the steel, you are able to hang onto the body of the part when there’s only a small bit of detail on it you are trying to see. When you get to a small part, it is standing on its own or there aren’t any straight edges on the part. Fixturing a part or holding onto it relative to some datum becomes extremely difficult. In some cases, it’s nearly impossible. What we do in those cases is measure the steel and use the steel measurement as a reference. Then, use a process capability experiment to prove the dimensions don’t change during processing.
“However, there are many features that challenge even the most sophisticated mold shop metrology departments,” Tully continues. “We have used outside resources that allow measurements in the nanometer resolution for the extreme needs. There is a number of emerging inspection technologies that will aid the micro moldmaker in the future. Technologies already in use today are being adapted to the molding industry—one example being the CAT scan. Researchers are working on technology to scan very small plastic parts with enough resolution to inspect them and compare them to a model.”
Learn the Basics
In Tully’s vast experience designing and building micro molds, he has come across a common denominator time and time again. “One company after another has told us the same story. ‘We tried to do this micro mold project with our existing moldmaking vendor and we failed.’ When we analyze the results of all the failed projects, one simple theme has emerged. In every case, the moldmaker has failed to cover the fundamentals needed to produce a successful micro part. They may have done some portions of the project well, but in every failed project they missed at least one fundamental. With micro molds, you can’t afford to miss any details.”
Tully summarizes the fundamentals of micromoldmaking:
- Understand the limitations of material flow for each material being considered. You can’t know too much about the material in making the molds for tiny parts. You really need to understand how this material will act when it comes into the mold.
- Refine the molded part design to accommodate the best material flow, venting, mold insert manufacturing and assembly.
- Design the mold to accommodate the best method of manufacture for its cavity and insert creation.
- Pay close attention to surface finish and draft.
- Design the mold for optimum venting.
- Design the mold to allow ejection and proper degating.
- Plan on making extra components for the inserts that need multiple operations precisely registered to one another. You will most likely have fallout as you learn to deal with critical setups.
- Inspect your components after each step and start over when something is wrong.
- Participate in the mold sampling to gain a better understanding of the molding issues.
In the world of micromoldmaking, attention to minute detail is a must. “We have seen cases where .0002 error made a difference between a good and a bad part,” Tully notes. So, don’t expect to become an expert in this niche overnight. It will take time to develop and perfect the process. For Miniature Tool & Die, the results have been worth the years the company has invested in this specialty. “By focusing our efforts on micromoldmaking,” he concludes, “we have guaranteed our growth over the next several years.”
Related Content
MGS Mfg Group Acquires Danish Product Design Firm Technolution
The partnership is said to create a unique position in the global healthcare value chain, combining MGS’ specialization in precision plastics and tooling with Technolution’s R&D and project management.
Read MoreInnovative Mold Building Enhances Packaging Material Efficiency, Elevates Recyclable Design
A manufacturing-focused design and optimized tooling enhance material efficiency in packaging for a new medical instrument.
Read MoreTriple Threat: How One Shop's Success Resonates Across Three End Markets
When I revisited Eden Tool in New Freedom, PA, this past summer for a follow-up feature on this mold builder’s growth, I underestimated the story.
Read MoreLessons in Quality Assurance for Micro Projects
Quality control, quality assurance and measurement technology are central considerations for micro mold building and molding.
Read MoreRead Next
Opportunities for Mold Shops with Micro Molds and Micro Milling
Learning about the trends and challenges with micro molds and micro milling will help shops maintain their competitive edge.
Read MoreMiniature Tool & Die: Good Things Come in Small Packages
Micro molding and micro EDM'ing help a moldmaker fine-tune its niche and double sales in a year's time.
Read MoreHow to Use Strategic Planning Tools, Data to Manage the Human Side of Business
Q&A with Marion Wells, MMT EAB member and founder of Human Asset Management.
Read More
