Measurement Right on the Shop Floor
Portable, direct computer controlled coordinate measurement can streamline processes and reduce inspection backlog for a better bottom line.
As technology progresses and more mold shops are using 3D CAD models for their designs, highly accurate 3D measurement tools have become increasingly necessary for inspection, both during mold design and manufacturing. And, just as the technology related to the design and manufacture of molds has progressed, so, too, has technology related to quality, measurement and inspection tools.
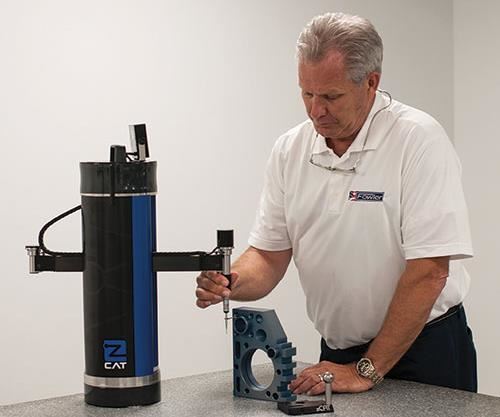
One such technology advancement is in the size of such tools. The availability of compact, portable direct computer control coordinate measuring machines (DCC CMMs) means designers and manufacturers can now bring automated, accurate, repeatable 3D measurement directly to the engineering room or shop floor. Previously, this measurement could only be completed in a dedicated area or with a less-accurate piece of equipment.
So, what do mold builders need to look for in a portable DCC CMM in order to maximize their investment and reap the most benefits? Following are four attributes of a portable DCC CMM that, when applied correctly, can streamline processes and produce less waste, ensuring a better bottom line:
1. Speed and accuracy. Time savings equal cost savings, regardless of the industry. The ability to quickly and accurately inspect a mold at any time during the design or production processes can help an operator identify defects or signs of wear before too much waste is produced or production is impacted significantly.
DCC technology in a portable CMM allows the device to take over and conduct automatic measurements instead of the operator having to perform repeated manual inspections. This technology can reduce typical error that can accompany handheld measurement tools or other manual measurement processes, including varying measurements from one measurement to the next, or from one operator to the next.
While accuracies on the shop floor or in the manufacturing environment are highly dependent on climate (temperature) and conditions (vibration or moisture), portable DCC CMMs have been tested in laboratory environments to perform at diametral (round-part) accuracies of 3.0+ (D/100 mm) and linear accuracies of 5.0+ (L/100 mm)—an average of three to five times higher accuracies than manual, portable articulated-arm CMMs. Conventional CMMs have higher accuracies than portable ones, but they also come at a higher price tag, and require a dedicated space and often a dedicated employee to perform inspections.
DCC technology also allows for repeatable measurements at speeds ranging to 150 millimeters per second (mmps), which means inspections happen more quickly compared with manual methods. In addition, with 360-degree rotation, parts can be nested around the entire perimeter of the device for efficient and repeatable group inspections.
2. Ease of use. Aside from speed and accuracy, another important feature of measuring equipment that ultimately helps with the moldmaker’s bottom line is ease of use. A portable DCC CMM is manufactured as a compact, self-contained unit, making it fundamentally different from conventional CMM technology, design and operation, as operators can take measurements and run 3D programs with substantially less training.
For example, the programming process with a portable DCC CMM is done by first teaching the device the program to be written through manual inspection. The device then “learns” the measurement program from that inspection and can take over in its automated, or DCC, mode at repeatable speeds and accuracies. In fact, with touchscreen, icon-driven operation similar to a smartphone, operators with a very basic understanding of geometry can write complex 3D programs within a couple of hours. Not only is program development simplified so that more employees can be trained on the device, but once a program is written, anyone can conduct inspections at the same accuracy, speed and repeatability, eliminating measurement differences attributable to differing users.
The reduced time on training alone can translate into significant cost savings. Full training for a portable DCC CMM requires no more than a day or two on-site, compared with off-site training costs, travel fees and other expenses associated with other sophisticated metrology devices.
CMMs often have their own proprietary software that requires updates and licensing fees, particularly for producing 3D measurements. Therefore, another consideration that can lower training time and further save money is an open architecture software interface that gives moldmakers the ability to continue using their existing, already-familiar metrology software instead of learning a completely new platform.
For companies that do not need to leverage more complex or third-party 3D metrology software, and that also want to conduct common geometric measurements (plane, sphere, angle or cone), built-in geometric measurement software enables them to take advantage of the DCC technology right out of the box, without the need for a secondary computer.
Portable DCC CMMs also have icon-driven screens that enable the user to view measurements. Without this interface, a secondary computer would be required for users to view results and run programs. Portable DCC CMM devices typically also come equipped with an Ethernet cable for data transfers or a WiFi option that supports data transfer in many formats, including Excel spreadsheets.
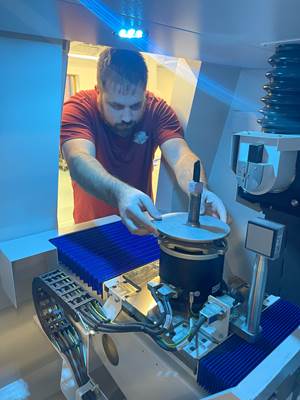
3. Portability and versatility. Undoubtedly one of the most unique benefits of a portable DCC CMM is the portability and versatility it offers. A typical hand tool can only take a single dimensional measurement at a time, while a portable CMM gives operators the flexibility to take 3D measurements directly at the mold. Direct computer controlled 3D measurements can be taken on the shop floor at the point of production, inside a part, outside a part, or even on a conference table or desk. Manufacturers can also measure and inspect for wear anytime for earlier maintenance and less downtime due to failures.
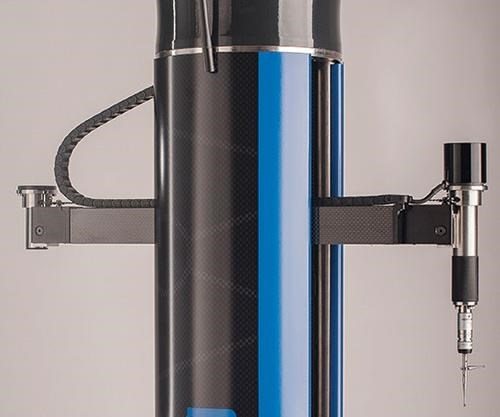
The benefit of the ability to deploy automatic 3D measurement directly on the shop floor cannot be overstated. Rotary motion as the primary axis allows for a smaller footprint than a conventional CMM. This type of motion allows the measuring device to turn around in a circle while the part under inspection sits outside it. Many conventional CMMs move rectilinearly (in a straight line) and use air bearings to provide precision movement while the part being measured sits inside the machine. A compact, self-contained unit, particularly if it is lightweight and battery-operated, has few restrictions on where it can move. Taking automated measurements directly to the part saves time and money.
In addition, the weight and height of a portable DCC CMM (typically less than 30 pounds and 24.4 inches (620 mm) tall) means these devices can be shipped directly back to the manufacturer for service instead of requiring an in-house service call.
4. Total cost of ownership. Other considerations that contribute to a better bottom line for the moldmaker and the device’s total cost of ownership are initial equipment price, upgrade costs and licensing fees. Because of its size and all-in-one design, a portable device tends to be on the low end of the cost range for DCC CMMs, making it attractive to users who have tighter tolerance requirements than manual inspection can provide and a need to conduct portable measurements. The value of free hardware or software upgrades, and no licensing fees also should not be underestimated.
Additionally, because, as stated earlier, a portable DCC CMM is designed to be ready to use directly out of the box, all of the equipment, including the probe and built-in software, are installed ready for use without requiring lengthy calibrations. Together, calibration setup and training time on a conventional, non-portable CMM can take eight weeks or longer before it is up and running.
Time is money in today’s world, and portable DCC CMMs may help moldmakers meet their inspection needs while saving both. For high-throughput shops, or any application that requires repeatability and flexibility, the faster and more accurately parts can be measured, the better.
Related Content
Precision Meets Innovation at IMTS 2024
After attending IMTS, it's clear that the integration of advanced technologies is ready to enhance precision, efficiency and automation in mold manufacturing processes. It’s a massive event, so here’s a glimpse of what the MMT team experienced firsthand.
Read MoreBreaking Down 3D Scanning in Moldmaking
Identifying 3D scanning requirements and implementing the appropriate technology.
Read MoreUsing CT Scanning to Qualify Molds Faster
Software and hardware advances reduce dimensional inspection with part-to-CAD by 70%.
Read MoreFour Micro Tooling Considerations
Issues involving gating, ejection, mold splits and direction of pull are of special concern when it comes to micro tooling.
Read MoreRead Next
How to Use Continuing Education to Remain Competitive in Moldmaking
Continued training helps moldmakers make tooling decisions and properly use the latest cutting tool to efficiently machine high-quality molds.
Read MoreReasons to Use Fiber Lasers for Mold Cleaning
Fiber lasers offer a simplicity, speed, control and portability, minimizing mold cleaning risks.
Read MoreHow to Use Strategic Planning Tools, Data to Manage the Human Side of Business
Q&A with Marion Wells, MMT EAB member and founder of Human Asset Management.
Read More


