Inspection/Measurement Advances Yield Better Molds Faster
A roundtable discussion of the latest trends and developments in mold inspection and measurement technology highlights the cycle time reduction, accuracy improvement and cost decrease benefits.
Advancements in inspection and measurement technologies are focused on helping moldmakers produce the highest quality molds in the shortest timeframes—which involves gathering accurate surface data through a number of methods. Reducing cycle times and rejection rates while improving accuracy are areas that manufacturers, suppliers and service providers continue to address as they introduce the latest in products, equipment and offerings.
Several leading inspection/measurement suppliers discuss common inquiries they field as well as reveal the newest packages, products and services on the market.
Challenges
Over at Renishaw Inc. (Hoffman Estates, IL)—a company that specializes in measurement, motion control and spectroscopy technologies—questions relate to reducing cycle times and accuracy, notes Jeff Seliga, Manager of Marketing Services. “A common question is, ‘We've shifted to five-axis machining to reduce cycle times for chip cutting, but our CMM inspection times have not been similarly shortened. We often hit a bottleneck there. What are our alternatives to correct this?’” Secondly, Seliga points out that Renishaw’s customers want to know what they can do to improve the speed and accuracy of on-machine probing once they have upgraded to five-axis machine tools.
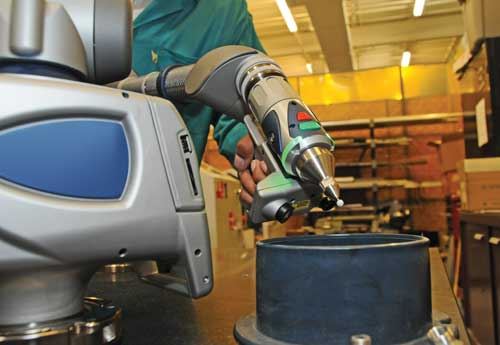
Greg Richards, Supervisor, Public Relations and Events at FARO Technologies, Inc. (Lake Mary, FL)—a producer of computer-aided coordinate measurement and imaging devices and software—notes that the company’s most common questions relate to how moldmakers can improve efficiency and lower their costs by reducing rework time and expediting measurement functions. “To that end, our customers want to know how they can reduce waste through better measurement; techniques to enable users to measure better, faster and more accurately; and why precise measurement is so important to reducing cost,” he says.
According to David Olson, Director of Sales & Marketing for Anaheim, CA-based Verisurf Software, Inc.—a metrology software development company that delivers computer-aided inspection and manufacturing solutions—fields questions like the following:
• How can we speed up the inspection and buy-off of our molds?
• How can we reduce or eliminate paper drawings?
• How can we speed up profile inspection?
• What are the pros and cons of non-contact inspection?
• Where can we find skilled inspectors?
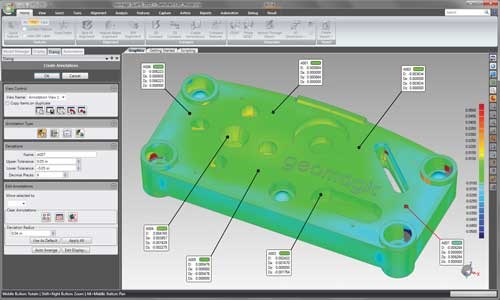
At Geomagic (Morrisville, NC)—a provider of 3D technology through 3D digital reality, touch-enabled design and product verification—Senior Sales Manager Nick Chwalek points out that moldmakers want to reduce reject rates and still get the products manufactured faster. “The main mission is to avoid warpage, twist, voids and other errors in a production part, and we are always asked questions about how to identify specific part areas that are out of spec,” he says.
Kamal Khan, also a Senior Sales Manager at Geomagic, adds that often moldmakers want to be able to measure a mold, measure a resulting part, and then compare all that to the engineering CAD data. “As per usual in manufacturing, it is never quite that simple,” he notes. “CAD data never matches the tool because the tool is designed to compensate for material shrinkage and warpage in order to match the desired output. Moldmakers are constantly asking about go/no-go scenarios, how to achieve lower reject rates, and how to identify potential defects like weld area problems and air trap issues.”
Other questions customers approach Geomagic with include how to identify when tool wear or damage may require replacement rather than repairs, and often how that can be done when original CAD drawings may not exist.
According to Peter Dickin, International Marketing Manager for Delcam (Birmingham, UK)—a
supplier of CAD/CAM solutions for the manufacturing industry, including inspection software—developments that shorten delivery times are something that every shop in manufacturing asks about. “However, due to the complexity and size of the parts that moldmakers usually have to deal with, especially in the automotive industry, quality and safety is a major priority,” he notes. “Delivery of a part fast is nothing if it is not correct.”
Dennis Morical, CMM Sales Engineer at Mitutoyo America Corporation (Aurora, IL)—a provider of precision measuring tools, instruments and equipment—notes the company is approached with both software and hardware related questions. Software-related questions are: What CAD formats will your software work with? Will you software work with solid models? Can you create graphic reports from your software? Can your software measure exact points that are placed on the model by our customer? Can you reverse engineer a mold with your system?
Hardware-related questions include: Will highly reflective surfaces cause issues? Does your software create a surface from the point cloud? How long does it take to scan a mold with your laser scanner? What is the standoff distance required for the laser scanner? What file format will your software output the data in?
Jesse Garant, President JG&A Metrology Center (Windsor, ON)—a provider of industrial CT scanning services, adds that the number one question he gets asked is, “How quickly can you get me the part-to-print results?”
Advancements
FARO’s Richards notes that he expects advancements in non-contact measurement/laser measurement technologies to continue to evolve. “While very accurate, most laser scanning solutions fall just short of the accuracies achieved by their hard probing counterparts,” he elaborates. “But, because they are easy to use, accurate enough for the majority of moldmaking applications and can capture point cloud data of very contoured molds, laser scanners have become the preferred method of measurement for manufacturers.
“To that end, we expect the blurring of lines between contact and non-contact measurement to continue,” Richards continues. “We also expect the accuracy of laser scanning solutions to improve to where, someday, there may be no difference between contact and non-contact measurement accuracy.”
Richards points out a developing trend toward more portable, easier to use and more robust 3D measurement technologies. “FARO continues to develop 3D measurement solutions that allow our customers to improve the quality of their products, reduce work time and lower cost,” he states. “Our focus is on improving the portability of our products, the ease with which they can be implemented and the accuracy at which they measure. Our customers continue to demand tighter tolerances in their work, so we must continue to meet that demand and develop solutions that not only exceed those tolerances, but can be implemented in a variety of environments and situations.”
Morical of Mitutoyo also predicts laser technology will continue to advance, “Laser technology will come closer to the accuracy of tactile measurement on a CMM, and laser-based technology will make progress in the surface reflectivity area.”
At JG&A Metrology Center, Garant believes this next year will see many more moldmakers who handle highly complex geometrical parts on a regular basis turn to Industrial Computed Tomography (CT) technology to conduct their part-to-print projects. “The cost of performing such projects is dramatically reduced when outsourced to industrial CT scanning service providers, especially projects that involve multiple identical cavities,” he states. “I guess you can say that the advancement is in the use of Industrial CT technology by moldmakers themselves.”
Industrial CT has shown to help moldmakers based on three determining factors, Garant maintains—accuracy, repeatability and savings (both in terms of time and cost) when it comes to highly complex part to print projects, which require numerous Geometric Dimensioning and Tolerances (GD&T) points inspected. “What moldmakers want most is a successful transition from part-to-print request to a part-to-print report,” he notes. “That is why you will see more and more of a transition of these types of projects fall onto Industrial CT scanning service providers.”
To that end, the company has just developed a technology that scans a 22-inch diameter with accuracy of 10 microns, which Garant points out is a larger scanning envelope for PPAP and part-to-print requirements.
Accuracy is also a trend seen at Geomagic. Chwalek believes that production within tolerances is regarded by many as one of the most significant influences on product cost. “Checking tools and first-article parts for adherence to tolerances is driving greater functionality in 3D inspection tools, enabling much more integrated workflows,” he elaborates. “For example, our inspection software can intuitively change the design data after scanning a production part or tool in order to leverage conformity to those set tolerances.”
Automation of inspection processes is also a key area of demand for manufacturers over the next few years, Geomagic’s Khan adds. “This rise in demand for automation specific to a manufacturer’s needs has been growing over the last two years,” he affirms. “It has been driven by the need to improve repeatability and reproducibility variances, and to drive productivity to new levels. This is being made more feasible by the consistent reduction in price of scanners, but also the ability to more closely link inspection software with control software and the scanners themselves.
Like Garant, Chwalek cites the importance of repeatability to the inspection/measurement process. “For this to be successful, the inspection software being used has to be able to consistently repeat tasks and produce correct results without intervention,” he notes. “Flexible scripting tools and a robust inspection toolset are the foundational elements. Automated and easily customizable reporting is a must—as support for industry-standard dimensioning tools.”
The company’s latest release of 3D metrology and inspection software has been enhanced to enable much more intuitive measurement using industry-standard GD&T, Chwalek says. “In addition, the tools that actively measure and identify out-of-tolerance conditions have been combined with expanded automation tools to allow intuitive editing of the design data so that output matches tolerance definitions,” he explains.
Additionally, the company’s newest automation platform enables the rich toolset of its software to be accessed by Python scripting (tools and macro commands, Khan continues. “The power of Python scripting means that users—even those with very little programming knowledge—can achieve very close integration and build-out of customized, automated workflows,” he says. “Geomagic is ensuring that customers have access to a growing array of scripts that can be accessed by everybody and applied to specific purposes. In addition, a growing team of third-party automation specialists is being formed to assist manufacturers in automation tasks.”
Verisurf’s Olson also weighs in on software developments. “Moldmakers are adding 3D computer-aided inspection technology to speed their processes and provide detailed quality reports to their customers,” he notes, “including portable and wireless CMMs for inspecting mold bases while they are still in the machining center and online training technology to improve skilled worker knowledge.” He adds the company is currently developing rapid profile inspection technology for moldmakers, new 3D scanner support and Statistical Process Control (SPC) database integration.
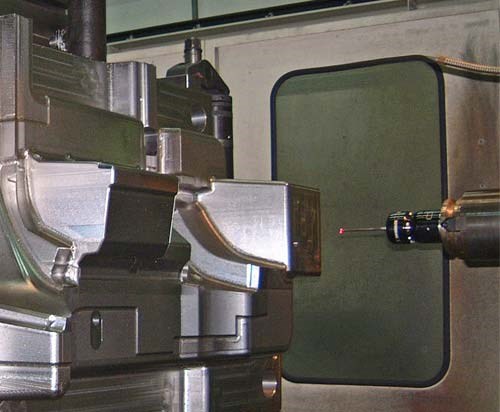
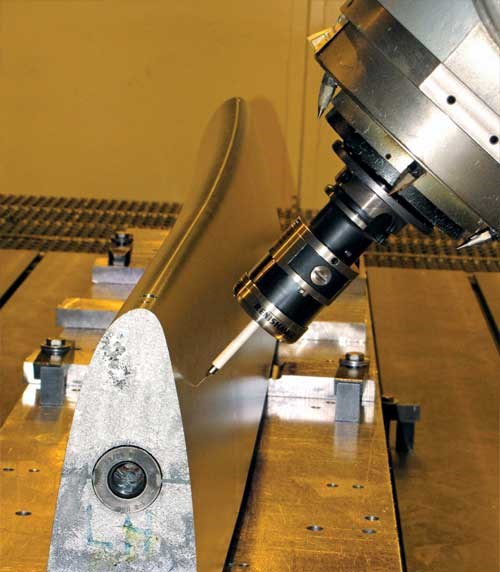
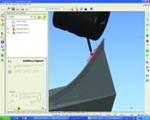
Another inspection/measurement software advancement is on-machine verification (OMV), notes Delcam’s Dickin. “OMV allows initial checking of machined parts to be carried out on any CNC machine tool rather than having to transfer them to coordinate measuring machines for inspection,” he explains. “Most modern machine tools either come with, or can be retrofitted with, probing capabilities to assist in the set-up of the job. With OMV, this same equipment can now be used for verification. The main advantage is that any mistakes are discovered where they can be corrected—on the machine tool.”
The most obvious benefit of OMV, Dickin continues, is for those companies that do not have existing inspection capabilities, like companies that machine parts so large that the cost of dedicated facilities is prohibitive. “However, companies with independent inspection facilities can also save time with OMV, especially those that produce large parts or tooling,” he states. “Repeated cycles of machining and inspection—interspersed with long set-up times on the respective pieces of equipment—are avoided, meaning that overall manufacturing times can be reduced. This can be particularly valuable in cases where every part in a production run needs to be checked.”
Another OMV advantage is the improvement of quality control by enabling components to be monitored more frequently during the manufacturing process. “This will allow any errors to be detected earlier, and so corrected more quickly and at lower cost,” Dickin comments. “For example, it will be possible to check that the correct amount of stock has been left on the component after a roughing operation, rather than having to wait until all machining operations have been completed before discovering that an error has been made. Similarly, the extent of any damage caused—for example—by a tool breakage, can be assessed accurately and a decision made immediately to determine whether the part can still be completed within tolerance or whether it will have to be scrapped.”
The OMV version of Delcam’s inspection software offers all of the advantages associated with the releases of the software for use on dedicated inspection equipment,” Dickin adds. “It gives both quick and easy comparison of tooling and sample components against CAD data, and produces clear, comprehensive reports that can be understood by everyone involved in the product development process, not just inspection specialists,” he elaborates. “The system allows off-line programming of the inspection sequence for the machine tool, with fully-integrated simulation, and so minimizes the time taken on the machine for the verification operation.”
Additionally, a new module is available for the latest version of the software that allows it to create efficient inspection sequences for use on dual-column CNC CMMs, Dickin adds. “The combination of a dual-column CMM and this software enables inspection times to be reduced by allowing the simultaneous measurement of different features on larger parts,” he states. “A common application is automotive body-in-white inspection, where the evaluation of a large, complex and relatively symmetrical assembly requires both intricate measurements on each side combined with an assessment of the structure as a whole. Using this new module gives the ability to measure parts on these devices in a single coordinate system without repositioning.”
Seliga of Renishaw believes that additive metal manufacturing is likely to affect moldmaking metrology by creating fully dense metal parts directly from a CAD model, thereby reducing metal cutting (subtractive manufacturing) and the variables that necessitate constant checks of workpieces, tools and finished parts. He notes the company has introduced two additive metal systems that can process cobalt-chrome, aluminum and titanium, to name a few. “The ability to produce quick-turn mold tooling with these systems gives part designers a fast and comparatively inexpensive way to iterate and refine concepts for better parts and molds, with minimal machining time,” he states. [Ed. Note: click here for a related article.]
Specific company developments focus on increasing the capabilities of Renishaw’s five-axis measurement system—namely surface finish measurement. “Our new probe option for our five-axis measurement system is the first to allow surface finish inspection to be fully integrated within coordinate measurement routines,” he comments. “With a measurement capability of 6.3 to 0.05 Ra, this probe makes the CMM a ‘single platform’ metrology system. It eliminates the need for hand-held surface measurement devices or transporting parts to a dedicated surface measuring machine—thus reducing labor costs and inspection leadtimes. The system allows automated switching between dimensional measurement and surface finish measurement, with the analysis contained in a single report.”
Seliga concludes, “Manufacturers face increasing pressure to improve the performance and cost-effectiveness of their products. There is a focus on achieving ever tighter tolerances on complex parts through a controlled manufacturing process, which eliminates manual intervention in finishing. In order to produce consistently smooth blended surfaces, accurate, high-density surface data is being required more frequently throughout the machining, gauging and verification stages. By adopting advanced measurement/inspection technologies developed for the CMM market, new measurement technologies for use in the machining environment are quickly emerging to make an automated metrology-enabled manufacturing approach more viable.”
Implement some of the aforementioned inspection/measurement technologies into your mold manufacturing process and reap the benefits—improved accuracy, lower costs and better quality molds.
Related Content
Breaking Down 3D Scanning in Moldmaking
Identifying 3D scanning requirements and implementing the appropriate technology.
Read More7 Measurement Innovations Transforming Moldmaking
Smart sensors and sophisticated process and measurement data management are driving intelligent moldmaking to new heights.
Read MoreUsing CT Scanning to Qualify Molds Faster
Software and hardware advances reduce dimensional inspection with part-to-CAD by 70%.
Read MoreSoftware Strategy for Automated Mold Inspection
Consider inspection software with a CAD/CAM platform that supports model-based definition, works with all CAD files, and drives all fixed and portable CMMs.
Read MoreRead Next
Five-Axis Inspection for Moldmakers
Does five-axis inspection offer similar benefits in speed and accuracy for moldmaking operations?
Read MoreHow to Use Strategic Planning Tools, Data to Manage the Human Side of Business
Q&A with Marion Wells, MMT EAB member and founder of Human Asset Management.
Read MoreHow to Use Continuing Education to Remain Competitive in Moldmaking
Continued training helps moldmakers make tooling decisions and properly use the latest cutting tool to efficiently machine high-quality molds.
Read More
