Initial Pellet Contact is the Screw
Here’s what every moldmaker should know about an injection molding machine’s reciprocating screw, which is often misunderstood and applied to the process incorrectly.
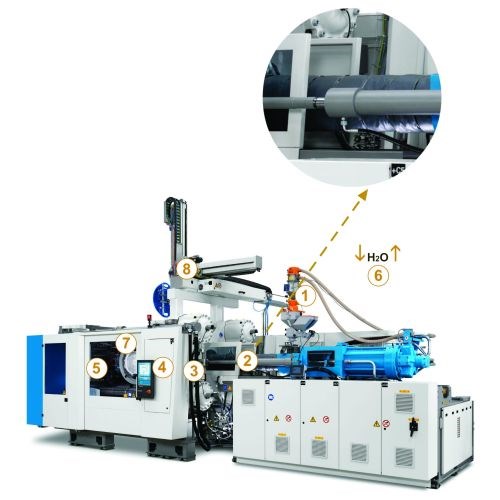
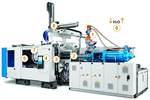
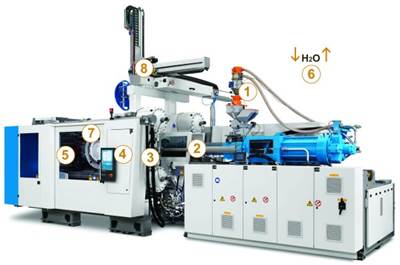
This article will review (2) the screw part of melt delivery system. Image courtesy of KraussMaffei.
You may be thinking “Why should I learn about the screw and its role in the injection molding process? I’m building the mold, not running the parts!” Well, let’s consider the following: Have you ever changed steel per your customer’s (the molder’s) request only to change it back again? Have you chased flash that came and went, even though your mold was spotted in so nicely? Have you experienced unexplained, inconsistent part dimensions driven by unexpected molded-shrink rates? You then check the mold steel and calculate shrink to find everything is correct, but you mold a part that is still out of specification? If you answered yes to even one of these questions, there is the possibility the wrong screw was used, or it was used incorrectly for your application.
In the complex injection molding process, the reciprocating screw is only one element to consider when you are performing application engineering or root cause analysis, but understanding screw terminology and application fundamentals will prevent molding issues, providing predictable performance and a reliable process.
Screw Fundamentals
In the screw assembly part of the injection molding system, the plastic pellets are transformed from a solid state into a fluid (referred to as a non-Newtonian fluid). This transformation occurs as the pellets travel through the three main sections of the screw:
1. The feed section, through which the pellets are introduced into the screw.
2. The transition section, in which the pellets begin to transform from a solid to a fluid. This physical transformation happens as different energy sources are applied to the melt at the same time. The resin is then physically compressed as decreasing volume on the screw flights (usually becoming shallower in depth) generates shear energy (friction of one plastic layer sliding on another). When this is combined with energy provided from the barrel heaters, the melt temperature’s thermal condition and consistency can be predictably controlled.
3. The metering section, which is the final stage where the melted resin is orientated and metered to the front of the screw. This melted resin then waits here to be injected into the mold. If contamination or degradation occurs, the molded parts will show inconsistencies.
Screw Options and Common Mistakes
There are a number of screw assemblies, surface coatings, steel types and types of screws available to the injection molder. Figure 1 shows three screw types that are each designed for specific applications and performance. The molder’s process engineering team must first consider part requirements and volumes in selecting the appropriate screw. Molders’ understanding (or lack of understanding) here can dramatically impact a mold’s performance, as well as any root cause analysis and corrective actions.
One simple and common failure among injection molders is sampling a mold in one machine with one type of screw, then moving that mold to another machine with the same or similar tonnage but with a different screw configuration and shot capacity for the second sample or production run, and expecting the same result.
Another common mistake occurs with melt condition. Energy applied to plastic is called thermal conductivity. The rate at which energy is being given up by the plastic is called thermal diffusivity. When energy is applied correctly, the expected melt condition can be achieved, but when it is applied incorrectly, the melt results vary, resulting in an unreliable process.
Skinning, as shown in Figure 2, can result from equipment failure such as burned-out heater bands, incorrect screw design or improperly maintained equipment that allows contaminants to get into the parts. Figure 2 clearly shows resin that degraded before it was introduced into the mold cavity.
Screw inventory versus shot capacity is another area of concern for the injection molder and moldmaker. Knowing the screw’s volumetric area is key to understanding the time it takes for the resin to transition from a solid to a fluid. When selecting a press (or multiple machines) to run samples and production, the injection unit must be sized for the application’s requirements.
The screw type and valve assembly is also critical. The most widely used method for calculating injection unit sizing is the 80-20 rule, which is based on the shot capacity of the machine. An alternative method uses the volumetric area of the screw to calculate residence time and the available resin inventory. This inventory replaces the shot capacity based on the 80-20 rule. You can get the inventory calculation from the screw OEM. The 80-20 rule combined with total shot capacity tells you if you can fill a cavity, but it does not ensure predictable, quality results. Using the volumetric area calculation will help you mold parts with the melt in the predicted state and will yield a much higher degree of repeatability.
All of these considerations for examining the screw’s role in the injection molding process reminds us of Albert Einstein’s definition of insanity: “Insanity: doing the same thing over and over again and expecting different results.” Start thinking about your process differently, and change your results!
FIGURE 1
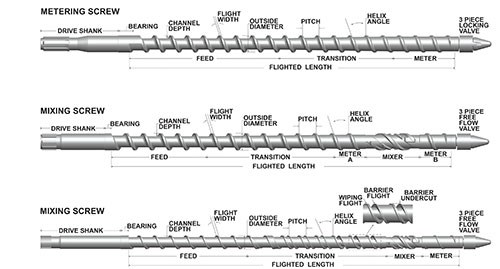
These three screw types all show the three main sections of a screw: feed, transition and metering. Figure courtesy of Reiloy Westland.
FIGURE 2
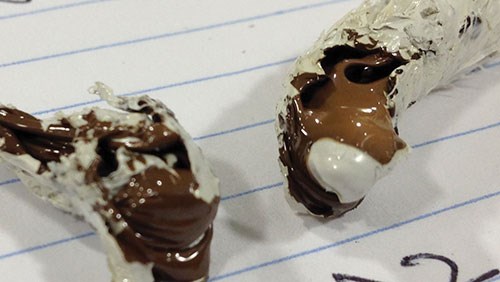
This example of skinning is marked by the degraded “brown” material forming a skin. The plastic was pulled out of a hot runner manifold’s inlet immediately after the screw. Image courtesy of Rich Oles.
Related Content
6 Ways to Optimize High-Feed Milling
High-feed milling can significantly outweigh potential reliability challenges. Consider these six strategies in order to make high-feed milling successful for your business.
Read MoreMaintaining a Wire EDM Machine
To achieve the ultimate capability and level of productivity from your wire EDM on a consistent, repeatable and reliable basis, regular maintenance is a required task.
Read MoreThe Ins and Outs of Hot Runner Temperature Control
A training checklist that explains the why and how of proper hot runner temperature control and system management.
Read MoreRead Next
Plastic Injection Molding Starts with the Pellet
This is the first article in a new series that will examine the injection molding process by breaking down the path a plastic pellet takes as it is transformed from Pellet 2 Part. It covers what every moldmaker should know about raw materials, including the fundamentals of viscosity curves, Melt Flow Index, Melt Flow Rate, shear and more.
Read MoreAre You a Moldmaker Considering 3D Printing? Consider the 3D Printing Workshop at NPE2024
Presentations will cover 3D printing for mold tooling, material innovation, product development, bridge production and full-scale, high-volume additive manufacturing.
Read MoreReasons to Use Fiber Lasers for Mold Cleaning
Fiber lasers offer a simplicity, speed, control and portability, minimizing mold cleaning risks.
Read More
