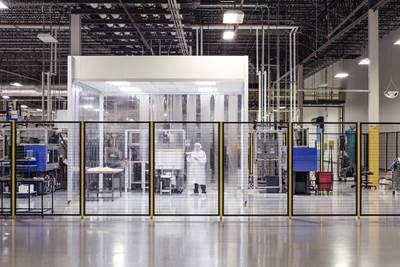
Technology in moldmaking has grown substantially over the years, and so has our knowledge of the full process of Design for Manufacturing (DFM). We’ve realized that it is important not only to consider the detail of designing for efficient molding, but to also consider how tooling, molding and tool maintenance should connect.
At Canon Virginia, DFM and experience running our own tooling in a manufacturing environment have led to our increased focus on design for maintenance. We’ve realized that it is important to consider both factors in the design process, so with this article we introduce you to what we call DFM.
For the molder, DFM maintains robust process windows, improves repeatability and quality and makes tool maintenance easier.
Design for Manufacturing
It’s well known that the most well-established way to reduce costs is to design from the beginning with manufacturing in mind. Manufacturing and assembly costs add up if the design of the part and how it will be manufactured are not carefully considered. With that being said, traditional DFM can easily be substituted with many things today—one being design for moldability. We find ourselves asking questions like:
- How moldable is the part geometry?
- Where are the undercuts?
- How are you going to get the part out of the mold?
- What draft angles are required?
- Where should it be gated?
At Canon Virginia, we have been responsible for designing the part, manufacturing the tool and mass producing that part. Though we may not be involved in each of these processes for every job we take on, that experience gives us the knowledge to consider the comprehensive cost to all parties while designing the tool.
The time it costs to do a proper DFM up front is far less than the cost associated with making corrections later in the process. We’ve all seen that DFM can dramatically change the outcome for all of the parties involved.
For the tool manufacturer, it can improve the ease of machining, simplify the mold and win over the customer by considering the costs downstream. For the molder, it maintains robust process windows, improves repeatability and quality and makes tool maintenance easier. For the end manufacturer, it ensures incoming parts meet specs, reduces assembly processes and enhances product quality. It’s important to understand the outcomes for each of the parties downstream.
For example, we recently had a two-piece assembly that utilized a twist fit. Though it seemed simple in the beginning, it would have complicated the molding and manufacturing downstream. The twisting motion of fitting the part together would have been tricky. The end manufacturer would have to add cost for a human to twist each piece or create an even more expensive automated assembly process.
The better solution was a press fit or snap fit. Though it was slightly more complicated to add an undercut to the design, it offered significant downstream cost savings on assembly. This is just one simple example, but it illustrates the principle well—keep all of the stakeholders in the production process in mind.
Through software that simulates the molding process, we are able to see each tool in action before it goes into production. We are able to predict many things like where the flow lines and sink areas will be, as well as warpage, pressure and flow rates. These predictions are valuable to everyone involved in the process. Not only are you able to fix molding problems before they arise, but you are able to save time on maintenance of the tool.
But that’s not where the process ends. At Canon, we don’t stop with simply assessing part moldability and manufacturability, but incorporate Design for Maintenance considerations into our tool design as well.
Design for Maintenance
Design for Maintenance, at its core, is simply considering the structure and elements of the tool, and designing them to be maintenance-friendly. For many years, I was responsible for a large injection molding operation that included nearly 100 active molds. I became familiar with the Mold Maintenance Department and witnessed the differences between molds that were easy to maintain and those that were not. After those experiences, I have become adamant that ease of maintenance is important to extend tool life and must be considered during the design phase.
The question everyone asks is, “How can you quantify the value and the importance of maintenance?” The quick answer is this: With basic preventive maintenance (PM) systems we have eliminated our internal tool replacement program. Back in the day, like many molders, we budgeted year after year for the replacement of tools after one million cycles. Through innovation and the improvement in Design for Maintenance processes—as well as the advancement of technology—we extended tool life to two million shots, then three million shots and beyond. Now, we expect that our tooling will last until the end of the product’s life.
I compare one million cycles on a mold to 100,000 miles on a vehicle. In the early days, one million cycles or 100,000 miles was a lot, but not anymore.
In the early years, performing PM was often difficult and extremely time consuming. Tools became more and more complex, making it more and more difficult to maintain each one efficiently. Design for Maintenance started making its way into our initial design process at this time. Through the innovation of our design processes, several benefits arose. These included reduced time to do tool maintenance and reduced WIP inventory between the processes. Reviews of each tool and history using gathered data gave us the ability to customize plans and allowed us to make PM faster and safer. It also let us know if we needed to increase maintenance frequency. In the end, we saved a lot of capital investment in tooling.
Here are some Design for Maintenance Tips for your consideration:
TIP 1: Consider the material being used to build a given tool. When choosing this material, first ask the question: What is the expected life of the product? For mold classification purposes, we can say a “Class 101 mold,” but for the investment, just like our vehicles, we want them to last. I compare one million cycles on a mold to 100,000 miles on a vehicle. In the early days, one million cycles or 100,000 miles was a lot, but not anymore. We expect our tool to exceed one million cycles and our vehicle to exceed 100,000 miles; therefore they should be designed accordingly.
Another material question to ask is: What resin are you running and is it abrasive or corrosive? Some materials are harsh and require extremely hard or exotic steels. There is a big difference in tool wear rate on a simple open/shut tool with no action versus a tool that has moving components. When considering those moving parts, material selection is critical. Corrosion can come in the form of water contact, acidic materials and outgassing. Choosing materials that can stand up against these elements is critical for achieving long tool life.
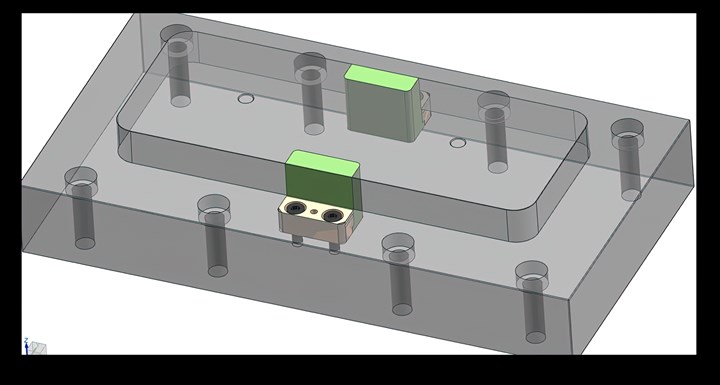
To prevent erosion from outgassing and facilitate mold maintenance, hardened inserts (green) are placed in the final fill areas of the cavity where gas will be trapped.
For example, when controlling volatile gases, consider inserting areas that are subject to erosion. In the image above, I show a soft cavity block with hardened inserts at the final fill area where the gas trap will be. This type of strategy will give you better tool life and will help you keep cost down because the entire cavity block does not need to be hard. Otherwise, you may end up cutting out the worn area and inserting it anyway because of steel erosion over time. If you don’t insert these areas up front, take it into consideration in the design phase and don’t run water channels under areas of concern, so you at least have the option for inserting in the future.
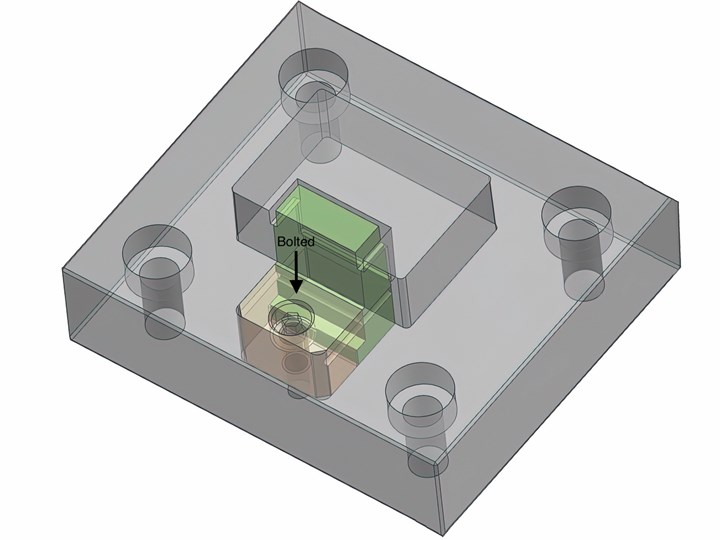
Venting with removable vent dumps allows the vents to be cleaned in the press.
TIP 2: Include front-loading components as much as possible. Disassembling the whole tool is extremely time consuming. For this reason, we attach the fixed components on the parting line side rather than the backside when we can. In the accompanying images, you can see a simple representation of this in action. Cavity blocks bolted from the front; inserts that can be pulled from the front; hot runner gate tips that can be cleaned in the press; angle pins that can easily be removed; and venting with removable vent dumps are all design elements that will reduce the time to do PM.
As time goes on and data is collected, use that data. Every tool is different, and it is important to customize each tool’s preventative maintenance.
TIP 3: Standardization of mold components is a great area to focus on. Components that can be easily standardized include springs, switches, angle pins, angle bushings and shot counters. Keeping the required variety of such parts at a minimum helps the PM shop keep less inventory.
Often, we find ourselves building several molds for the same customer. If you are able to standardize across multiple tooling projects and also use off-the-shelf components, sourcing becomes easier and lead times can be dramatically reduced. In many cases, skilled moldmakers are able to order stock blank components and finish them in-house with the detail needed, whether it be cutting them to length or adding other details.
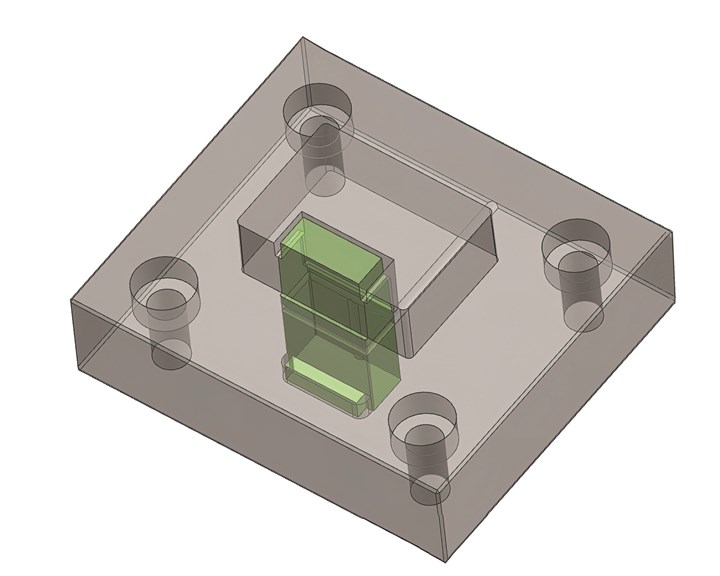
Attaching fixed components on the parting line side rather than the backside eases disassembly. This cavity block is bolted from the front of the tool.
To prevent confusion down the line, assign part numbers that can be configurable to include the detail of the finish work, such as adding the length to the end of the part number. A molder without machining capability has no use for a blank pin. They need a pin to come in ready to use, so including this information on the Bill of Materials (BOM) brings clarity to the molder and saves capital for the moldmaker.
Lastly, try to keep the hot runner system as standard as possible. With most heaters and thermocouples being standard, it is efficient for the only difference in a tooling set to be the valve pin length. Additionally, custom gate tips, pins and bushings are expensive and increase lead times. Though it is not always possible to use standard components, there are benefits to starting with standard components and working from there.
As much as possible, design the tool to be error-proof. For a moment, consider yourself a tool maintenance technician. You don’t wake up and say, “I am going to make a mistake today!”
TIP 4: As much as possible, design the tool to be error-proof. For a moment, consider yourself a tool-maintenance technician. You don’t wake up and say, “I am going to make a mistake today!” You go to work and start on the mold that is scheduled for PM. Everything goes well and later that day you finish up. Little did you know that one out of 50 ejector pins in the tool is rotated 180° out of orientation in the pocket. That pin happens to have molding geometry on it or a sharp angle. Guess what happened when you shut the tool? Damage. The machine is now unable to run and repair is needed for the mold. This kind of thing happens time and time again. We are not perfect.
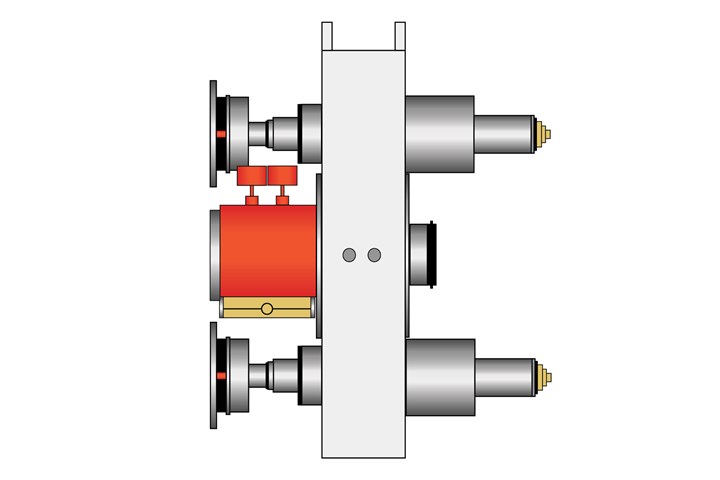
Hot runner gate tips that can be cleaned in the press will ease maintenance.
In the initial design phase, incorporate error proofing wherever it’s possible. As you focus in on the areas that present risk, design with the perspective that the PM technicians know what they are doing, but they are also human. We all make mistakes. Therefore, when a mistake happens, focus on how the mistake was made, rather than what mistake was made. Move toward continuous improvement and efficiency.
Develop a Motivated Culture
At Canon we are constantly evolving and incorporating Design for Maintenance strategies, but we are also passionate about our tool-maintenance systems. Here are some top ways to support a successful tool-maintenance strategy:
1. Get everyone involved on the same page. Making sure everyone on the molding floor is speaking the same language is important to continuous innovation.
2. As time goes on and data is collected, use that data. Every tool is different, and it is important to customize each tool’s PM. Some tools need more care than others.
3. Develop a scheduled maintenance plan based on the number of shots or time duration. Knowing when to execute the work will help you have less disruptive and more timely maintenance.
4. Make sure training includes how to detect defects and areas that could lead to future failures, as well as how to use data effectively.
In order to be truly successful, there needs to be collaboration between all the parties involved. If there is alignment between these parties, we are able to look beyond Design for Moldability and consider Design for Assembly. Then, we can even consider Design for Disassembly. Many times, recycling is not cost beneficial, but using these design principles helps to make sustainability more attainable. Long-term success is the target, and using DFM helps us design from a quality, cost, delivery and environmental point of view.
Updated and republished from Plastics Technology.
ABOUT THE AUTHOR: Wayne Daniel currently serves as Director of Business Development at Canon Virginia Inc. He has been engaged in the tooling and molding industry for over 30 years. Daniel has experience in both injection molding and tool manufacturing, including previous roles as Canon Virginia’s director of Molding and director of Tool Manufacturing Operations. During this time, he has guided activities in mold processing and production innovation with a focus on cost reduction, efficiency and flow improvements, as well as personnel development.
Read Next
Ultra-Precise Molds Energize the Microfluidics Market
High-precision machining with micron-level accuracy enables mold builders to achieve tooling and injection molding that produces repeatable, cost-effective microfluidic parts.
Read More3 Is the Magic Number
Canon Virginia kicks off this free webinar telling attendees that they will not be sharing something they don’t already know, but will share a few best practices for getting things right the first time—three steps to improve medical tooling and validation times.
Read MoreHow to Use Strategic Planning Tools, Data to Manage the Human Side of Business
Q&A with Marion Wells, MMT EAB member and founder of Human Asset Management.
Read More


