Assembling Molds
The process of assembly is the stage during which most mistakes occur, so accurate and safe mold assembly is key.
The past few months we have broken down and discussed how to implement a typical mold repair using a 32-cavity unscrewing mold as a sample mold. We have covered the necessary documentation and how to use the data collected to confidently proceed through three of the four stages (disassembly, troubleshooting, cleaning and assembly) of a typical mold repair. We are now ready to assemble our mold.
Accurate and safe mold assembly is all about preparation and methodology in controlling the:
- Application of rust inhibitors
- O-ring installation
- Installation of the cavity tooling within the mold plates
- Installation of plates containing cavity tooling
- Sequence of operations
- Bolting it up
Installing and fitting close-tolerance tooling requires patience, a steady hand, attention to detail and, once again, the ability to read resistance. After spending 15 to 20 hours or more in the proceeding maintenance stages of cleaning and troubleshooting a mold, what a huge waste of time and money it is to hurry the process of assembly, yet this stage is where most mistakes occur.
As too many molders are painfully aware, one small miscue can result in thousands of dollars in unscheduled downtime, lost product, a damaged mold and stressed out employees. Re-pulling molds to install tooling left out, tighten bolts long forgotten or fix an internal water leak only further strains the delicate relationship that most companies experience between the molding and tooling departments.
To combat this, experienced repair technicians develop unique methods of assembly, continuously checking themselves to ensure that hundreds of pieces of tooling have been installed in the proper position and nothing is forgotten, allowing the mold to function as designed.
Preparation
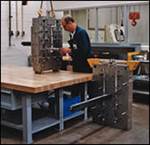
To prepare for assembly it is important to get the bench cleared of any clutter and all tools not required in the assembly procedure such as cleaning tools, any loose paperwork, measuring instruments, etc.
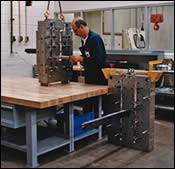
Working in the vertical position leaves all our plates standing, braced and aligned in sequence and ready to be installed. All bolts and tooling relevant to position, are placed between the appropriate plates. This makes it easy to give everything one final inspection, with the Repair Sheet (see May issue, page 65) in hand, to confirm that nothing has been overlooked and all issues have been addressed.
Spray Down
The first step is to spray on a healthy coat of rust inhibitor to the back (counterbored) side of all plates that have been observed in the past to become especially dirty or rusty during the mold's typical production run. Medium duty rust inhibitors that go on clear and dry quickly work great for short runs such as 250,000 cycles or less, or around 60 days. Heavier, wax type inhibitors are needed if long runs are normal, heavy condensation is present from sweating molds in facilities not climate controlled, or if the mold is to be racked for a long period of time.
All fountain or bubbler plates and any other plates exposed to internal condensation or heavy contamination needs to be coated. Rust inhibitors also work well on plated or stainless steel plates because it allows the residue to be ultrasonically removed much faster by reducing oxidation and the pitting effect contaminants have under enormous tonnage.
It is critical to protect exposed cavity tooling from over spray of the rust inhibitor as this can cause serious galling or leaching issues; therefore, a list of which plates to coat and a procedure on how to coat them safely should be noted in the mold maintenance manual. Once the coating has been applied and dried, assembly can begin.
An example is a mold where the cold half or B side consists of six plates that contain the cores, stripper bushings, gears and gear rack along with the thrust washers, bearings and quad-rings. The tooling will be installed in reverse order of which it was removed. The hot half, or A side of the mold consists of a cavity plate to be mated to the manifold plate.
O-Ring Installation
Pinched, twisted or cut o-rings are responsible for many a repair technician's bad days. Taking a few precautions during installation will greatly reduce the potential for o-ring damage that may not materialize during a bench water or air test, but begins to drip after a few cycles in the press.
- Verify the correct (print) size of the o-ring.
- Lubricate the o-ring and the bore the o-rings slide against.
- Take care not to twist o-rings while stretching them over the heads of tooling.
- Take the time to chamfer or break sharp edges inside plates and internal waterlines and counter-bores.
- Install o-ringed tooling slowly into bores, giving the o-ring time to collapse. Use only hand pressure wherever possible.
- If the installation feels wrong, it probably is. Remove the tooling immediately and check the integrity of the o-ring. Don't waste time by taking a chance that the leak test will be OK.
- Keep o-rings in good shape by changing them at specified cycle intervals.
Get It Straight
Installing tooling into tight fitting bores and pockets takes patience and the skill to detect whether or not the tooling is starting straight, and if the resistance felt is normal. It is very easy to start close fitting tooling on a bind, assuming it is just a tight fit that needs some extra persuasion, usually in the form of a huge hammer.
Tooling that has sharp leading edges is especially difficult. An impatient or heavy-handed repair tech might carelessly start the tooling crooked, then continue to drive the tooling further into the bore, hoping it straightens itself out or seats home before it locks up completely. The bur created by this once sharp tooling can get trapped between the tooling and the bottom or sidewall of the bore, jamming the piece. The next time the mold is disassembled, a different technician might have to remove this stuck tooling, prompting nasty comments about someone's lineage.
The fires from this type of workmanship are usually slow to ignite and not immediately recognized. Washed out bores and dinged/damaged and tight fitting tooling are probable causes for many types of issues that reduce mold performance and inflate labor and tooling costs, but careless workmanship is the root cause.
Assembling Plates with Tooling Installed
Another area of assembly that can cause major issues if rushed is a popular method where plates containing tooling are installed all in one move to save time. For example, a sleeve retainer plate is bolted to a backing plate with 32 sleeves installed. The entire unit is then slid onto the mating plate via guide pins and bushings while assuming the sleeves will locate safely into their respective bores. If the plates and any hardened internal tooling are built with generous 30-degree lead-ins (versus the typical 45 degree) on every bore, this method can be somewhat safe. But most molds (especially older ones) have minimal or no lead-ins and the ends of sharp tooling and plates may be damaged while attempting to insert many pieces into their respective bores at the same time.
If just one piece of tooling binds or doesn't start completely, it is difficult to determine exactly which one is causing the plate to stick, and will prompt the hurried technician to resort once again to his 4:00 friend the big boomer.
A safer method is to make this assembly with the backing plate off and the 32 sleeves in the retainer plate pushed slightly back out of harms way. This will prevent the sleeves from contacting the edges of the bores while you align the leader pins and bushings.
Align the leader pins to the bushings in the retainer plate first, and slide the retainer plate on.
This will allow the sleeves to be more accurately and safely slid into their bores one at a time. If resistance is felt, you know exactly which sleeve is the hold-up, and can stop and investigate.
Bolting It Up
Another seemingly simple function of mold maintenance is installing the hundreds of SHCSs that hold plates and tooling in place. Most problems carrying out this task are attributed to an individual’s idea of what tight is. Bolts get tightened either by hand or pneumatically to the point of stripping the head just to make sure they don't vibrate loose. To counter this, some shops use an S.O.P. regulation that requires all SHCSs to be tightened to a set torque value usually determined by the thread/diameter and steel type of the bolt. This is effective, but can really slow up assembly. A more efficient method is to learn what the proper torque feels like through experimentation using a cali-brated torque wrench as a guide. If you use a pneumatic gun, use the torque wrench to verify the different clutch settings on the gun. Monitoring bolt-tightening issues will determine if your techs need a refresher course with the torque wrench.
Also instrumental is the quality of the SHCSs and allen wrenches used for installation. If a company cannot be convinced of the value of quality tools, a craftsman will usually purchase their own versus using the cheap freebies. To Each His Own (kind-of).
The method of assembly is usually mold specific and determined by shop experience. Whenever you have a group of skilled technicians working on similar devices, there always will be a degree of competition and personalities involved that will result in diverse styles. This can be a healthy situation to have in a shop, and can produce timesaving methods as long as individuality does not get out of hand and impede communication. So if contrasting assembly styles are separated only by a couple of hours, and mold performance issues are nonexistent within the different styles, then this is acceptable.
The challenge is getting a competent, competitive skilled tradesman to adopt a standardized procedure developed by someone else. As a maintenance group, a major timesavings is realized and mold performance and reliability are improved when all technicians perform critical work in a predetermined, consistent manner.
Managers and supervisors must be careful when setting standard assembly procedures requiring compliance, and base these decisions on accurate data that compares average repair hours, mold repair reliability and performance issues among technicians. The goal is to maintain an environment that fosters new ideas, but controlled enough to prevent inconsistent results.
Related Content
How to Use Thermal Management to Improve Mold Cooling
A review of common mold cooling issues and possible solutions, including 3D printing applications.
Read MoreWhat is Scientific Maintenance? Part 2
Part two of this three-part series explains specific data that toolrooms must collect, analyze and use to truly advance to a scientific maintenance culture where you can measure real data and drive decisions.
Read MoreThe Ins and Outs of Hot Runner Temperature Control
A training checklist that explains the why and how of proper hot runner temperature control and system management.
Read MoreQuestions and Considerations Before Sending Your Mold Out for Service
Communication is essential for proper polishing, hot runner manifold cleaning, mold repair, laser engraving and laser welding services.
Read MoreRead Next
Evaluating Mold Repair Skills
A systematic approach to train mold repair skills is more effective.
Read MoreHow to Use Continuing Education to Remain Competitive in Moldmaking
Continued training helps moldmakers make tooling decisions and properly use the latest cutting tool to efficiently machine high-quality molds.
Read MoreHow to Use Strategic Planning Tools, Data to Manage the Human Side of Business
Q&A with Marion Wells, MMT EAB member and founder of Human Asset Management.
Read More
