Automated 3D Optical CNC Measuring Machine Targets High Precision and Challenging Applications
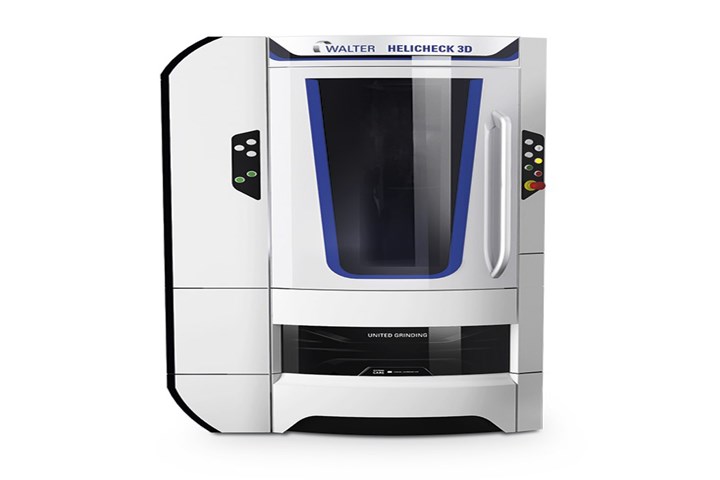
The Walter Helideck 3D is United Grindings’ latest non-contact 4-axis machine that generates 3D models of tools and production parts for the most demanding of industries.

Photo Credit: United Grinding
The Walter Helicheck 3D optical non-contact 4-axis CNC measuring machine from United Grinding adds to the precision of tool grinding operations for challenging applications in the defense, construction machinery, civilian aircraft and medical industries. The machine generates 3D models of tools and production parts, and compares scans of drills, step tools, milling cutters, woodworking and form tools to CAD/CAM system models. A transmitted light camera and laser sensor scan digitize and register the complete geometry of each part.
After the backlight camera and sensor measure the outer contour of the part, the Walter Helicheck 3D generates the 3D data point cloud required for a 3D model. The machine’s special 3D Tool Analyzer software allows users to lay vertical, horizontal and freely-selectable cutting planes at any position on the 3D model. From there, the software automatically analyzes the planes and provides exact measurements of the model’s parameters, including core diameter, rake angles and spiral pitch. Because the product derives the measurements from the 3D model, users can work offline at a separate station.
The Walter Helideck 3D also applies Walter’s 3D Matcher software, which overlays two 3D models within a graphical user interface and performs a color-coded comparison. After matching up both models, the machine provides an instant evaluation of product quality and any deviations from desired values.
Further, the high-precision ISO 50 spindle with automatic clamping mechanism provides precise and repeatable measurements. The modular adaptor spindle uses quick-change ISO, HSK, Capto and VDI adapters to eliminate additional setup time. High-precision ball roller spindles and linear guides guarantee positioning accuracy for measurement precision. A solid granite base damps vibrations and provides thermal stability for high measurement accuracy and reliability.
To further increase part quality and production efficiency, automation options dependent on the intended application are available.
Related Content
-
Using CT Scanning to Qualify Molds Faster
Software and hardware advances reduce dimensional inspection with part-to-CAD by 70%.
-
Four Micro Tooling Considerations
Issues involving gating, ejection, mold splits and direction of pull are of special concern when it comes to micro tooling.
-
Predictive Manufacturing Moves Mold Builder into Advanced Medical Component Manufacturing
From a hot rod hobby, medical molds and shop performance to technology extremes, key relationships and a growth strategy, it’s obvious details matter at Eden Tool.


