Productivity Meets Precision
With machine dynamics, mechanical design and thermal stability in control, mold manufacturers can take five-axis machining to the next level.
Today’s manufacturing environment remains extremely active and highly competitive on a global scale. To compete, manufacturers must constantly hone their internal technology while seeking ways to increase precision and efficiency, and reduce delivery times and costs. All this, while pushing the limits of doing more with less in terms of shop space, organization, staff skill levels, and overall machine performance and productivity.
The past decade has introduced some major new developments in manufacturing, particularly in machining, including high-speed machining, hard milling, high-performance machining, micromachining, multiplatform machining and high-dynamic machining. Many of these machining processes have incorporated technologies that enable more precision in electrode, mold and die manufacture.
While flourishing mold shops continue to embrace these changes and new technologies, small- to medium-sized shops that don’t are vulnerable to losing market share and closing their doors. Although many shops have implemented these advancements, doing more with less is not an easy task. This article will address the “doing more with less” strategy as it relates to five-axis machining.
Technology Does Not Equal Productivity
Most shops today employ some form of automation, such as the production of electrodes or cores and cavities using EDM, or direct milling without human interaction. Automation has allowed manufacturers to do substantially more, but it hasn’t necessarily increased productivity, because often a single part must be processed using multiple machining technologies, such as milling, turning, EDM and jig grinding. This can result in lost productivity and precision.
So how can mold builders do more with less while maintaining productivity and precision? The answer is by using machine tools that seamlessly incorporate multiple milling technologies into a single, automated, high-precision, five-axis machining process.
Although five-axis machining is nothing new, and many shops have added this machining strategy to their list of capabilities, problems still persists in terms of productivity and precision when using a multi-platform milling machine or on an “all-around” machining center that incorporates automation.
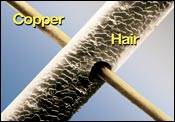
To understand how to achieve this required productivity and precision with five-axis machining, it is important to first understand the difference between a multipurpose and a multi-platform machine. Multipurpose machining centers focus on simple operations, such as basic drilling, tapping and milling, while the advanced technology of multi-platform machines allows them to perform more complicated tasks, such as hard-milling, high-speed machining and micro-milling. When looking at new machine technology, consider whether the machine spindle can be designed to handle low-speed hard-milling operations while being precise enough to drill a hole in a part as thin as a hair or fast enough to plow through aluminum at 1,200 inches per minute, and if it can handle a harsh graphite environment. A multi-platform machining center is fully capable of being multipurpose and can handle many different machining technologies.
Productivity and Precision Considerations
To further increase productivity without sacrificing precision, consider the machine’s tolerance budget and the true definition of five-axis precision before investing in five-axis machining.
One of the challenges to doing more on a machining center is the machine’s accuracy budget. This is the total achievable tolerance that the machine is capable of holding on the parts. It is calculated from the total tolerances of all machine system components, however, it does not include the process budget or tolerance loss due to machining methodology. Part complexity determines the machining methodology, which may require that a part be processed on many different machines rather than on just one machining center. Every time the part is removed and set up on another machine, tolerance is lost, so the goal should be to perform as many processes as possible on one machine. If more can be done on one machine, it’s more likely that tighter tolerances can be held, increasing productivity.
Many machine tool builders have done fairly well in keeping budgets in check for three-axis machining centers, but when more capabilities are added to a machine to increase productivity, for example, adding two more axes, a more-capable high-speed spindle, a higher capacity toolchanger, a touch probe or a laser, part precision can quickly deteriorate. Similar to the case when multiple machines are used to process a part, each of the single machine’s components has its own tolerance range. The more machine components there are, the more likely there will be tolerance lost at the end of the machine build. Therefore, the tolerance range for each of those components must be tightened even further during their respective parts of the manufacturing process in order to control the tolerance stack-up. This includes addressing spindle precision and laser capabilities.
Obtaining a machine’s achievable part accuracy is another challenge. Nearly all builders will provide some details about positioning accuracy and machine repeatability, with a single or multiple reliable standards. However, not all builders use the same standard, and that makes it difficult to produce a fair comparison. Standards for determining machine tool precision include NMTBA (U.S.), ISO 230-2 (Europe), BSI BS 4656 Part 16 (Britain), VDI/DGQ 3441 (Germany), JIS B 6336-1986 (Japan) and ASME B5.54-92 (U.S.).
Further, when capabilities are added to a machine, it becomes more difficult to get a clear picture of the machine’s overall precision performance, particularly in a productive environment. The standards mentioned here only pertain to the machine and don’t address what achievable or expected part tolerance the machine can hold. To overcome this, manufacturers typically resort to a “test cut” that they commonly define themselves. Although this can be a great way to test the performance and precision of a machining center in a real manufacturing environment, it doesn’t necessarily eliminate process tolerance due to machining methodology, as mentioned earlier.
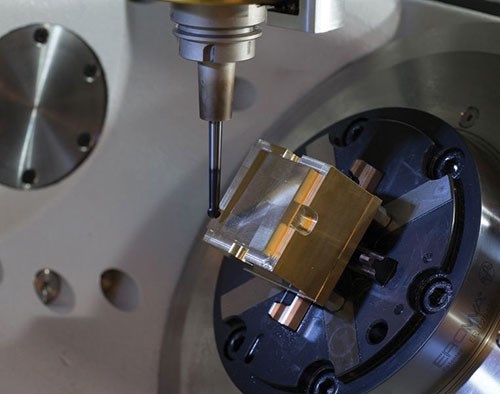
A goal is to define achievable part accuracy in the scope of the entire machining environment while simultaneously removing any influence from the actual machining of the part. Material type, milling strategy, cutting tool type, and size and amount of stock removal all influence the achievable tolerance. Limiting these influences can help reveal the true accuracy of the machine in operation in a real environment. For example, when machining a difficult material, the tool may deflect, causing a loss of tolerance. This doesn’t reflect true machine accuracy, therefore, as it is influenced by the machining methodology used. However, dimensional part accuracy can be achieved. A part accuracy of 5 microns or less is plausible. The question becomes: Can this concept be used to identify the achievable productivity level on a multi-platform five-axis machining center in a real-world environment?
A Multi Solution
To answer this question, a shop should first revisit the machine tolerance budget with machine dynamics, mechanical design and thermal stability in mind. These are often-overlooked machine attributes that can have a large effect on five-axis precision when it is met with productivity.
Machine dynamics. These are key to establishing a balance of what is possible across the largest machining area while holding the tightest tolerance. For example, some companies desire the best of every part size, from large to micro. This is not balance. It is not reasonable to expect to hold extremely tight tolerances on a large part and then hold tight tolerances on a micro-part, particularly in five-axis machining. Companies should work towards a balance, with average or common part size.
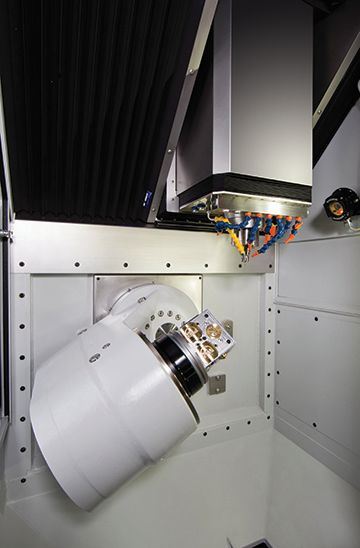
Machine design, mechanical design and the kinematics of the fourth and fifth axes in relation to the X, Y and Z axes become rather important to part size and are essential to tuning this balance to a suitable “sweet spot.” Large compensation movements always lead to imprecise parts, and larger distances from the center of rotation, combined with heavier parts and higher feeds, can create instabilities in motion that can make holding part precision very difficult. The goal is to find that reasonable sweet spot in machine design that allows handling of large parts (greater than 12 inches in diameter), while also holding unprecedented tight tolerances (for example, 3 to 5 microns). Typically, a machining center with a traveling column design incorporating a fourth/fifth-axis swivel table is better than a typical bridge or trunnion design. Traveling-column machines offer an optimal solution for that well-balanced part size.
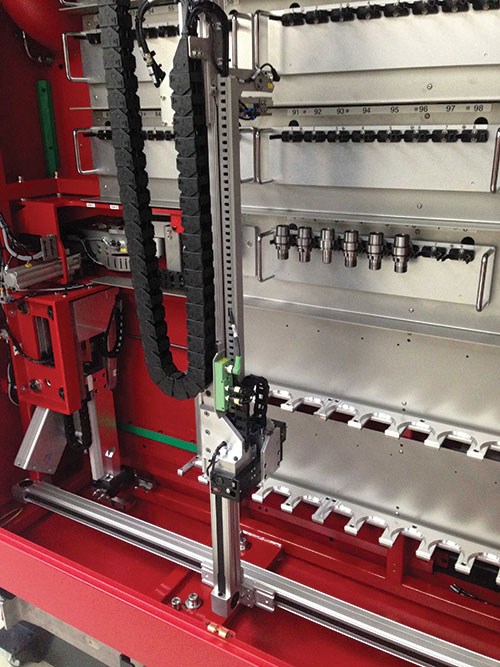
Mechanical design. Once a balance is achieved in a machine’s design, it’s important to balance the mechanical design as well. The guiding system, toolchanger and storage cabinet, along with the laser measuring system for the cutting tools, should be closely accessible around the cutting environment. This provides further control of precision and productivity.
For example, optimal dimensioning of the guiding system yields greater precision due to the smaller load on the guides and reduced moving mass. Both are inherently achieved by a well-designed guiding system. Additionally, keeping the laser close to the working environment results in greater accuracy, since smaller travels increase precision and productivity. The toolchanger and storage cabinet should also be located near the working environment, easing tool management. Exact-position tool-changing further increases precision in the tool-change cycle by maintaining the exact radial location of the toolholder from the toolchanger to the spindle. New developments in tool-storage design make it possible to incorporate tool palletization, which was previously restricted to parts.
Thermal control and compensation. Machines undergo constant thermal changes due to heat transfer among the spindle motor, drives, guiding system, coolant, machining process and environment. Controlling this heat and thermal expansion requires proper temperature management and an understanding of machine structure, including the construction material of each of the systems/machine components. A conservative material choice, one that responds slowly to thermal changes, is one with high thermal capacity and low thermal conductivity, such as steel, cast iron, granite and polymer concrete. However, because these materials have a slow response to changes in thermal conditions, they can yield short-term thermal errors. Solutions like these often conflict with machine dynamics and lengthen temperature-transient cycles and warm-up phases. The result is temperature behavior that is difficult to capture, simulate and compensate for.
An alternative solution are components constructed of materials with low thermal capacity and high thermal conductivity, such as aluminum. The physical characteristics of these materials help them to accept changes in ambient conditions and respond quickly to thermal changes. They also allow high dynamics, and short transient temperature cycles and warm-up phases while minimizing temperature differences within the machine components.
Precise management of the temperature of heat sources and structural components such as the axis motor, spindle motor, guideways and coolant system is also critical and requires individual, high-precision cooling circuits. This eliminates any temperature deviation that can influence the geometric accuracy of the entire machine.
Summary
Five-axis machining can bring a wealth of opportunities to mold manufacturers, and incorporating automation takes them to a higher level. When these two strategies are achieved with productivity and precision on a multi-platform machining center, they enable mold builders to remain competitive by doing more with less.
Related Content
Machining Center Spindles: What You Need to Know
Why and how to research spindle technology before purchasing a machining center.
Read MoreHow to Analyze and Optimize Cutting Conditions to Reduce Cycle Time
Plastic injection mold design and manufacturing company puts NC program optimization software module to the test. The results were surprising.
Read MoreLeading Mold Manufacturers Share Best Practices for Improving Efficiency
Precise Tooling Solutions, X-Cell Tool and Mold, M&M Tool and Mold, Ameritech Die & Mold, and Cavalier Tool & Manufacturing, sit down for a fast-paced Q&A focused on strategies for improving efficiencies across their operations.
Read MoreHow to Eliminate Chatter
Here are techniques commonly used to combat chatter and guidelines to establish a foundation for optimizing the moldmaking process.
Read MoreRead Next
Engineering the Micro
Here’s a look at just a few notable design features of the Kern Micro, the machine tool builder’s latest offering and the subject of many of the demonstrations at its recent open house in Germany.
Read MoreRe-defining Precision
It’s important not to limit the definition of precision to one in particular, but instead expand the definition to three unique precision types: micro precision, ultra precision and nano precision.
Read MoreReasons to Use Fiber Lasers for Mold Cleaning
Fiber lasers offer a simplicity, speed, control and portability, minimizing mold cleaning risks.
Read More



.jpg;maxWidth=300;quality=90)


