Moldmaking in 3-D
Laser scanning helps moldmakers to improve reverse engineering and inspection tasks for their molds.
A wide range of moldmakers are adopting the emerging technology of 3-D laser scanning in order to improve the accuracy and substantially reduce the time and cost of reverse engineering (RE) and inspection tasks for molds and parts. Moldmakers usually are responsible for the mold’s ability to produce the part to the customers’ specifications so, as parts become more complex, inspection is becoming more of a challenge. 3-D laser scanners capture up to 50,000 coordinate points every second, drastically improving RE and inspection speed and accuracy. Using a laser scanner instead of a touch probe-based digitizer or touch probe scanning device mounted on a machining center or CMM (coordinate measuring machine) for RE/inspection can help a mold builder attract new business and therefore increase the proportion of time that these machines can be used for their intended purpose. Laser scanners also can dramatically reduce first article inspection costs for injection molded parts by graphically presenting on a screen exactly how the entire shape of the first article part compares to the design intent (CAD model).
What Moldmakers Need to Know
RE or digitizing a physical part is a critical task for any mold and pattern shop. Most customers say that they design all of their parts on a CAD system; however, the reality isn’t that simple. Many older parts were designed on a drafting board before the company started heavily using CAD and others were done on an older CAD system whose files haven’t been converted over to their new system. In many other cases, the parts, molds or patterns were originally designed on a CAD system, but changes were made by hand to the mold or pattern after the design was completed and the CAD file was never updated. Whatever the reason, nearly every mold shop is continually asked to duplicate or RE parts.
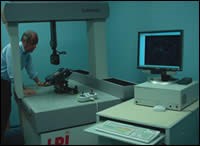
Many moldmakers use CMMs or CNC (computerized numerical control) milling machine tools for RE. The problem with this approach is the amount of time required. It might take about 30 minutes to set up the machine and from that point on it works without a lot of attention. But parts have become so complex today that it takes at least tens of thousands or sometimes even hundreds of thousands of points to create an accurate 3-D model. Getting this many points takes hours, or even days, on a typical machining center or CMM. The contact digitizer probes used on these machines also are limited in the geometries that they can accurately reverse engineer. Some parts have undercuts or indentations that are too small for the probe to enter. There also are some parts with 3-D contours that are so complicated that it would just take too long to accurately digitize them with point-by-point. The resulting coordinate points also have an offset calculation that is needed to vectorize the data that rarely gets calculated into the measurement accurately due to the constantly changing vector representing where on the touch probe sphere, that contact with the part was made.
Another critical measurement task for nearly every moldmaker is the need to provide accurate measurement of prototype parts in order to evaluate the performance of the mold and process. Once the engineers are satisfied, they set up the production operation and produce the first article parts. These parts are carefully measured and compared to the manufacturer’s specifications. The problem with using a CMM for these measurements is that as the geometrical complexity grows, the number of points required for accurate measurements increases at an exponential rate. This greatly increases the amount of time needed to capture points one at a time on a CMM. Small high detail parts can be extremely difficult to measure without deflecting the part when touching it with a mechanical touch probe. For example, delicate, plastic parts like those of cell phones easily deflect due to very thin walls and difficult to probe fine detail geometry.
Laser Scanning Offers Major Advantages
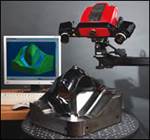
Laser scanning has demonstrated the ability to address all of these challenges. Laser scanning systems work by projecting a line of laser light onto surfaces while built-in arrays continuously triangulate the changing distance and profile of the laser line as it sweeps along, enabling the object to be accurately digitized in 3-D. The laser probe electronics translate the video image of the line into 3-D coordinates, providing real-time 3-D coordinate data that gives the operator immediate feedback on areas that might have been missed. Laser scanners are able to quickly measure large parts while generating far greater numbers of data points than mechanical touch probes without the need for templates or fixtures. Since there is no mechanical contact by the laser scanner with the object, the problems of depressing soft objects, measuring small details, capturing complex free-form surfaces are eliminated.
Laser scanners can greatly increase any moldmaker’s RE capa-bilities. First of all, laser scanning takes far less time than a touch digitizer or scanner because—instead of collecting points one by one—the scanner picks up thousands every second. Laser scanning can RE parts that are so complex that they would be practically impossible one point at a time. It’s like the difference between painting with a spray gun and a nailbrush. Instead of spending days to RE a complicated part, it can now be done in an hour or two. Second, this method produces a far more detailed and accurate point cloud, typically containing several million points that can be used to replicate into CAD models even the most complicated part to demanding tolerances. Laser scanning also does away with other limitations of a digitizer probe such as its inability to accurately define small features or to measure soft parts.
Laser scanners also can improve the process of inspecting prototypes or first articles. Instead of just measuring dimensional lines, laser scanners capture the entire contour of the part. They import the resulting point cloud into software that automatically registers the as-built first article to the CAD model provided by the customers with colorful highlights any differences out of tolerance. RE software provided with the scanner greatly simplifies the process of moving from point cloud to a CAD model, making it possible in minimal time to generate a CAD model of the scanned part that faithfully duplicates the original part.
Laser scanning drastically improves productivity for moldmakers by capturing up to 15,000 points per second, dramatically reducing reverse engineering and inspection time. The ability to capture complete geometries rather than a limited number of points improves accuracy. The non-contact laser probe easily measures free-form shapes, delicate parts and difficult geometries. The quick and simple retrofit is by far the lowest cost way to take advantage of laser scanning technology.
Using Reverse Engineering to Protect Against Competitors Copying Your Molds
The most common use of reverse engineering has always been to generate CAD data from existing molds or parts in order to build new tooling for manufacturing them or use them as the starting point for new designs. However, some companies with innovative designs have discovered that reverse engineering also can be used to guard against competitors copying their designs.
For example, a leading manufacturer of golf clubs reverse engineers competitive products on a regular basis. This manufacturer then imports the CAD geometry of their own design and the competitor’s design into software that shows the similarities or differences between the two designs with color coding. If the graphic shows the two designs are identical or nearly identical, the club manufacturer has the evidence it needs to go to court to force the competitor to remove the infringing product from the market.
Another example involves Flexible Steel Lacing Company—the world’s largest manufacturer of mechanical fastener systems for conveyor belts. The company suspected that a competitor’s product infringed upon one of their patents. The geometry of the product, which is produced on a progressive die, was so complex and the product was so small that it was impossible to tell for sure by visual inspection. So the engineers asked a service bureau to scan both their products and their competitor’s products. They overlaid the solid models of the products on top of each other and discovered that the competitor’s design did not infringe. “We saved time and money by quickly determining that the competitor was not infringing upon our patent,” explained Greg Westphall, Chief Engineer for Flexco.
Related Content
Tips for Tackling Mold Design, Machining, Cutting Tool and Wear Challenges
Tips for tasks ranging from reducing risk in part design and taking advantage of five-axis machining to refining cutting tool performance and reducing wear with guiding and centering systems.
Read MoreHow a Small Programming Change Cuts Cycle Time in Half
Overriding the CAM system when milling a series of lifter pockets helps to improve metal removal rate and increase feed rates.
Read MoreFour Micro Tooling Considerations
Issues involving gating, ejection, mold splits and direction of pull are of special concern when it comes to micro tooling.
Read MoreTolerancing in Mold Design, Part 2: Using GD&T to Address Conventional Tolerancing Issues
Mold designers can achieve a single interpretation of workpiece functionality when following the American Society of Mechanical Engineers Geometric Dimensioning and Tolerancing standard.
Read MoreRead Next
Taking Technology to New Heights
White light, non-contact scanning system adds new capabilities including real-time inspection.
Read MoreReasons to Use Fiber Lasers for Mold Cleaning
Fiber lasers offer a simplicity, speed, control and portability, minimizing mold cleaning risks.
Read MoreHow to Use Continuing Education to Remain Competitive in Moldmaking
Continued training helps moldmakers make tooling decisions and properly use the latest cutting tool to efficiently machine high-quality molds.
Read More


