Guidelines to Put Your Production Process on the Profitability Track
A top-down commitment to investigate new options for molding materials, release agents, training techniques and equipment is critical to reduce mold downtime.
When it comes to reducing mold maintenance and downtime, the topic seems at first glance to be as broad as the range of molds and molding processes currently in use today. Yet there are certain guidelines which apply to all types of molds—whether one is producing a large ski boat or a small interior auto automotive component. By using the following guidelines, you can easily review the core production processes to verify that your business is doing its best to decrease mold maintenance and downtime. It’s worth your time because better mold maintenance means increasing both production and profitability. Even if you are not on track, you’ll have a road map for improving the processes.
Your Roadmap for Process Improvement
Validate that the Right Material Has Been Selected to Create the Mold
Many organizations have a limited range of options when creating new molds because they only have expertise or tooling to produce either metal or plastic molds. Nonetheless, you still need to verify that the materials being used to create the part—whether rubber, metal, composite, polyurethane or even concrete—are compatible with materials being used to create the mold.
These choices may be evaluated or selected by R&D engineers for new projects in a large organization. In smaller shops, creating the mold may be outsourced or done by a senior technician or even the owner. Whatever the composition of the parts being manufactured or wherever mold is made, the moldmaker must have either the necessary experience or the documentation to verify the correct material selection when the initial mold is created.
Test the Mold under Conditions Closely Matching the Actual Manufacturing Environment
If there are wide fluctuations in temperature during the molding process, it has to be tested in that environment. Conversely, successfully making parts that require very precise heat and cure times for either the mold or materials obviously won’t work well if that level of precision cannot be maintained in the shop.
The list of manufacturing parameters is much longer, but regardless of the parameter, the goal is to match actual manufacturing conditions as nearly as possible to avoid production problems. With more expensive molds—for example, those used to create a large boat—matching plant conditions can be challenging, but doing without this type of verification can result in both materials and costly molds being destroyed. It’s worth the effort.
Know the Characteristics of the Molding Process and Match Them with the Most Effective Category of Mold Release
In other words, one must carefully confirm the parts volume, the cure time, the cycle time, the temperature of the mold and of the production materials as well the number of releases desired. Knowing the required surface finish, whether matte, semi-gloss, glossy, paintable or bondable is yet another key parameter. By thoroughly understanding manufacturing conditions, the very best mold release agent can be determined.
Whether your manufacturing process requires a mold release that’s water-based, semi-permanent, silicone-free or solvent-based, providing the correct details makes it possible to select a release agent that optimizes production efforts. While some release agents are available off-the-shelf, many situations require custom-formulated mold release to maximize the quality of the part and minimize the mold maintenance time. It also is true that cutting costs with an inexpensive release solution can actually be costly. Attempting to save pennies may result in damaging expensive molds, excessive release build up—triggering more cleaning time or increased raw material costs, when molds seize and a part is destroyed.
Condition the Mold Correctly
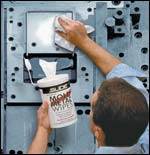
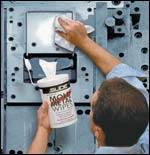
For brand new molds a rigorous cleaning, curing and sealing effort upfront means less downtime later on. If using a hot water and/or solvent wash, you first need to make certain the cleaning agent doesn’t damage the mold surface. Cleaners used for metal tooling may be much too harsh for polyester tooling. Understanding the difference between cleaning and stripping production molds also is important. In the same way one doesn’t clean a kitchen counter with EZ Off Oven Cleaner®, but simply uses a light antibiotic spray; make sure your molds are being cleaned, not inadvertently stripped.
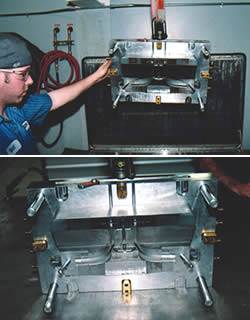
It also is critical to verify the consistency of the cleaning process. Mold cleaning should not vary between the first and second shifts. Next, make certain any edges or flanges receive the special treatment they require. This could include extra release agent being used on edges or even a completely different release agent being used just for the flanges. Finally, careful visual inspection of each properly cleaned mold lets you see whether sanded or repaired areas are still viable. It also provides the opportunity to retire old or worn molds.
Review the Application of the Release Agent
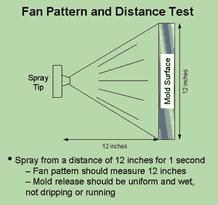
While it’s often noted that mold release agents are the redheaded stepchildren of the industry, blamed for any type of molding problem—valid or not—correct release application is key. Whether using a spray gun or manually applying the release, know what works. Spray guns vary greatly in their efficiency from conventional guns functioning at 30 to 40 percent efficiency, air-assisted airless guns at 40 to 60 percent efficiency, airless moving up to 50 to 60 percent, and HVLP guns with the very best rating of 70 to 80 percent efficiency. Regardless of the type of spray gun, the proper angle and distance is another key success measure (see Figure 1). There isn’t one right answer for all processes, but knowing what to expect when applying the release and measuring the performance contributes to minimizing mold maintenance.
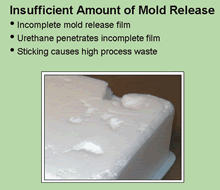
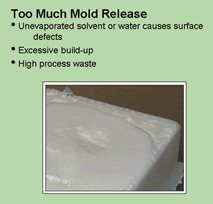
When manual application is being used, it’s not the old real-estate cliché, location, location, location that matters, but rather training, training, training that makes the difference between success and failure. With the right training and properly selected mold release, your molds will release smoothly without tightness. Over application of mold release leads to extra costs for both the release agent and additional cleaning and surface defects (see Figure 2). Under application means pulling, and at times leaving polymer on the mold—also causing more downtime for cleaning (see Figure 3). Observing the manufacturer’s instructions, storing the release at the right temperature, keeping the container sealed, never pouring unused mold release back into the larger container, and never diluting the mold release agent are other important rules. But perhaps most important, is to carefully document the work instructions, to laminate that documentation and post it in a visible position close to the manufacturing action. Documentation that is safely tucked away in the quality manager’s office has limited impact.
Gather Information on the Molding Process
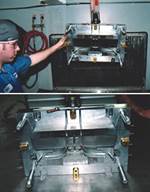
This is an often-ignored concern. While there are many ways to track the performance of individual molds so that preventative maintenance can be performed, the method of mold tracking must fit your manufacturing process. Otherwise, the tracking simply doesn’t get done. Plants with expensive, high value molds may actually keep a performance notebook containing individual mold histories and production performance. Others with higher volume or lower value molds may mark them with strings or pieces of tape that are removed one at time after each molding cycle. When the mold no longer contains any string or tape, that mold is pulled from production for thorough cleaning or stripping. Still other plants schedule the cleaning of categories of molds on a weekly or daily calendar (see Figure 4).
However the tracking is done, scheduled preventative maintenance pays dividends. Additional information tracking activities include monitoring scrap and doing a root cause analysis when performance targets are not being met. Full documentation of the root cause analysis and any updating of manufacturing procedures, again posted in visible places means improving productivity as well as minimizing downtime. Finally, a commitment on the part of the business, process engineers and supervisors to proactively investigate new options for molding materials, release agents, training techniques and equipment is critical.
Summary
If you have made it through all six steps, it should be clear that it is neither advanced technology nor magic that is needed to minimize mold maintenance and downtime. By observing the six guidelines or areas of focus, you can put your production process on the profitability track.
![]()
Related Content
MMT Chats: Solving Schedule and Capacity Challenges With ERP
For this MMT Chat, my guests hail from Omega Tool of Menomonee Falls, Wisconsin, who share their journey with using enterprise resource planning (ERP)—and their people—to solve their schedule and capacity load monitoring challenges.
Read MoreHow to Improve Your Current Efficiency Rate
An alternative approach to taking on more EDM-intensive work when technology and personnel investment is not an option.
Read MoreTop 10 Topics to Cover During an ISO 9001 Manufacturing Audit
Take a look at this practical hands-on approach to conducting a quality audit.
Read MoreMaking Mentoring Work | MMT Chat Part 2
Three of the TK Mold and Engineering team in Romeo, Michigan join me for Part 2 of this MMT Chat on mentorship by sharing how the AMBA’s Meet a Mentor Program works, lessons learned (and applied) and the way your shop can join this effort.
Read MoreRead Next
Choosing and Using the Right Mold Cleaners
Knowing the requirements of offline and online cleaners yields cleaner molds.
Read MoreStreamline Your Mold Cleaning Process
Ultrasonics can help your shop reduce labor costs and product waste while boosting efficiency and product quality.
Read More
