Benefits of Using the Right Measurement Tool
How to accelerate design review with the right measurement tool and what to look for in the tools you select for measurement and checking of thickness on 3-D models.
Thickness analysis software is a CAD tool that facilitates the measurement and validation of wall thickness of 3-D CAD models. It accelerates the design review process for manufacturability, enabling designs to move to prototyping and production stages much faster. Unlike the traditional measurement tools, the right thickness analysis software should be fast and easy to use, while delivering savings in downstream costs through improvements at the design stage itself.
It should implement two main methods of thickness measurement: (1) normal ray and (2) rolling sphere, while providing the user the flexibility to select the analysis method based on the geometry of the part.
Applications
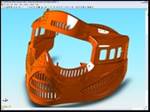
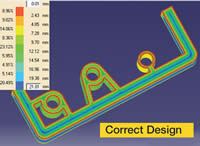
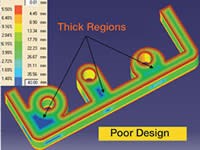
The right thickness analysis software should be integrated within a CAD application. This helps design engineers to detect inconsistent and thick/thin wall sections automatically. The designers can then reduce the possibility of internal voids, surface sink marks, warpage, unpredictable shrink rates, unnecessary resin content, longer cycle time and increased part cost (see Figures 1 and 2).
Consistent Wall Thickness
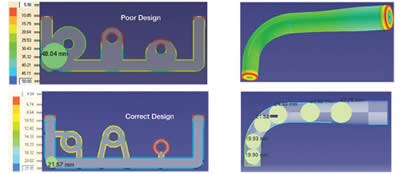
Design engineers need to maintain a consistent wall thickness, and any change in the wall thickness needs to be smooth, in order to ensure ease of flow and a stress-free part. Thickness analysis software that has automatic rolling sphere-based computation can help to identify regions that do not have consistent wall thickness (see Figure 3).
Rib Design
Designers follow standard design guidelines for rib design. Some of the common guidelines prevalent in the industry are:
- Rib thickness should be 60 to 80 percent of nominal wall thickness
- Maximum height should not exceed three times nominal wall thickness
- Minimum spacing between ribs should be two times the nominal wall thickness
- Thick ribs should be cored out
Cooling and Ejector Pin Location
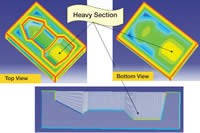
Molds must be provided with adequate cooling in order to take advantage of the faster cooling rates of reinforced compounds. Poor cooling rates lead to rising mold temperatures and longer cycle times. They also can result in voids, shorts and poor surface finish. So, cooling and heating channels should be located directly in the mold inserts and cores, if the mold design permits. Thickness analysis software that can automatically provide 3-D thickness on the entire model helps indentify thicker areas in the mold design, which require cooling or heating channels (see Figure 4).
Tight Integration within CAD
Thickness analysis software should be integrated within the CAD application. This helps design engineers to check the wall thickness while designing the model.
Summary
The right thickness analysis software can help to identify critical wall thickness in mold design. It checks for thick/thin and inconsistent wall thickness areas that cause issues during molding. By detecting manufacturability issues at the design stage, valuable time and effort is saved by preventing costly rework at later stages.
Related Content
-
OEE Monitoring System Addresses Root Cause of Machine Downtime
Unique sensor and patent-pending algorithm of the Amper machine analytics system measures current draw to quickly and inexpensively inform manufacturers which machines are down and why.
-
How to Select a Mold Temperature Controller
White paper shares how cooling channel analysis, which collects maximum pressure drop, total flow rate and heat dissipation, eases the performance evaluation of mold temperature controllers.
-
Tips for Tackling Mold Design, Machining, Cutting Tool and Wear Challenges
Tips for tasks ranging from reducing risk in part design and taking advantage of five-axis machining to refining cutting tool performance and reducing wear with guiding and centering systems.





.jpg;maxWidth=300;quality=90)


