Part One of a Three-Part Series Five Steps for Improving Your Shop’s Maximum Productivity
Learn how to evaluate your shop’s productivity and begin increasing it by considering the variables of implementing hard milling and high-speed machining.
It is safe to say that many mold shops are not up to date with all the processes and products on the market because these shops are comfortable with the systems they have in place and don’t believe it is necessary to continue their education on what they could do to become more efficient. And then shops that are making investments are only making partial improvements, and are therefore disappointed because they are not seeing the results they were told to expect.
One Process at a Time Approach
When attempting to improve your shop’s productivity, you need to take it one process at a time, beginning with an evaluation of the existing machining processes. Following are two case studies illustrating this process.
Case Study #1
Challenge: A shop was machining a die with a hardness of 66RC and running a two-flute replaceable blade insert style milling cutter. It was machining at 12 inches per minute and using two inserts to complete one pocket.
Solution: A replaceable insert milling cutter and the application was recommended. Feed, speed and programming path were changed and the testing was finished at 36 inches per minute and nine pockets were completed with one insert.
Case Study # 2
Challenge: A shop was having problems achieving the surface finishes required on a finish milling application.
Solution: After an evaluation of the application and process, it was determined that the machine controller was filtering out most of the code. Simply stated the program tolerance was set at .0001 and the controller tolerance was set at .0004. After changing the controller tolerance to match the program tolerance the finish was improved greatly (see Figure 1).
This three-part series will delve into the five components of achieving maximum shop productivity that moldmakers must consider when taking it one process at a time: finishing components by hard milling not EDM sinking; machining the components unattended; knowing the difference between HSM and conventional machining; using hard milling instead of jig grinding; and, learning when to high-speed machine before hard milling. Following the example set by the two aforementioned case studies, below are five areas where you can begin to evaluate your shop’s productivity and then begin to increase it.
Five Quick and Simple Recommendations
1. Finish Components by Hard Milling Not EDM Sinking
Hard milling is the process where you put the finish and tolerance into the part. Because of the advances in machinery, toolholders and milling cutter technology, it is possible to achieve 10 times more efficiency over EDM. In the time you can machine the electrode you could have machined the part. Although it is not possible to completely replace EDM in all situations, you can reduce the amount of electrode use on a component and improve the efficiency.
2. Machine the Components Unattended
Why spend a full day handworking the finish into your parts when you could get better results by allowing your machine the time to do the work. In some shops they will run a part for one hour and handwork for four hours because they do not have the machine time to allow longer cycle times. Lights out machining is a way to add machine time to your shop. It also will allow you to keep your mold and die tolerances from being polished out.
3. Know the Difference between High-Speed Machining and Conventional Machining
The biggest difference in HSM over conventional machining is the cutter. Conventional machining is done with high-speed steel or basic carbide using geometries established many years ago with inch sizes only. HSM is done with micro grain carbide end mills with high-temp, aluminum-base coatings. The geometries are material-specific, hardness-specific and application-specific. This is achieved by better grinding technology—bringing a stronger and more efficient cutting edge.
4. Use Hard Milling Instead of Jig Grinding
Many machining centers on the market can circular interpolate a round hole equal to that of jig grinding. There are end mills available today that are capable of producing the finishes and accuracy equal to or greater than that achieved by conventional jig grinding.
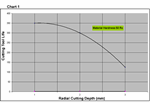
It can take up to 10 minutes or longer to jig grind a .750" diameter dowel pinhole. By using a hard milling process the same hole can be machined in less the five minutes. If you are interested in using this process on a machine in your shop, a ball bar test on your machining center is required to show your machine’s capabilities (see Figure 2).
5. Learn When to High-Speed Machine Before Hard Milling
It is not appropriate to hard mill in all cases. There is a standard that needs to be established in your shop to determine when to rough and finish by hard milling, and when to use HSM and heat-treating prior to hard milling. This can be determined by the size and shape of the material needed to be removed.
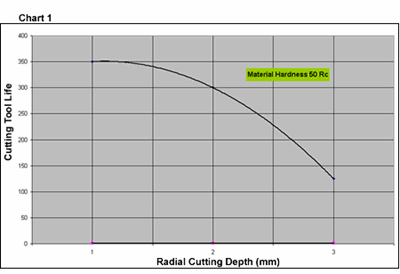
If the mold size is greater than a cell phone mold, generally the part is roughed with HSM first. The process of removing a bulk of the material via a HSM will take a lot less time than trying to hard mill all that material. In addition, tool life of a high-speed cutter can be more than 40 hours in soft steel at speeds more than 200 inches per minute. Hard milling in the same material after heat treat can result in a cycle time more than 200 percent greater and only achieve 50 percent of the tool life. That is why it is recommended to use hard milling for adding the finish and tolerance and not as a roughing process.
These five principles have been thoroughly tested, and can be applied in your shop. Next month we will examine more closely the reasons and justification behind moving your component finishing operation from EDM sinking to hard milling with the right machine, software, cutters, toolholders and training—focusing on the lessons learned from a specific application. The next installment also will show how you can add machine time to your shop through lights out machining. It will discuss the reasons shops have not taken the plunge into machining components unattended and share the steps to implementing this strategy.
Related Content
Leading Mold Manufacturers Share Best Practices for Improving Efficiency
Precise Tooling Solutions, X-Cell Tool and Mold, M&M Tool and Mold, Ameritech Die & Mold, and Cavalier Tool & Manufacturing, sit down for a fast-paced Q&A focused on strategies for improving efficiencies across their operations.
Read MoreOEE Monitoring System Addresses Root Cause of Machine Downtime
Unique sensor and patent-pending algorithm of the Amper machine analytics system measures current draw to quickly and inexpensively inform manufacturers which machines are down and why.
Read MoreMMT Chats: Solving Schedule and Capacity Challenges With ERP
For this MMT Chat, my guests hail from Omega Tool of Menomonee Falls, Wisconsin, who share their journey with using enterprise resource planning (ERP)—and their people—to solve their schedule and capacity load monitoring challenges.
Read MoreTackling a Mold Designer Shortage
Survey findings reveal a shortage of skilled mold designers and engineers in the moldmaking community, calling for intervention through educational programs and exploration of training alternatives while seeking input from those who have addressed the issue successfully.
Read MoreRead Next
Part Three of a Three-Part Series Five Steps for Improving Your Shop’s Maximum Productivity
An explanation of the differences between high-speed machining and conventional machining; and, general thoughts on when to high speed machine and heat treat versus hard milling.
Read MorePart Two of a Three-Part Series Five Steps for Improving Your Shop’s Maximum Productivity Part 2
The reasons and justification behind moving your component finishing operation from EDM sinking to hard milling with the right machine, software, cutters, toolholders and training; and how you can add machine time to your shop through lights out machining.
Read MoreHow to Use Continuing Education to Remain Competitive in Moldmaking
Continued training helps moldmakers make tooling decisions and properly use the latest cutting tool to efficiently machine high-quality molds.
Read More





.png;maxWidth=300;quality=90)


