Cleaning a Flashed Hot Manifold, Part One
A look at in-house and outsourced cleaning.
Editors note: This is part one of a three-part series. You can find the links to the entire series below.
Part 1: A look at in-house and outsourced cleaning
Part 2: Steps of a typical clean and rebuild of an encapsulated system
Part 3: Cleaning nozzles, manifolds, electrical boxes, assembly & final check
I have spent hundreds of unremarkable hours chipping and cleaning the manifolds of multicavity (16 to 48) molds equipped with various types of manifold systems. No one system is safe from the hurried start of an overzealous processor, or bolts left loose from a preoccupied repair tech. No particular brand cleans up quickly or easily, some just flash easier than others. The only commonality is that every flashed system seems to attract a number of white shirts clambering for a super-quick turnaround, with seemingly no clue as to what the job entails.
And after the dirty work is done, it will then test the skills of the most seasoned craftsman through precise measurements that are required to determine if combined tooling tolerances (stack-out) are enough to contribute to the leak.
Measuring mold components to within .0001 while referencing off non-perfect surfaces is a time-consuming task requiring calibrated instruments, a surgeon’s touch and excellent analytical skills. It is the part of the troubleshooting process that separates a journeyman from … well … everyone else.
Encapsulation Proclamation
I once attended a seminar where the guest speaker was a hot runner specialist who thanked those in attendance for our continued support to his children’s college fund through steady encapsulations. When asked as to reasons for these flashing follies, he answered in order of root cause frequencies:

Flashed manifold. A perfectly good manifold victimized by a heater left on over the weekend and with the water turned off. Photo courtesy of MoldTrax.
Manifolds Left Turned On Over Weekends
Many older presses will not power down the heaters when the press is shut-off, so manifolds are left to cook, overheat. This accomplishes two things: the burning plastic is significantly reduced in viscosity causing the resin (weepage) to migrate into tooling clearances and also overheats the tooling, causing it to over-expand and hob sealing surfaces, reducing the ability to seal when the manifold temperature is brought back down into range (see Photo).
Cold Starts
Not permitting manifold systems a “soak” time of 20 to 40 minutes to allow the steel (manifold, probes, spacers, etc.) to fully expand, creating the necessary sealing pressure between components.
Process Habits
Failing to reduce shot size when blocking cavities, not using back pressure when filling empty manifolds, running temps to high, reversing valve pin sequence and forgetting to turn on the water are just a few of several processing conditions that contribute to leaking systems.
Lack of Preventative Maintenance
Worn valve pins and bushings seem to be a major contributor in manifolds that are long overdue for a thorough going-over. Also lethal are hobbed manifolds, spacers and other tooling where combined dimensions are under the recommended cold stack height. Also include stressed/stretched bolts and fatigued compression seal washers.
Do-overs
Manifolds where cleanings are attempted in-house by maintenance personnel who, for the sake of speed and dollars or a lack of experience, short cut the process by partial disassembly and cleaning or failure to assemble the manifold correctly. It only takes a small mistake—such as a bolt not properly torqued or a probe skirt not fully seated—to create clearance, allowing a system to leak.
Cracked Tooling
There are occasions where manifolds, probes, sprues, cross-over bars or bridges develop small fractures than turn into major cracks under injection pressure.
Bad Design
When shopping for a hot runner system, it would be great to inspect one after a few million cycles, but you don’t see these at trade shows. Too bad.
Suffice to say that hot runner manifolds, with the obvious advantage to reduce production costs through faster cycles, less waste (no runners), etc. and better quality parts also have the capability to be major headaches requiring high labor hours and expensive replacement parts should it ever leak.
When they do leak, experience and skilled techniques should never be compromised for the sake of a quick turnaround. For the only thing that will draw white shirts into the toolroom faster than a leaking manifold is one that leaks immediately after a rebuild.
Cleaning In-House
The attraction to cleaning an encapsulated system in-house versus sending it out is based on typical concerns (i.e., turnaround time/lost production, costs and manpower availability).
An experienced technician can chip, clean, partially rewire and reassemble a 16-cavity valve gate manifold of average complexity (cap mold) completely flashed with PEs, PP, PS, ABS and others in approximately 30 hours provided they have a heat gun, an ultrasonic cleaning tank, appropriate music and lots of coffee.
Multiply these hours by your fringed labor costs and possibly a couple of replacement heaters or thermocouples and you can easily have $1,500.00 to $2,000.00 invested. But the bigger advantage is that if you have experienced techs around the clock, then you only lose about a day and a half of production. This is roughly the time it takes to crate and ship the mold to an outside vender, and the number one reason why many cleanings are first attempted in-house.
Cleaning Outside
The outside vendor will not bother with the chip and rip, but instead place the manifold in a high temp oven to burn/remove the plastic from the manifold and components. The tooling emerges from the ovens/procedyne sand bath super clean with no plastic residue to throw off stacking measurements.
This method is less damaging (dings and burrs), and you get the added benefit of having the manifold, cross-overs (bridges) and probe bodies and sprues cleaned internally as well as the outside. Some vendors also have the capability to check tooling for small cracks with digital imaging.
Having an outside vendor handle this job also shifts the burden of accountability squarely to the shoulders of the vendor, for once they disassemble, clean and repair it, it’s their puppy now.
Outsourcing Considerations
In-house experience
- If you don’t have personnel with hot runner experience, then it’s a no-brainer. Training a new or inexperienced tech in manifold maintenance should not take place on a (badly needed) encapsulated system, unless they are “helping” a capable tech with the job. Minimizing component damage when chipping plastic requires at least an idea of where the wires, heater and thermocouple connections are located within the system and how they are routed. Discovering this by simply whacking the chisel with a large hammer to “see what you hit” is not advisable.
- The best training scenario would be on a mold/manifold that is not flashed, in the middle of a critical production run, and that only requires routine maintenance or maybe a heater or thermocouple replaced.
Costs and turnaround time
- Since the thermocouples and possibly some of the heaters will be cooked by the vendor during the meltdown, tooling cost along with rewire/assembly time is increased.
- So unless the vendor is right next door, shipping and turnaround time is at the least doubled. So now the job costs $3,000.00 to $4,000.00 and turnaround time is four to five days minimum.
In-house availability of replacement tooling
- A common mistake is to begin the chip and rip without first verifying that you have several spare heaters, thermocouples, seals and bolts on hand. Verify the part numbers are correct and actually get the parts out of stock before you begin. I never trust storeroom (BOH) balance on hand figures.
- If you have to stop and order parts, or send parts out for repair in the middle of a cleaning, then all of your hustle has been for nothing because it is now a week-long turnaround.
Current production requirement
- Double check what you really need to have and how fast before you begin a frantic teardown. If a couple of days won’t matter that, much along with another couple of thousand dollars, then it’s a good idea to send it out for a thorough going over, especially if you are not sure why the manifold flashed in the first place.
Justification for an in-house repair includes flashed for a known reason; mold history shows manifold not a problem child; turnaround time is critical; tooling in-house; and, manpower available and at least one employee has experience on the manifold.
Justification for out-of-house repair is basically the opposite of above: longer turnaround time not a back breaker; flash reason unknown; manifold has lots of cycles; no/little maintenance, which can equate to a necessary stack up inspection of component tolerances; cost not an issue (kind of); other shop issues limit available manpower; and, limited replacement parts.
Check Out Your Vendor
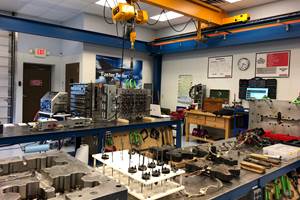
If sending the work out, always visit the vendor first to get a feel for hands-on manifold repair experience. Take a walk around the benches and observe if measuring (stacking) tools are mixed in with cleaning tools. Then look at wired-up manifolds. Are the wires numbered and routed cleanly with appropriate length or is excess wire rolled up and shoved into the electric box? Are there an appropriate number of clips (every 6 inches) holding the wires in the channels?
These could be indications of inexperience at the bench and a confused maintenance plan where the clean/rebuild process is unorganized and prone to mistakes. It pays to check out your vendor.
Next: The steps of a typical clean and rebuild of an encapsulated system
Related Content
What You Need to Know About Hot Runner Systems and How to Optimize Their Performance
How to make the most out of the hot runner design, function and performance.
Read MoreLine Width vs. Depth Ratio in Laser Engraving
A laser does not produce 90-degree sidewalls. It requires a certain amount of draft in order to produce the required pattern.
Read MoreFour Micro Tooling Considerations
Issues involving gating, ejection, mold splits and direction of pull are of special concern when it comes to micro tooling.
Read MoreHands-on Workshop Teaches Mold Maintenance Process
Intensive workshop teaches the process of mold maintenance to help put an end to the firefighting culture of many toolrooms.
Read MoreRead Next
Cleaning a Flashed Hot Manifold, Part Three
Cleaning nozzles and manifolds, electrical boxes, assembly and final check.
Read MoreReasons to Use Fiber Lasers for Mold Cleaning
Fiber lasers offer a simplicity, speed, control and portability, minimizing mold cleaning risks.
Read More


.jpg;maxWidth=300;quality=90)


