Laser Scanner Helps Mold Shop Attract New Business
For one moldmaker, laser scanning has provided a major addition to their capabilities and has helped the company win new jobs.
Using a laser scanner instead of a digitizer mounted on a machining center for reverse engineering (RE) has helped a mold builder attract new business and increase the proportion of time that machine tools can be used for their intended purpose. RE is a major task and revenue opportunity for nearly every mold and pattern builder because customers often ask them to build a mold from a part or a mold for which a current CAD file doesn't exist.
At Nielsen Enterprises—a mold, pattern, prototype and impeller manufacturer in St. Paul, MN—the biggest problem with using a probe was that the need to collect large numbers of points in order to accurately define part geometry tied up machines for twelve to twenty-four hours.
Dave Nielsen, president of the company, heard about laser scanning, a new technology capable of scanning parts to a much higher level of resolution than is possible with a digital probe, producing a surface model ready for machining. "Our SURVEYOR PS-1100 laser scanner from Laser Design (Minneapolis, MN) provides a much more accurate geometric model in about one-tenth the time required with a digitizer probe," Nielsen says. "We have attracted more RE work, which often leads to machining jobs, and freeing up our machine tools to focus on cutting chips."
In the mid-1970s Tom and Dave Nielsen had a vision to create a pattern and mold shop based on providing the highest level of quality at the lowest possible cost with on-time delivery using state of the art equipment. In 1979, they founded Nielsen Enterprises and began turning their vision into reality. Today, the company has grown into a million dollar plus corporation and is a premier pattern, mold, impeller and prototype manufacturer. About fifteen years ago, the company purchased its first CNC mill, becoming one of the first pattern and mold shops to implement what was then a hot new technology. Nielsen Enterprises was one of the first manufacturing facilities capable of offering CNC milling and digitizing and also has become a leading distributor of SURFCAM CAD/CAM programming software.
Reverse Engineering Is a Critical Task
"RE or digitizing a physical part is a critical task for any mold and pattern shop," Nielsen says. "While nearly all of our customers would tell you that they design all of their parts on a CAD system, the reality isn't that simple. Many older parts were designed on a drafting board before the company started heavily using CAD and others were done on an older CAD system whose files had not been converted over to their new system. In many other cases, the parts, molds or patterns were originally designed on a CAD system, but changes were made by hand to the mold or pattern after the design was completed and the CAD file was never updated. Whatever the reason, our company, and every other mold shop, is continually asked to duplicate or RE parts. The need is so common that when we purchased our first CNC machines we were almost as excited about their RE potential as we were about milling. We purchased a probe and discovered that we could fairly easily set up the machines to generate an accurate point cloud. But over the years, we became less and less enthusiastic about this approach."
Nielsen explained that the number one problem was the amount of time required. It took about thirty minutes to set up the machine and from that point it worked without a lot of attention. However, parts have become so complex today that it takes at least tens of thousands, sometimes even hundreds of thousands, of points to create an accurate 3-D model. Getting this many points took at least twelve to twenty-four hours on a typical machining center and the margins on RE were lower so he preferred to have the machines do what they were designed to do. A digitizer probe also was limited in the geometries that it could accurately RE. Some parts had undercuts or indentations that were too small for the probe to enter. There also were some parts with 3-D contours that were so complicated that it would take too long to accurately digitize point by point.
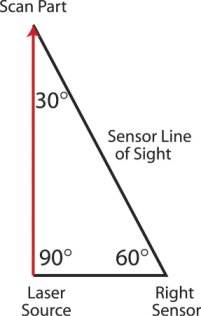
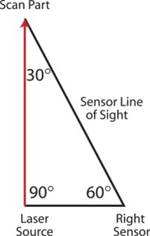
For some time Nielsen had been looking for a better way to do this job. He had considered a number of different options over the years, but nothing ever offered the potential of laser scanning. Laser scanning systems work by projecting laser light, onto surfaces while cameras continuously triangulate the changing distance and profile of the laser as it sweeps along, enabling the object to be accurately replicated. Laser scanners are able to quickly measure large parts while generating far greater numbers of data points than probes without the need for templates or fixtures. Since there is no probe on a laser scanner that must physically touch the object, the problems of depressing soft objects and measuring small cavities are eliminated.
Nielsen evaluated machines from several different manufacturers and selected the SURVEYOR PS-1100 model. The SURVEYOR PS-1100 is an economical, portable laser scanner that enables users to quickly scan complex shapes and geometric data from any object and create a 3-D digital model. It only weighs 4.5 pounds, is about 9.6" by 9.8" by 3.1" in size and only requires two cable connections to a laptop computer, making it easy to carry it anywhere in the shop or even to a customer's facility.
Jobs Are Faster and More Accurate
Nielsen says that the new laser scanner has greatly increased the company's RE capabilities. "First of all, laser scanning takes far less time than a digitizer because, instead of collecting points one by one, the scanner picks up thousands every second. It's like the difference between painting with a spray gun and a nailbrush. Instead of spending days to RE a complicated part, we can now do it in an hour or two. Second, this method produces a far more detailed and accurate point cloud, typically containing two to five million points that can be used to machine even the most complicated part to demanding tolerances. Laser scanning also does away with other limitations of a digitizer probe such as its inability to accurately define small features or to measure soft parts." Nielsen continues, "Finally, the software provided with the scanner greatly simplifies the process of moving from point cloud to CAD model, making it possible in minimal time to generate a CAD file that often amazes the customer by how faithfully it duplicates their original part or mold." Operators use Geomagic, a software package that came with the scanner, to convert the point cloud into a STL format surface file. Then they import this file into Surfcam CNC programming software and perform any additional work that might be required, such as designing a mold around the part geometry.
Nielsen says that the new laser scanner has helped the company substantially increase RE quality while reducing turnaround time and increasing uptime of machine tools that are now free from lengthy digitizing jobs. "We can now RE parts that would have been difficult or impossible on a machining center," he says. "Anything with a weird shape or intricate design can be done much more quickly and accurately on the laser scanner. Our customers know that we can RE their most complex prototypes, patterns and molds without any difficulty. In most cases, we also design and build a mold to produce the part, make a pattern or build a number of pieces of the part. Our RE capabilities, which are now well above those of most of our competitors, have also helped us to win new machining jobs."
For example, one customer sent them an intricate woodcarving with undercuts that they never could have duplicated using a digitizer probe. With the laser scanner, it was a piece of cake to produce a surface model and build the handful of parts needed. In another case, their ability to duplicate a very intricate vane shape for a water pump helped them get a machining job.
All in all, laser scanning has provided a major addition to their capabilities and has helped the company win new jobs while keeping their machine tools cutting chips instead of digitizing parts.
Related Content
Navigating Economic Resilience and Consumer Trends
Consumer behavior provides mold builders insight into the evolving market dynamics of goods and services that helps strategic planning.
Read MoreDomestic Collaboration Yields Efficiency and Budget Gains For Innovative Tooling Project
Pyramid Molding Group and Lettuce Grow partner to develop optimal tooling for a compact Hydroponic Farmstand.
Read MoreHow Hybrid Tooling Accelerates Product Development, Sustainability for PepsiCo
The consumer products giant used to wait weeks and spend thousands on each iteration of a prototype blow mold. Now, new blow molds are available in days and cost just a few hundred dollars.
Read MoreHammonton Mold, ADOP France Forge Strategic Partnership in Injection Blow Moldmaking
Hammonton Mold Inc., a leading full-service mold shop based in New Jersey specializing in injection blow molds (IBM), proudly announces its official partnership with ADOP France, a prominent IBM mold manufacturer based in Normandy, France.
Read MoreRead Next
Developing Generalized RE Methodologies for Moldmaking
The use of contact scanning and laser scanning systems can aid moldmakers with reverse engineering due to their speed, accuracy and low cost.
Read MoreReasons to Use Fiber Lasers for Mold Cleaning
Fiber lasers offer a simplicity, speed, control and portability, minimizing mold cleaning risks.
Read MoreHow to Use Continuing Education to Remain Competitive in Moldmaking
Continued training helps moldmakers make tooling decisions and properly use the latest cutting tool to efficiently machine high-quality molds.
Read More


.jpg;maxWidth=300;quality=90)


