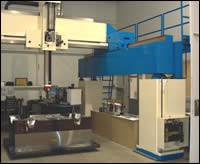
Applying Continual Process Improvement with the Right CMM/EDM Setup
Shifting coordinate-acquisition from EDM to CMM yields dramatic productivity gains.
Founded in 1977, Roembke Mfg. & Design, Inc. is one of North America’s leading designers and manufacturers of tooling used primarily for high-precision molding of rubber materials ranging from LSR to high-consistency elastomers such as EPDM, FKM and Vamac. The parts processed in these molds are used mainly in automotive and other tightly-specified applications such as medical manufacturing.
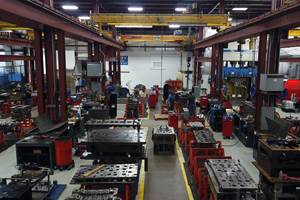
Family-owned, with more than 60 employees and six manufacturing cells, the ISO 9001-certified company occupies more than 62,000 square feet in modern facilities located in the Ossian Industrial Park (owning land able to accommodate a doubling in facility size) about 15 miles south of Fort Wayne, IN.
The driver behind the design of most Roembke Mfg. molds—whether transfer flashless molds, split ring molds, hot and cold transfer pots, cold runner decks or liquid injection molds incorporating valve gates—is precise flash control.
According to Executive Vice President Gregory J. Roembke, “Customer requirements can vary from having extensions on the parts that will deflash easily and consistently, to parts with only a 0.002" maximum extension as they come directly from the mold.
“Flash control is critical to part quality, especially for parts with fragile wall thickness or delicate edges that can be damaged by aggressive deflashing. Flash control allows many parts to be shipped directly after molding, eliminating the time and cost of secondary operations.”
The degree of design freedom required by the complex, interior shapes often found in Roembke’s molds makes these features virtually impossible to achieve using conventional machining processes, which employ a rotating tool or workpiece.
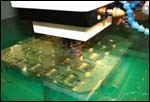
As a result, both wire and sinker types EDMs are an indispensable part of the company’s operations. The number of components EDM’d per mold varies greatly since cavities-per-mold can run from one to as many as 2,500. Material is typically 440 mild stainless steel heat treated to 58-60 Rockwell.
Eight years ago the decision was made to bring most EDM work in-house in order to achieve the tightest possible control over the process. And, ever since then, EDM has been the subject of Roembke’s Continual Process Improvement (CPI) initiative.
EDM Earns a Grade of “Needs Improvement” at First
The initial out-of-the-box EDM solution did not have the productivity that Roembke knew was possible. According to Roembke Technology Development Director Scott Shutt, “When we first started in-house EDM processing, there were some very apparent snags. First, the EDM came equipped with fixed electromagnetic fixturing. In operation, the electromagnet generated heat, heating up the dielectric fluid and causing growth in the fixture, and ultimately, in the parts. This threw off our very tight tolerances (some parts are held to ±.0001).”
Additionally, it was immediately apparent that overall, the process was moving extremely slowly. Shutt observes, “Compared to the machine tools we were accustomed to, the EDM was just creeping. The actual burning process was very efficient, but watching the EDM slowly probe to locate each workpiece before each burn had us looking at each other saying, bummer. The owner was saying, OK guys, you can turn it up now!, but, of course, it was already going full speed.”
A second factor slowing the pace was the fact that the EDM was idle during the electromagnetic fixture’s extended parts loading sequence. This sequence involved draining the dielectric fluid, turning off the magnet, removing finished workpieces, cleaning the magnet, loading a new set of workpieces, filling the fluid and turning the magnet on again.
According to Roembke, “We’ve always been dedicated to driving waste out of processes wherever possible. And in the original EDM configuration, it was obvious that there was a huge waste of time-and-motion. We decided to apply our CPI process to see if we could do better.”
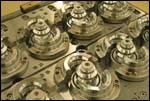
The problematic electromagnet was a relatively easy fix. According to Shutt, “We went to a permanent magnet instead of an electromagnet. We found a magnetic pallet-and-receiver system with the receiver bolted solid to the EDM and capable of repeating to 80 millionths. This setup gave us a couple of advantages. First, we eliminated the tolerance headaches associated with heat. Second, the pallet was now portable. This meant we could load pallets of workpieces off-line. This got the CPI group thinking, if off-line loading of workpieces could be integrated with off-line acquisition of centerpoints, then nothing would prevent the EDM from burning continually, pallet after pallet, without stopping to pick up locations. Throughput would be where we wanted it.”
CMM Enables Separation of Functions to Free up the EDM
What was needed was a separate machine, dedicated to acquiring workpiece centers—a pallet-load at a time—and with the ability to communicate location data back to the EDM.
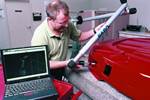
Shutt explains, “Our eureka moment came when we realized that a coordinate measuring machine (CMM) uses a probe just like an EDM, except much faster, while being easier to program. Since both CMM and EDM are CNC devices, we realized it should be possible to get them talking to each other to transfer locations. We just needed to be sure we could get each machine to index the same pallets with sufficient accuracy and repeatability.”
Next, Roembke confirmed with the EDM manufacturer that their goals were achievable. The feasibility of the concept was confirmed, indicating that others had experienced success with similar configurations. Now Roembke had to find the right CMM.
Shop Required a Production Floor CMM Plus Software
Describing their CMM selection strategy, Roembke Vice President of Customer Development Troy K. Smith explains, “We spoke with a short list of major CMM makers with a focus on three issues:
- We needed a machine able to run 24/7 on the shop floor as opposed to in an isolated cleanroom or lab.
- We needed software to tie things together.
- We needed strong product support.”
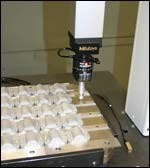
All this pointed to a CMM from Mitutoyo America Corp. that had the accuracy, speed and reputation for reliability, which came with a standard parts program.
Middle link software was used to translate the parts program in language under-stood by the EDM. Use of the middle link software; however, resulted in programming redundancies, which Roembke ultimately eliminated by writing a sub-routine within the standard parts program, enabling it to communicate directly with the EDM.
The next productivity-enhancement initiative was to switch from the standard parts program to graphically-driven CMM software able to directly interface with common CAD formats such as ACIS, CATIA, ProEngineer, SDRC and Unigraphics.
The intent was to pull 3-D models developed in CAD programming directly into the CMM part program utilizing native CAD tools. This would reduce programming time and the chance for error.
Accomplish this, Roembke reasoned, and the CMM would provide benefits beyond EDM setup, also providing centerpoint data to their laser and hard mill. This approach would also mean the CMM could easily be incorporated into first-parts checking, in-process checking and through final inspections after heat treat and chrome. Significant time would be saved while process capability and customer documentation would benefit.
Shutt comments, “Used in all these ways, the CMM got to be too busy a machine, so we moved it out of the EDM room to the machining floor and acquired a new, faster, Mitutoyo CMM dedicated to only EDM operations.”
It was then determined that a software package with a perfect blend of 3-D measuring and CAD/CAM technology designed for optimum CMM measuring for both global CMM users and first time operators would provide the necessary capabilities.
Shutt elaborates, “While this new soft-ware package is real intuitive and we quickly became fluent with it, our objective for multiple CMM applications resulted in some pretty challenging programming. But the supplier’s full support and technical people were always available to help and provide advanced training.”
Shutt quantifies the productivity improvement resulting from the current CMM/EDM setup. He says, “As a typical example, a run of 50 mold inserts that would have taken two-and-a-half hours when using the EDM’s on-board probe to pick-up centers now takes only 20 minutes using the CMM.”
Related Content
How to Harness 3D Scanning for Mold Tool Repairs
3D scanning supports the repair of molds with no history, drawings or design files.
Read MoreIndiana Mold Builder Decatur Mold Offers a History of Grit and a Future of Innovation
Decatur Mold Tool and Engineering Inc. serves as a tooling tour guide, helping busy tooling managers reduce uncertainty, lighten workload.
Read MoreQuality Control Technologies Geared for Injection Molds
These latest technology solutions, from noncontact gages to test probes and automated inspection systems, aim to minimize production risks and ensure optimal quality control practices for moldmaking.
Read MoreProducts and Services for Multiple Moldmaking Needs
New year, new technology roundup! Featured here is a collection of product offerings, from profile milling cutters to industry-specific CAD/CAM software to innovative hot work tool steels.
Read MoreRead Next
Take Measurement to the Tool
A portable CAM measurement system cuts inspection times by 84 percent, improves accuracy and conducts tooling capability studies.
Read MoreThe Benefits of a Remanufactured CMM in Your Shop
The only way to economically meet the need for a large gantry CMM with an uncommon measuring envelope was to find an existing one, rebuild it and remanufacture it.
Read MoreHow to Use Continuing Education to Remain Competitive in Moldmaking
Continued training helps moldmakers make tooling decisions and properly use the latest cutting tool to efficiently machine high-quality molds.
Read More




.jpg;maxWidth=300;quality=90)


