Texturing - The Finishing Step in the Mold Building Process
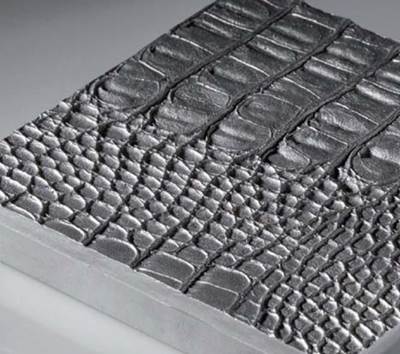
The ability to increase the visual appeal of the part, disguise molding imperfections and produce a more natural appearance make the art of texturing an important step in the production of desirable parts.
If you think of texturing as the paint on a finished car, you can then draw the comparison that the paint job is only as good as the bodywork beneath the paint. And so, texturing can be optimized by the quality of the surface to be textured.
The most prevalent challenge in texturing is the presence of marks on the part created by welds. Although welding is a necessary evil when it comes to moldmaking, it remains a texture's nemesis.
However, following proper welding procedures and keeping in mind that the mold will be textured later can eliminate future headaches. The added cost or loss of time at this point in the mold's construction will lead to better results in the end.
Heating the mold before welding, using parent material and annealing after welding are all valuable processes that should be used to achieve proper welding. When a surface is welded, the difference in metal hardness results in a difference in texture depth in the welded area. The chemicals used for etching the surface recognize the variable hardness across the welded area and then treat each area differently. This creates a blemish or flaw in the finished texture. To worsen the problem, parent materials are not used as the welding material.
Stainless weld is popular because it flows well and does not leave pits, but for texturing nothing could be worse. Stainless itself is difficult to texture due to its natural resistance to corrosion.
Another texturing problem is the EDM process, which creates a scale with uneven hardness across its surface - where the electrode comes closer to the surface, the hardness is greater and vice versa.
During the process, contact between the electrode and the surface will often result in a mark on the surface, which resembles a weld. When removing EDM scale, it is common to leave much of it in the corners. This results in an uneven texture finish. In polishing there is a saying, "Polish the corners and the middle will take care of itself." This holds true with the removal of EDM scale. When an EDM surface is exposed to the texturing process it tends to begin etching unevenly and many depths and untextured areas are created. A mixture of copper sulfate and water brushed over the mold's surface will expose remaining EDM scale and clearly identify areas that need more polishing.
An additional challenge is the common belief that a deep texture will cover or hide scratches or unfinished polishing, when in fact, texturing may highlight scratches and polishing marks. For this reason, polishing the surface according to the requirements for the texture to be applied is highly recommended. Many of the textures commonly used in the industry today are capable of hiding surface flaws, but they still require an evenly polished beginning surface. A 320-emery surface would be sufficient for most of the texturing performed, but communicating with your texturing house before completion is always recommended.
Work-hardened surfaces are yet another problem for the texturing process which are caused by increased cutter speed or increased tool dwell time in corners or a particular area. Using different materials in various areas of the same project - such as H13 inserts in a P20 block - also leads to visual differences in the texture finish.
With all of the processes involved in the manufacturing of a quality mold and the possible engineering changes and speed requirements related to our industry, it is likely that the mold shop will have some or all of the problems listed here. With help from a texturing company during the construction of a mold, you can achieve better results with fewer hidden surprises at the crucial first article stage in the process.
The ability to increase the visual appeal of the part, disguise molding imperfections and produce a more natural appearance make the art of texturing an important step in the production of desirable parts. Through careful thought, design and proper manufacturing procedures, texturing is the finishing step in the mold building process.
Related Content
What Is Scientific Maintenance? Part 1
Part one of this three-part series explains how to create a scientific maintenance plan based on a toolroom’s current data collection and usage.
Read MoreLaser Welding Versus Micro Welding
The latest battle in finely detailed restoration/repair of mold materials.
Read MoreHands-on Workshop Teaches Mold Maintenance Process
Intensive workshop teaches the process of mold maintenance to help put an end to the firefighting culture of many toolrooms.
Read MoreMachine Hammer Peening Automates Mold Polishing
A polishing automation solution eliminates hand work, accelerates milling operations and controls surface geometries.
Read MoreRead Next
Surface Texturing with Laser Ablation
Much of a product’s appeal to the consumer has to do with its look and feel—literally, the texture of its visible surface.
Read MoreReasons to Use Fiber Lasers for Mold Cleaning
Fiber lasers offer a simplicity, speed, control and portability, minimizing mold cleaning risks.
Read MoreHow to Use Continuing Education to Remain Competitive in Moldmaking
Continued training helps moldmakers make tooling decisions and properly use the latest cutting tool to efficiently machine high-quality molds.
Read More


.jpg;maxWidth=300;quality=90)





.jpg;maxWidth=970;quality=90)