Subtract Damage to Add Value
The toolholder/spindle interface and its impact on the high-speed revolution.
Offshore competition. Outsourcing. China. Subsidies. All scary words that are bandied about quite freely in our industry. Fortunately, they are only words. Most often, the true obstacle in the path to our success is of our own making, or at best, our own neglect.
In order to increase our profits and bolster the success of our enterprise, we can either cut costs or raise prices. When raising the price is out of the question, how can we cut cost without negatively impacting our product?
Much has been written about efficiencies of labor, about reducing machining cycles, and increasing tooling life, but what about simple shop practices?
Toolholder/Spindle Interface
One of the things that has struck me over the last 10 years of visiting shops has been the almost universal disregard for the condition of the toolholder. Harsh, but true. Toolholders are left out on workbenches along with cutting tools, hand tools, fixture components, and all the other detritus of manufacturing. The result? Toolholders that are banged, bruised, nicked and chipped.
Working with many types of toolholders, this hasn’t presented too much of a problem. Now, in the first part of what is truly a new millennium in machining, it is a large and growing problem.
Think about it. When I first started working in the trades, somewhere around 30 years ago, 5,000 rpm was considered high-speed, a really radical number. Now I routinely tell customers that we consider “high-speed” to start around 20,000 rpm. Feedrates and stock removal rates continue to keep pace with spindle speeds, as cycle times are slashed and accuracy held to increasingly tight tolerances.
The driving force in this high-speed revolution has not been, as many suppose, high-speed spindles, but rather, the toolholder/spindle interface, which allows for higher speeds and better accuracy. You can turn an ANSI B5.50-94 30 taper toolholder at higher speeds, but the fact is, without extensive modifications, it’s difficult if not impossible to improve its accuracy and repeatability.
HSK Interface
The HSK interface is the one that seems to be most commonly used to push the envelope of speed and accuracy. This non-proprietary toolholder is capable of transmitting large amounts of torque very accurately, but to do so, it needs to be properly cared for.
The taper diameter tolerance of an HSK toolholder is measured in microns, and it doesn’t take much of a bump against a tee-nut to make a dent or raise a burr of more than a few microns. Once that happens, the toolholder no longer functions as it should.
Machine designers, spindle designers, programmers and process engineers all use basic knowledge about the performance capabilities of toolholders to optimize the performance of any given machine tool. When the toolholder is used for any period of time, it will inevitably degrade. As it does, the performance of the machine tool will as well.
How to Add Value
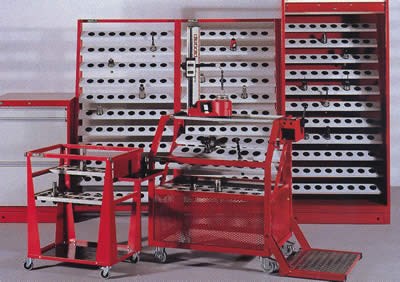
This is our chance to add value to our product by subtracting damage to the toolholders used. Simple things—such as cleaning the tapers and bores of HSK tooling, proper assembly techniques and proper storage equipment—can go a long way toward eliminating taper damage and ensuring that your tooling can deliver all the performance it’s capable of.
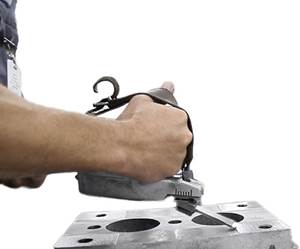
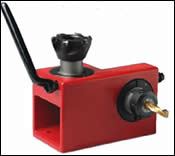
- When assembling tooling into toolholders, use an assembly fixture, not a vise or a spindle (see Figure 1).
- Don’t store toolholders on a bench or in an open factory environment where they will get covered in oil-mist that attracts damaging particles.
- Train and encourage your machinists and tool crib people to handle and clean HSK toolholders as the precision parts that they are.
- Use purpose-built carts to transport tooling between crib areas and the machine itself.
- Restrict access to toolholders and com-ponents to people who actually need to work with them.
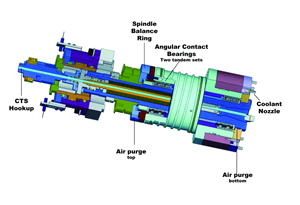
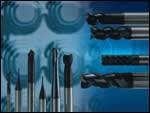
All simple, basic steps (see Figure 2).
Once the storage issues are settled, it’s time to take a look at what you will be storing. As I noted above, the tolerancing on an HSK toolholder is very tight indeed. Ask yourself, honestly, if your shop could hold a tolerance in the range of four microns, or one-and-a-half ten-thousandths of an inch. This, not just in one point, but along the length of a taper. Right. Not many other shops can either!
That said, every time you buy tooling that doesn’t conform to the HSK standards, it costs you money. Nonconforming tooling may have radically different performance characteristics than tooling that does conform, and that could have serious implications for your machine, your spindle and your finished parts.
It used to be a truism that the end user couldn’t afford to buy gauging to check toolholders. After all, why should they? 7/24-style holders were relatively loosely toleranced, and so were the receivers. As long as it mated, and the parts looked okay, everything was good. Now, it’s close to a truism that if you are using HSK tooling, you can’t afford to not have your own gauging. There are many fine, high quality toolholders on the market today. Conversely, there is a lot of junk out there as well. It’s impossible to tell by looking at it which is which.
To protect yourself, to protect your investment in machinery and tooling, and to add value to your products by maximizing the realized benefits of the HSK system, check your toolholders with certified, traceable gauging to verify that it is indeed what the salesman says it is.
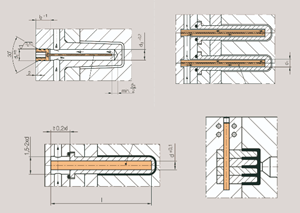
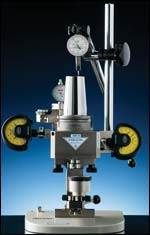
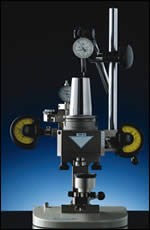
This gauging, which was once beyond the means of many shops, is now avail-able in many different configurations, and at a price that makes sense. Whatever type of gauging you buy, it’s important to remember that without traceability, the gauge is worthless. You have to be able to see what the actual gauge master was checked against, who said it measures what, and when (see Figure 3).
Summary
It seems to be a lot of trouble and expense, but looked at against the value you add to your product by using quality tooling in your production, and by maintaining that tooling at optimal condition, it really isn’t much. Today, a difference of a few percent in the bottom line can make or break a shop, and these small things just might give you that few last percentage points you need.
Related Content
The Benefits of Hand Scraping
Accuracy and flatness are two benefits of hand scraping that help improve machine loop stiffness, workpiece surface finish and component geometry.
Read MoreMachining Center Spindles: What You Need to Know
Why and how to research spindle technology before purchasing a machining center.
Read MoreTreatment and Disposal of Used Metalworking Fluids
With greater emphasis on fluid longevity and fluid recycling, it is important to remember that water-based metalworking fluids are “consumable” and have a finite life.
Read MoreFundamentals of Designing the Optimal Cooling System
The right mold components can help improve mold cooling and thereby produce higher-quality parts.
Read MoreRead Next
High-Speed Collet Toolholder Or Shrink-Fit Tooling
An in-depth look at the benefits of a quality high-speed collet toolholder reveals advantages over shrink-fit tooling for most high-speed applications.
Read MorePart One of a Three-Part Series Five Steps for Improving Your Shop’s Maximum Productivity
Learn how to evaluate your shop’s productivity and begin increasing it by considering the variables of implementing hard milling and high-speed machining.
Read MoreHSK Fact and Fiction
Get the facts on what to consider when purchasing and using HSK tooling.
Read More




.png;maxWidth=300;quality=90)
