Scrap the Tap?
Thread milling is often faster and more accurate than tapping in tough mold applications.
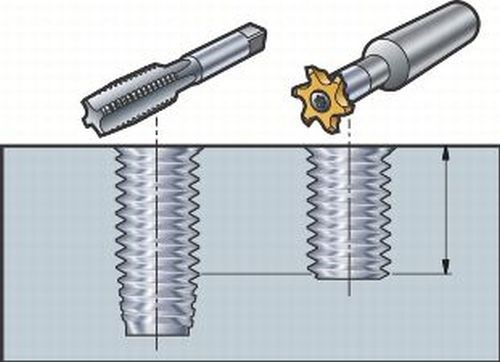
In order to cut a series of threaded holes on a CNC machining center, many moldmakers reach for taps. They’re inexpensive and easy to program, and their performance is fairly predictable. Unfortunately, taps have some shortcomings as well, especially when used in tough materials such as A6 or prehardened H13 tool steels. Anyone who has tried to remove one from those materials will testify that taps are prone to breakage, and, in general, they are a real challenge to extract. Also, when threaded holes end up undersized, the only way to salvage them is often a rush order using H5- or H7-sized taps and some tedious rework. And pipe threads? That’s a whole different story. There has to be a better way.
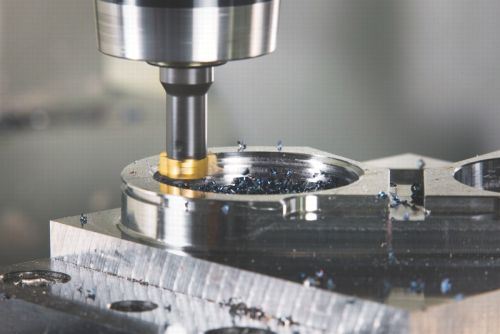
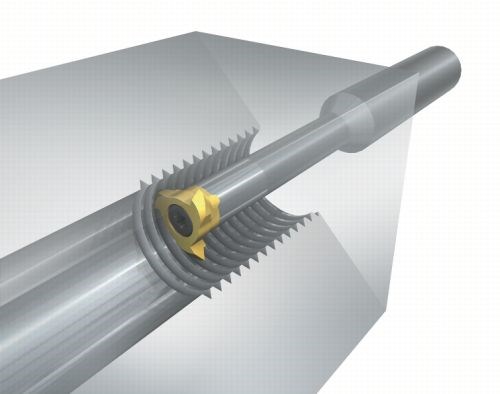
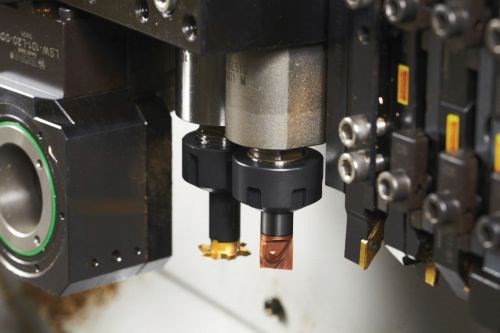
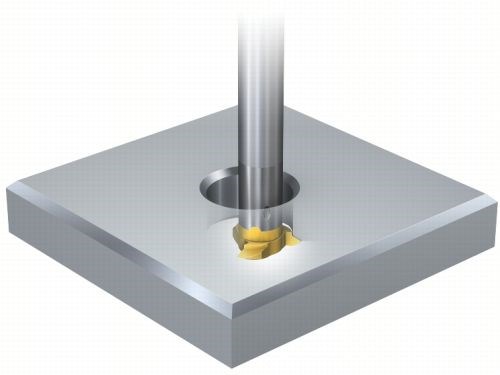
As it turns out, there is a better way. Solid carbide thread mills are available to machine all but the smallest of holes, while indexable thread mills can cover everything from finger-sized threaded holes to ones large enough to swallow a baby T-Rex. Thread mills are far more flexible than taps (a simple offset is all it takes to compensate for tool wear) and can be run at spindle speeds that would burn up even the most intrepid of taps. And since they are made from carbide, they will last longer and handle difficult materials much better than high-speed steel taps. True, thread mills cost more. A moldmaker who is used to spending $5 for a commodity 1/4-20 tap might balk at a thread mill’s 10- to 20–times-higher price tag. He or she can take solace in knowing, however, that the same 20-pitch thread mill can be used to cut 7/16-20 and 1/2-20 threads as well, and can do so with less spindle torque than a tap of equivalent size.
Doing the Dance
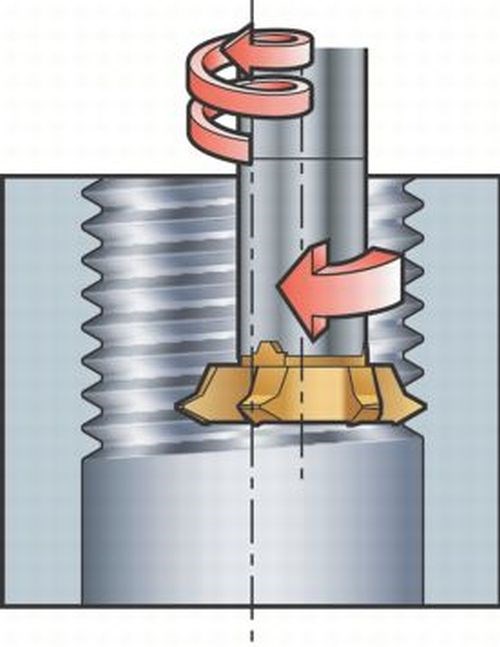
If you’re new to thread milling, some application advice is in order, along with information about a few basic requirements. First off, you need a machine capable of helical interpolation. If you are standing in front of a knee mill right now, you might as well just get back to work as usual. The good news is that almost any CNC machining center these days can do the thread-milling dance, which requires nothing more than programming a series of arcs in the X and Y axes while simultaneously moving the tool down (or up) in the Z axis. To a novice, this is the scary part of thread milling, and it is something even a few old-timers get wrong.
In soft materials, programming a thread mill is fairly straightforward—a quick ramp out to the thread diameter, interpolate 360 degrees (don’t forget to move in the Z axis), move back towards center enough to clear the tool, and disengage. However, for mold steels and super alloys, where shock to the tool should be avoided, a kinder, gentler approach is recommended. In these cases, the tool should be slowly spiraled out to the thread’s major diameter in a series of increasingly larger arcs, taking an additional one-fourth of the thread’s height every 90 degrees. Full depth of cut isn’t reached until a 360-degree circle has been made and then another complete revolution is taken. Through it all, the tool should advance proportionately in the Z axis (on a 1/4-20 thread, for example), and linear movement is 0.050 inch per revolution. The result is a clean and perfectly round threaded hole, and tools that last much longer due to lower cutting forces and reduced vibration.
This ability to make multiple passes is another cool advantage thread mills offer over taps. If size and finish are critical, a spring pass can be used to further clean up the thread after the first full-depth circle is completed. For especially difficult materials, one thread mill can be used to rough the hole and a second one to finish it. Granted, this requires careful alignment of the two tools, but for demanding materials or molds with lots of threaded holes, it might be just the ticket for predictable thread making.
If all these intersecting arcs and spirals make your head spin, don’t worry—most CAM systems make short work of such tool paths, or a custom macro program might be used if your machine is so equipped. In either case, the complexities of thread-mill programming shouldn’t scare anyone away from a process that saves time and improves part quality.
Breaking the Rules
Every CNC machinist should know that climb milling improves tool life and surface finish. When cutting a right-hand internal thread, this means moving the tool “down” or into the hole. But not so fast. Cutting tests suggest that up to three times as many holes can be threaded in Inconel 718 and other difficult materials by changing directions or “up-milling” the threaded hole. Another surprising bit of advice relates to cutting fluid—in many cases, tool life is greatly improved by the operator turning off the pump and cutting dry, using an air blast to blow chips out of the hole where necessary.
Another consideration related to thread milling is feed rate. In a typical thread-milling application, especially on threads ½ inch and smaller, the cutter may consume a relatively large percentage of the hole diameter. This means the center line of the thread mill (the point at which most CNC machine tools calculate federate) describes a much smaller circle than do its outermost edges when interpolating the hole, generating a “peripheral feed rate” that is much faster than intended. This phenomenon is true for any milling application but becomes especially relevant with thread milling due to higher tooling costs and greater concerns over deviation from intended thread form. The moral of the story is to be aware of this phenomenon and always calculate the programmed feed rate based on the tool’s diameter, not its center line.
The potential for form error is another thing to be aware of when thread milling. To achieve the most rigid setup, most machinists are inclined to use the largest diameter tool possible. Be aware that this may cause errors in the thread form. For example, when using a 21.7-mm-diameter tool to cut a 30-by-3-mm thread, the profile deviation at the thread root measures 0.07 mm (0.0027 inch). By using an 11.7-mm tool to cut the same thread, deviation is reduced to just 0.01 mm (0.0004 inch). For this reason, a cutter no larger than 70 percent of the hole size is recommended.
Everything discussed here relates to internal threads, but nobody’s stopping you from milling a threaded boss or other external feature. You basically would follow the same procedures, but in reverse, with a few feed and speed adjustments. This is just one more example of the versatility of thread milling—a process that reduces tool inventory, avoids the painful rework that comes with a broken tap and produces better threads. If you are looking to cut costs in moldmaking operations, give thread milling a try.
Related Content
Hands-on Workshop Teaches Mold Maintenance Process
Intensive workshop teaches the process of mold maintenance to help put an end to the firefighting culture of many toolrooms.
Read MoreMaintaining a Wire EDM Machine
To achieve the ultimate capability and level of productivity from your wire EDM on a consistent, repeatable and reliable basis, regular maintenance is a required task.
Read MoreThe Ins and Outs of Hot Runner Temperature Control
A training checklist that explains the why and how of proper hot runner temperature control and system management.
Read MoreThe Benefits of Hand Scraping
Accuracy and flatness are two benefits of hand scraping that help improve machine loop stiffness, workpiece surface finish and component geometry.
Read MoreRead Next
Are You a Moldmaker Considering 3D Printing? Consider the 3D Printing Workshop at NPE2024
Presentations will cover 3D printing for mold tooling, material innovation, product development, bridge production and full-scale, high-volume additive manufacturing.
Read MoreHow to Use Continuing Education to Remain Competitive in Moldmaking
Continued training helps moldmakers make tooling decisions and properly use the latest cutting tool to efficiently machine high-quality molds.
Read MoreReasons to Use Fiber Lasers for Mold Cleaning
Fiber lasers offer a simplicity, speed, control and portability, minimizing mold cleaning risks.
Read More


.png;maxWidth=300;quality=90)




.png;maxWidth=970;quality=90)