Reduce Tooling Costs and Time with Laser Scanning
Aircraft Technologies, Inc. (San Antonio, TX)—a leading manufacturer of toilets for corporate jets—saved $20,000 and four weeks in reduced tooling costs/time for a new model by utilizing NVision’s (Coppell, TX) laser scanning and engineering services.
By scanning an existing upper and lower bowl assembly and modifying the resulting CAD models to fit parts that we already had tooling for, we substantially reduced the tooling cost and got the product to market faster,” says Mark Riebesehl, Owner and Vice President of Operations for Aircraft Technologies. Aircraft Technologies Inc. provides single-source sanitary solutions for airframe manufacturers, completion centers and maintenance and repair facilities.
The company’s Series 90 externally serviced toilets are made of thermoformed Kydex and composites for a high strength-to-weight ratio. The user simply closes the cover for an automatic flush. The new variant of the Series 90 will be produced in volumes of about 70 per year for a corporate aircraft manufacturer. The main parts in the new design are the bowl cap, spray ring and upper and lower bowl assembly. The normal approach to tooling up for a new toilet would have required designing all four parts from scratch and then building a new thermoforming tool for each part. However, Riebesehl notes that an existing bowl cap and spray ring from one toilet and an existing upper and lower bowl from another toilet were all close to the new design and would work perfectly if modifications could be made to the upper and lower bowl to make them fit together.
“The upper and lower bowl were designed before we started using CAD so there was no model that we could modify,” Riebesehl explains. “I had heard about NVision’s laser scanning and decided to try reverse engineering the existing upper and lower bowl tooling. We hired NVision’s Engineering Service Division to scan the two parts and provide us with the CAD models. “The upper and lower bowl tooling was nearly irreplaceable so my partner and I flew to NVision’s facility in Dallas and stood there while they scanned the parts,” Riebesehl continues.
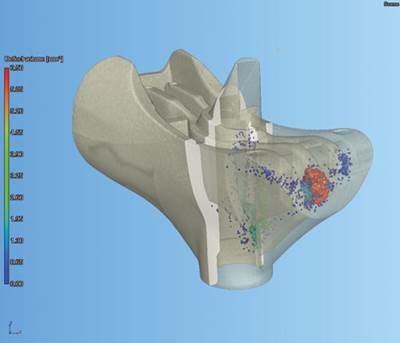
“NVision’s team worked quickly and efficiently and we flew back with the scan data the very same day. NVision then sent us the CAD surface models via FTP.” Laser scanning works by projecting a line of laser light onto the surfaces to be measured while a camera continuously triangulates the changing distance and profile of the laser line as it sweeps along, Riebesehl explains. “A computer translates the video image of the line into accurate 3-D coordinates of the object’s geometry,” he says. “NVision engineers then created point clouds consisting of millions of points and used the scan
data to create solid models and then output the IGES/STEP CAD surface models. This technology can be used to reverse engineer and create CAD files for parts that are lacking CAD information. The CAD files thus created can then be used to create the molds for production.
"When we got back we modified the CAD models to mate up with the existing bowl cap and spray ring,” Riebesehl adds. “Then we generated CNC programs and built the tooling on a machining center. Everything fit together perfectly, validating the accuracy of the laser scanning process. Using NVision’s scanning services saved us in the neighborhood of $20,000 from only having to build two tools instead of four and also helped us get the new product into production four weeks
earlier.
Related Content
What You Need to Know About Hot Runner Systems and How to Optimize Their Performance
How to make the most out of the hot runner design, function and performance.
Read MoreHands-on Workshop Teaches Mold Maintenance Process
Intensive workshop teaches the process of mold maintenance to help put an end to the firefighting culture of many toolrooms.
Read MoreWhat is Scientific Maintenance? Part 2
Part two of this three-part series explains specific data that toolrooms must collect, analyze and use to truly advance to a scientific maintenance culture where you can measure real data and drive decisions.
Read MoreRead Next
Using Industrial CT Scanning to Reduce Preproduction Inspection Costs
A look at the analyses that have been found to benefit major automakers, tiered suppliers and moldmakers.
Read MoreReasons to Use Fiber Lasers for Mold Cleaning
Fiber lasers offer a simplicity, speed, control and portability, minimizing mold cleaning risks.
Read MoreHow to Use Strategic Planning Tools, Data to Manage the Human Side of Business
Q&A with Marion Wells, MMT EAB member and founder of Human Asset Management.
Read More


.jpg;maxWidth=300;quality=90)


