Polishing Pointers - How to Cut Polishing Time By 30 Percent Forever
Ask any polisher what the hardest part of his/her job is and most will tell you the same thing - stoning.
Ask any polisher what the hardest part of his/her job is and most will tell you the same thing - stoning. It doesn't have to be that way. Here is a simple technique that not only makes stoning easier and more enjoyable, but actually cuts 30 percent off the time it takes to do a job - it's called "lightening up to a car wax finish."
Have you ever waxed your car? Do you take your cloth and grind it into the paint while you wax? Of course not! You massage the wax into the paint and yet when you visit shop after shop you see polishers doing the exact same thing - as they stone they take each successively fine grit stone and grind it into the steel - putting scratches in that they later have to go back and take out.
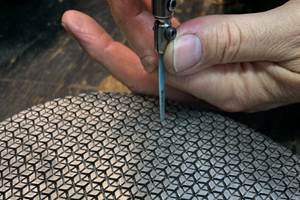
Here's how it should be done: Let's say you have a milled finish where the marks are .001 inch deep. From experience it's known that a 320 grit stone with a certain amount of downward pressure will produce scratches that are 75 percent as deep as the cutter marks, so this is the stone to choose. When pressing down hard enough to push the stone into the steel, you are actually grinding the stone into the steel, creating scratches. Once you have most of the cutter marks out using this rough stone approach, it is time to begin the lightening up method. With the same stone reduce the downward pressure and criss-cross over your previous marks, so you can read the previous scratches to know when they are out. Criss-crossing correctly and lightening up on the pressure with the same stone will enable you to take out your own stone marks. Why criss-crossing? Because no stone in the world is faster at taking out scratch marks than the same stone that put them there.
By carefully using lighter pressure the speed by which you achieve finer scratches increases. In the end your ultimate goal should be to reduce your downward pressure to the point where two things happen simultaneously. (1) The stone tops out, that is to say, you have reached the point where you can no longer squeeze any finer scratches out of the stone. You want your stone to top out before you go any further. (2) You end up getting a finish that runs about 200 to 300 grit finer than that at which the stone is rated. By lightening up on your downward pressure as you stone -to the point where at the end you are simply massaging the grit between the stone and the steel - and being careful at the end not to let the stone touch the steel, you actually end up with a scratch-free finish that is 200 to 300 grit finer than the stone with which you started and up to 30 percent faster than going the traditional slow grinding into the steel with every stone route. Once your 320 stone has topped out, move onto your next stone - usually a 600 grit - and by lightening up, you will quickly take that up to the 900 grit range where you easily begin brushing a scratch-free, super-fine, satin stone finish.
Many years were spent developing this technique and learning the range of capability of each of the 23 commonly used stones. The technique of lightening up to a car wax pressure will certainly produce time savings from the first job, but encourage your polishing department not to stop with its first results. An overall time savings of 30 percent is a realistic and achievable goal on almost all jobs. The rough stone time remains exactly the same, the original 320 grit stone time stays the same, but the time from 320 stoning to finish is greatly reduced and the finish is very often far superior to traditional methods.
By lightening up on the stoning pressure to the point where the fineness of the scratch tops out, the polisher will realize a 30 percent time savings over conventional methods and final diamond finishes will easily exceed the polisher's previous abilities.
Related Content
Laser Welding Versus Micro Welding
The latest battle in finely detailed restoration/repair of mold materials.
Read MoreHow to Polish Ribs for Proper Part Release
Using the right tools and abrasives is essential to polish a mold to the required final finish.
Read MoreHands-on Workshop Teaches Mold Maintenance Process
Intensive workshop teaches the process of mold maintenance to help put an end to the firefighting culture of many toolrooms.
Read MoreRead Next
Reasons to Use Fiber Lasers for Mold Cleaning
Fiber lasers offer a simplicity, speed, control and portability, minimizing mold cleaning risks.
Read MoreAre You a Moldmaker Considering 3D Printing? Consider the 3D Printing Workshop at NPE2024
Presentations will cover 3D printing for mold tooling, material innovation, product development, bridge production and full-scale, high-volume additive manufacturing.
Read MoreHow to Use Continuing Education to Remain Competitive in Moldmaking
Continued training helps moldmakers make tooling decisions and properly use the latest cutting tool to efficiently machine high-quality molds.
Read More


.jpg;maxWidth=300;quality=90)


