Across the Bench: One-Man Solution
A tool specifically designed to make tooling removal a quick, safe, one-person job helps moldmakers get jobs done quickly and efficiently.
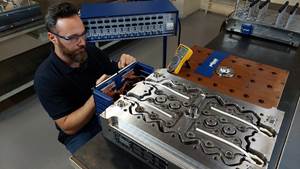
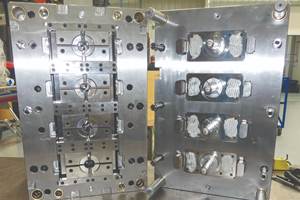
Several years ago when I was employed for another company, I was working second shift when a multicavity monster mold with way too many inserts landed on my bench. The inserts buried inside of this old forty-eight-cavity mold, required removal for routine cleaning. The standard technique was to use a sized nylon punch and a small brass hammer. Holding the punch with my left hand and the hammer with the other, the challenge was to tap the inserts out of the bore, just far enough to loosen them without anything falling onto the bench and risking damage. Since I was the only one working this shift and I could not find another set of hands, I could only attempt to tap out the inserts to a point that would allow me to lay the hammer down, push them out the rest of the way with the punch in my right hand while grabbing them with my left. Invariably, some of the inserts fell out. Lying the plate down was not an option because some of the inserts were loose enough to drop out, risking even more dings. I could have removed all of the loose ones, then lay the plate on parallels and punch out the rest, but I have never felt comfortable with that method either, since it is impossible to control tooling as it falls from the plate. I pondered the situation in front of me.
Tooling Solution
The solution was to design a tool that would allow me to remove tooling quickly and safely using only two hands. It would serve as both hammer and punch that would allow a controlled weight to be used with one hand and without fear of costly miss-hits.
The tool, a spring-load slide hammer, looks and works somewhat like a standard slide hammer, with a couple of important differences. The weight on most slide hammers is used to pull out pressed-in components. The weight on this hammer is used to push out components and the shaft is lightly spring loaded to return the sliding weight back to the end of the rod. This spring pressure also keeps the punch end of the tool in constant contact with the components being removed regardless of the speed used during repetitive blows. This eliminates rebounding and allows for better control of the exact amount of force, or length of stroke, needed to move the insert. Since the punch does not retract from the inserts during use, aiming the tool is not necessary, eliminating miss-hits.
In addition, for this particular application, I fashioned the lead end of the nylon punch to extend all the way through the three inserts, which kept them together during removal. After tapping them out, I placed each set of three inserts on a board that was outfitted with thirty-two wooden dowels that prevents the inserts from banging around during handling and cleaning.
Maintaining Control
Now, I have a spring-load slide hammer that allows complete control over where and how much force is applied to the inserts, freeing up one hand to maintain control of the tooling as it is being removed from the plate. It couldn't get any easier and better yet, safer.
Over the next few months, I will discuss the typical run/repair cycle of a standard thirty-two cavity unscrewing cap mold. I will discuss the necessary documentation and how a mold repair plan should be developed and used as we progress through the seven stages of a mold repair. Next month's topic will discuss clean/repair (C/R) preparation. Stay tuned.
| Easy to Make |
The spring-load slide hammer can be made by a "C" class machinist or higher, and from most steels commonly found in any toolroom. A few helpful tips when fabricating a slide hammer for your shop are:
|
Related Content
Hands-on Workshop Teaches Mold Maintenance Process
Intensive workshop teaches the process of mold maintenance to help put an end to the firefighting culture of many toolrooms.
Read More5 Hot Runner Tips for Moldmakers and Molders
Best practices for initial hot runner tryouts and effective preventive maintenance.
Read MorePrecision Welding Services Offer Rapid Turnaround Mold Repair and Reduced Molder Downtime
X-Cell Tool & Mold relies on outsourced, high-quality welding repairs from Lewis-Bawol Welding to ensure its customers' molds are back in production quickly and affordably.
Read MoreWhat You Need to Know About Hot Runner Systems and How to Optimize Their Performance
How to make the most out of the hot runner design, function and performance.
Read MoreRead Next
How to Use Continuing Education to Remain Competitive in Moldmaking
Continued training helps moldmakers make tooling decisions and properly use the latest cutting tool to efficiently machine high-quality molds.
Read MoreAre You a Moldmaker Considering 3D Printing? Consider the 3D Printing Workshop at NPE2024
Presentations will cover 3D printing for mold tooling, material innovation, product development, bridge production and full-scale, high-volume additive manufacturing.
Read More


.jpg;maxWidth=300;quality=90)


