Inspecting Complex Product Profiles
Using metrology software and a portable CMM, mold manufacturers can efficiently handle exceedingly complex surface profile requirements.
More than ever moldmakers are pressed to push the envelope on what is feasible and reasonable when it comes to accurately creating complex profiles. Companies today are heavily vested in each new product they bring to market. And good is not good enough. Manufacturing specs are often riddled with GD&T (Geometric Dimensioning & Tolerances) annotations that must be met and reported on in first article parts.
For a customer-centric brand these requirements are by no means unreasonable. Choices in the market breed competition, which in turns raises the bar on product form and function. Many customers don’t even realize how much the emotional response to an object determines his or her relationship to it. Form has meaning; it can touch us at such a primal level that our mind is left scrambling to rationalize our emotional reactions.
Form (or Design)—in the context of both the natural and man-made world—has two jobs: to be the messenger of a certain experience and to fulfill on that promise. When the two don't match up, the experience is unfulfilling and its form superficial. Apple's excruciating attention to this level of detail is at the heart of the brand's customer experience and behind its unprecedented consumer loyalty. Apple’s commitment to crafting this experience says simply that they care more about their customer than their competition.
It is obvious that a product’s emotional value is increased from a positive visual, tactile and interactive customer experience. These emotional profiles are what the customer tends to focus in on. Strangely enough the less obvious and most critical profiles are functional; especially when the profile involves operational ergonomics and/or fluid dynamics. Failure to deliver in these areas can result in far more severe consequences than a mere misstep in product styling.
Companies make considerable investments in marketing research and industrial design to get the product profile just right. As a percentage of overall revenue, research and development of new products can range from 3 to 15 percent and more. For a Fortune 500 company today, this translates into billions of dollars spent every year just to make sure they get it right.
As a moldmaker this is all well and good, but it doesn’t make your job any easier. More often than not it complicates things, especially when it comes to quality inspection and reporting.
Getting It Right
Today’s parts often come with increasingly complex profiles, requiring a high degree of accuracy to ensure form, fit and function. Until recently, dimensioning and inspecting organic or free-formed profiles was a daunting task. These types of shapes are difficult to dimension and quite often they are a product of the artist’s vision and not always geometrically grounded or they are a highly engineered functional shape that has been painstakingly optimized.
The key to successful inspection of a complex profile is a 3D CAD, which can come directly from your customer or design team, or can be reverse engineered from a physical part or a prototype. Using metrology software and a portable CMM, either method works great and can accurately inspect surface profiles of plastic molded parts or tooling.
Model-Based Inspection
Model-based metrology software works with the 3D CAD file and portable CMM to ensure design intent, and eliminate the need for 2D inspection drawings, while closing the loop on digital workflow. CAD-based inspection is a good practical first step toward the goal of a complete MBD (Model-Based Definition) environment. The central concept embodied in MBD is that the 3D CAD model provides all of the detailed product information necessary for all aspects of the design intent.CAD-based inspection involves inspecting the physical part measurements directly to the CAD model.
Metrology software connects to and controls measuring devices such as scanners and laser trackers as well as stationary and portable CMMs. It also accommodates intelligent GD&T associated to the CAD model.
Intelligent GD&T datums are imported directly from the native CAD software with the 3D model and provide nominal dimensions and tolerances. In short, using a 3D measuring device, such as a portable CMM, metrology software becomes a conduit, accurately comparing a finished mold or part to its virtual 3D CAD likeness.
Model-Based Inspection Starting with a Physical Model or Prototype
The challenge of using a physical model or prototype as the inspection nominal is you need to digitize the model. Reverse engineering software is designed for just that purpose. Using a portable CMM with a laser line scan head attachment, instead of a touch probe, the physical part is painted into the software (‘paint’ is a term used to scan a part because the process is similar to spreading paint onto the part with a wide brush).
Where a touch probe might capture up to 100 data points per second and is excellent for high precision inspection, a scanner will capture 50,000 points per second, accurately capturing the most subtle design features. From the scanned data points, reverse engineering software creates meshes, surfaces, solids and prismatic features to create precise CAD models. Once the completed 3D CAD model is in place, it can be used for manufacturing, tool building or inspection—using the MBD inspection process outlined previously.
Model Based Inspection of Plastic Mold Tooling
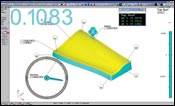
Using the 3D CAD model as the inspection nominal is great for inspecting plastic mold tooling as well as plastic molded parts. Most molds are machined with CNC machine toolpaths generated directly from a 3D CAD model, so inspecting the tool surface profile with the same 3D CAD model from which the toolpaths were created is an easy Align-Inspect-Report process (see Figure 1).
Summary
Using metrology software and a portable CMM, moldmakers can efficiently handle exceedingly complex surface profile requirements. Dimensioning, inspecting and reporting that used to be difficult, if not impossible can now be provided quickly and easily on molds or finished molded parts.
Related Content
CT Scanning Helps Micro Molder Reduce Cost of First Article Inspections
CT scanning services performed by 3D ProScan, a division of NyproMold Inc. provides MTD Micro Molding with accurate, high-resolution internal and external measurements performed about seven times faster and at significant cost savings.
Read MoreTechnology Roundup: New/Improved Technologies You Don't Want to Miss
With all the technology joining the market, moldmaking is a versatile, ever-evolving industry. As such, this technology roundup has no specific theme — it features a variety of products for applications and solutions across the industry.
Read MoreProducts and Services for Multiple Moldmaking Needs
New year, new technology roundup! Featured here is a collection of product offerings, from profile milling cutters to industry-specific CAD/CAM software to innovative hot work tool steels.
Read MoreSoftware Strategy for Automated Mold Inspection
Consider inspection software with a CAD/CAM platform that supports model-based definition, works with all CAD files, and drives all fixed and portable CMMs.
Read MoreRead Next
Speed Mold Verification and Improve Global Cooperation
Technology solution that combines model-based inspection software and portable inspection devices to improve mold verification.
Read MoreHow to Use Continuing Education to Remain Competitive in Moldmaking
Continued training helps moldmakers make tooling decisions and properly use the latest cutting tool to efficiently machine high-quality molds.
Read MoreReasons to Use Fiber Lasers for Mold Cleaning
Fiber lasers offer a simplicity, speed, control and portability, minimizing mold cleaning risks.
Read More


