Beyond Indicating
The winner of this year’s Leadtime Leader: Honorable Mention award aims to use on-machine probes to not just find zero location, but to perform full part inspections. The machines themselves have proven more than capable, but the shop still faces other hurdles.
Share

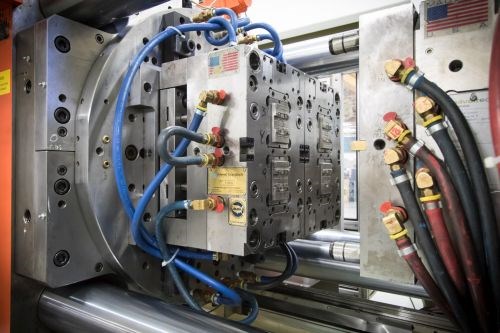
Stringent inspection routines are a big part of Dynamic Tool’s scientific process for manufacturing molds like this one, shown here being qualified via a similarly scientific process in the company’s brand new technical center (read the article to learn more). (All images courtesy of Creative Technology Corp.)
Although this article cites on-machine probing as a major new development at Dynamic Tool & Design, the winner of this year’s Leadtime Leader: Honorable Mention award has had probes on machining centers for about 2 years. These probes have saved a great deal of time by eliminating the need to manually indicate workpieces (and by virtually eliminating the potential for human error during that process). However, the company now has far more ambitious plans for its machine-mounted probes, says Dave Miller, president at Dynamic. Not only will they be used to indicate; they’ll be actually measuring parts, too.
Having had the mantra of “a machine not cutting chips is not making money” drilled into my head during my earliest days as an editor, I questioned this idea. After all, every minute spent inspecting parts could be spent machining them instead. Beyond that, a milling machine is designed to cut, not to measure. Could it really act in the same way as a CMM?
Miller had a ready answer for both points. The efficiency of the overall process trumps the efficiency of any individual workstation, he says. Given the scientific nature of Dynamic Tool’s approach, its quality control department handles quite a load—a load that’s often sufficient to cause a bottleneck. Thus, the whole idea behind probing on the machines is to limit pressure on CMMs and other downstream inspection resources. “We don’t have a 24/7 CMM operation,” Miller explains. “If too much gets in the queue to be inspected, we can wind up waiting for those inspections before we can proceed with finishing operations. Inspecting on the machines instead will take time out of the process.”
As for the equipment itself, I wasn’t totally off-base. “It has to provide the same results as what we can do in the inspection room,” Miller says. Machine tools have come a long way, however, and accuracy and precision haven’t been a problem for the three hard-cutting machines and the boring mill that currently incorporate probes. (For a full equipment list, scroll to the bottom of the Leadtime Leader article). As opposed to addressing any physical machine limitations, most of the work of implementing probing routines has involved integrating the equipment with the very same software that runs the CMMs in the company’s cleanroom.

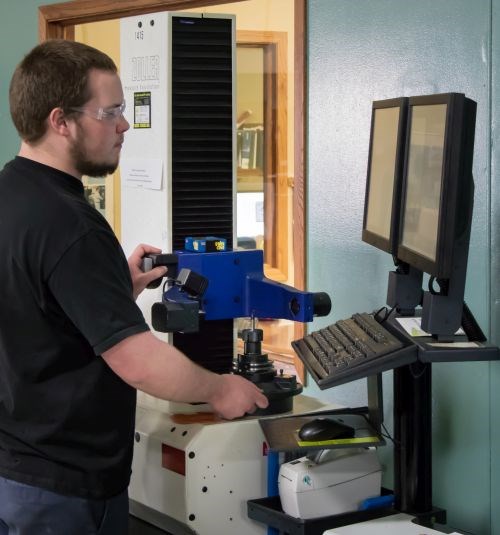
Quality control isn’t limited to post-machining inspections. Here, Mike Retzer, CNC operator, uses the shop’s Zoller presetter, which is employed to measure each and every tool assembly prior to use. In addition to detecting any problems, this strategy helps eliminate human variation when inputting offsets and lengths. Every new tool also undergoes in-house testing to verify the correct feeds and speeds for different conditions and materials.
Hurdles still remain. Just one example is the need to ensure parts are clean enough to inspect. At the time the Leadtime Leader article was published, the shop was experimenting with adding blow-off sequences to programs to ensure stray chips and other contaminants don’t interfere with probe readings.
Suffice it to say that using a machining center like a CMM involves far more than simply installing the right probe and software. Yet, if past experience at Dynamic is any indication, the shop’s efforts will be more than worth it. Taking labor out of the process has long been a top priority here ever since the company’s earliest experiments with unattended machining in the early ‘80s. Read the article to learn more.
Read Next
How to Use Continuing Education to Remain Competitive in Moldmaking
Continued training helps moldmakers make tooling decisions and properly use the latest cutting tool to efficiently machine high-quality molds.
Read MoreAre You a Moldmaker Considering 3D Printing? Consider the 3D Printing Workshop at NPE2024
Presentations will cover 3D printing for mold tooling, material innovation, product development, bridge production and full-scale, high-volume additive manufacturing.
Read MoreHow to Use Strategic Planning Tools, Data to Manage the Human Side of Business
Q&A with Marion Wells, MMT EAB member and founder of Human Asset Management.
Read More


.jpg;maxWidth=300;quality=90)


