Cutting Tool Strategies for Milling Ribs
A review of machining options for tapered rib processing, typically found in plastic injection and die cast molds.
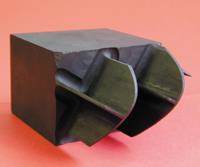
Applications involving tapered ribs are usually associated with plastic injection and die cast molds. For many years the process used for creating tapered ribs was EDM; however, utilizing programming processes that incorporate high-speed machining (HSM) principles can greatly reduce cycle times as well as polishing requirements.
In this review, we will consider standard HSM processes using smaller depths-of-cuts and faster feedrates as well as using the trochoidal style of programming processes, which allows for ribs to be machined in one pass with reduced cycle times that are very hard to believe unless you see it for yourself.
Both of these machining processes will allow for greatly reduced cycle times as well as reduced or eliminated polishing times as compared to EDM process; however, EDM still has its place—as many tapered ribs are too deep or require features with square corners along with contoured bottoms that are impossible to machine.
Machining Tapered Ribs: EDM Vs Tapered Rib Cutting Tools
The following information will list the necessary steps required for three different machining options for machining ribs.
EDM Machining Ribs: This requires graphite or other electrode materials to be purchased, mounted on holders and then machined before actually burning or machining the rib in the mold component. All of these extra steps take time, and time is money. Polishing ribs after the EDM process usually requires more time due to the EDM hard cast surface finish as compared to ribs machined with tapered rib style tools, which in many cases, requires no additional polishing time. When you have rib applications that can be machined with tapered rib tools there will be considerable time savings by eliminating many of the steps necessary with the EDM process.
Machining Ribs with Tapered Rib Style Cutting Tools:
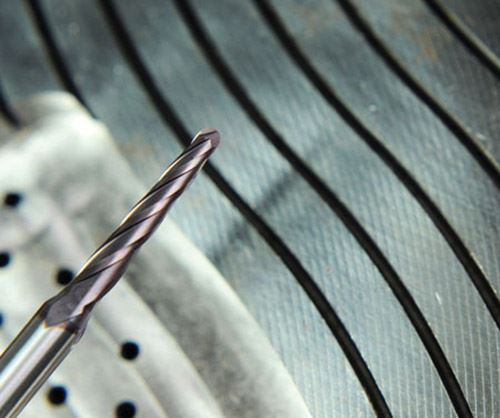
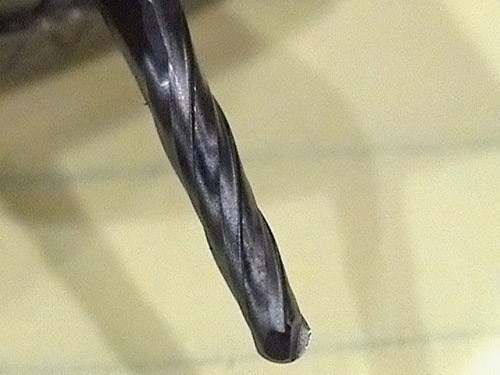
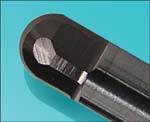
1. Standard Processing with Tapered Rib Tools: The tapered rib tool is an ideal choice for machining ribs because they are offered in a large variety of tapers, diameters, flute lengths as well as flat bottom, ball- and bull nose-style configurations typically required for machining ribs. This is considered the standard method of producing ribs wherever applicable, due to greatly reduced cycle times and polishing requirements when compared to the EDM process.
These types of cutting tools are specifically designed for ribs found in injection molds and die cast molds. They are also strong due to the tapers of the tools as compared to reduced straight shank rib processing tools. If you compare a straight relieved shank rib tool to a tapered tool having only ½ degree of taper per side, the tapered tool is the stronger tool.
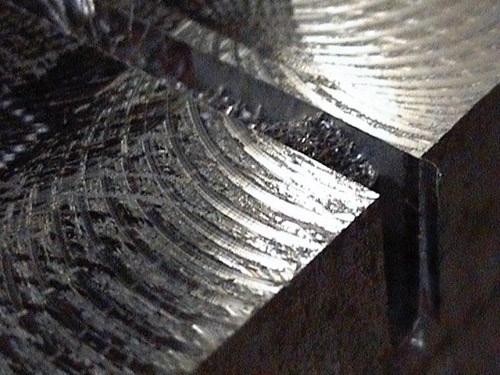
These tools are typically used to create ribs using a simple programming process, which involves a small depth-of-cut axially and on the center of the rib, followed by an X-Y movement across the part at high feedrates. Successive small depth-of-cuts are repeated until the finished depth is reached.
2. Trochoidal Milling: Using trochoidal milling with a tapered rib tool is the fastest method of producing a rib whenever applicable. Full depths of the flute lengths can be taken in one pass with greatly reduced cycle times.
For those who have yet to experience trochoidal-type machining, in layman’s terms it is a continuous spiraling toolpath feeding in the radial direction, which will in effect limit the amount of engagement in any rib or slotting type operation. Basically, in a slotting application if you engage the tool in a 180-degree engagement, you will have a tool that is engaged or in contact with the tool 180 degrees.
The trochoidal process will limit the engagement of the tool to 30 degrees or less, reducing heat and allowing for use of the entire tool’s flutes to be used in one pass, thereby reducing cycle times considerably.
Example
Following is a summary of the reduced cycle times that can be attained when machining ribs with tapered rib tools versus EDM:
- The rib to be machined is 12mm deep, 1mm radius on bottom and 100mm in length. The material is P-20 at about 28-30 HRc.
- The EDM process including machining an electrode and actual burning of the rib would take about 5 hours plus polishing time.
- Using a tapered rib tool with the standard programming process of successive small axial cuts back-and-forth across the rib until depth was attained would be 2 hours, which in itself is a terrific savings in cycle time not to mention the savings in graphite material and polishing time—graphite cost and mounting at about $100 for three minimum electrodes required; and, polishing time a minimum of 1 hour.
- Using trochoidal programming with a tapered rib tool allows for the fastest cycle time. At full depth of 12mm, you can machine this rib in one pass and it takes 5 minutes. Something you have to see for yourself.
Summary
It would be great to be able to use the trochoidal process on all ribs, but we know that is just not going to happen in all applications. There are rib configurations that have requirements for different tapers in the same rib. These are going to require extensive Z-level type contouring using rib processing tools that have relieved straight shanks.
The EDM process will need to be used in parts with requirements for extremely deep ribs and those with square corners and contoured bottom surfaces, to name a few.
The point is: you need to have a very good understanding of all the current machining processes, so you can select the most appropriate machining method, tooling and programming processes for your specific applications. This will aid in maintaining the best competitive advantage.
Related Content
Laser Welding Versus Micro Welding
The latest battle in finely detailed restoration/repair of mold materials.
Read MoreIt Starts With the Part: A Plastic Part Checklist Ensures Good Mold Design
All successful mold build projects start with examining the part to be molded to ensure it is moldable and will meet the customers' production objectives.
Read MoreHow to Eliminate Chatter
Here are techniques commonly used to combat chatter and guidelines to establish a foundation for optimizing the moldmaking process.
Read MoreAdvantages and Disadvantages of Copper and Graphite Electrodes
Both copper and graphite provide approximately the same end result, so it is important for a shop to consider the advantages and disadvantages of each material in order to discover what would work best in their shop floor environment.
Read MoreRead Next
Applying cBN Technology to Moldmaking
A summary of cBN and its progression to a preferred substrate for high-accuracy hard milling.
Read MoreAre You a Moldmaker Considering 3D Printing? Consider the 3D Printing Workshop at NPE2024
Presentations will cover 3D printing for mold tooling, material innovation, product development, bridge production and full-scale, high-volume additive manufacturing.
Read MoreHow to Use Strategic Planning Tools, Data to Manage the Human Side of Business
Q&A with Marion Wells, MMT EAB member and founder of Human Asset Management.
Read More


.png;maxWidth=300;quality=90)




.png;maxWidth=970;quality=90)