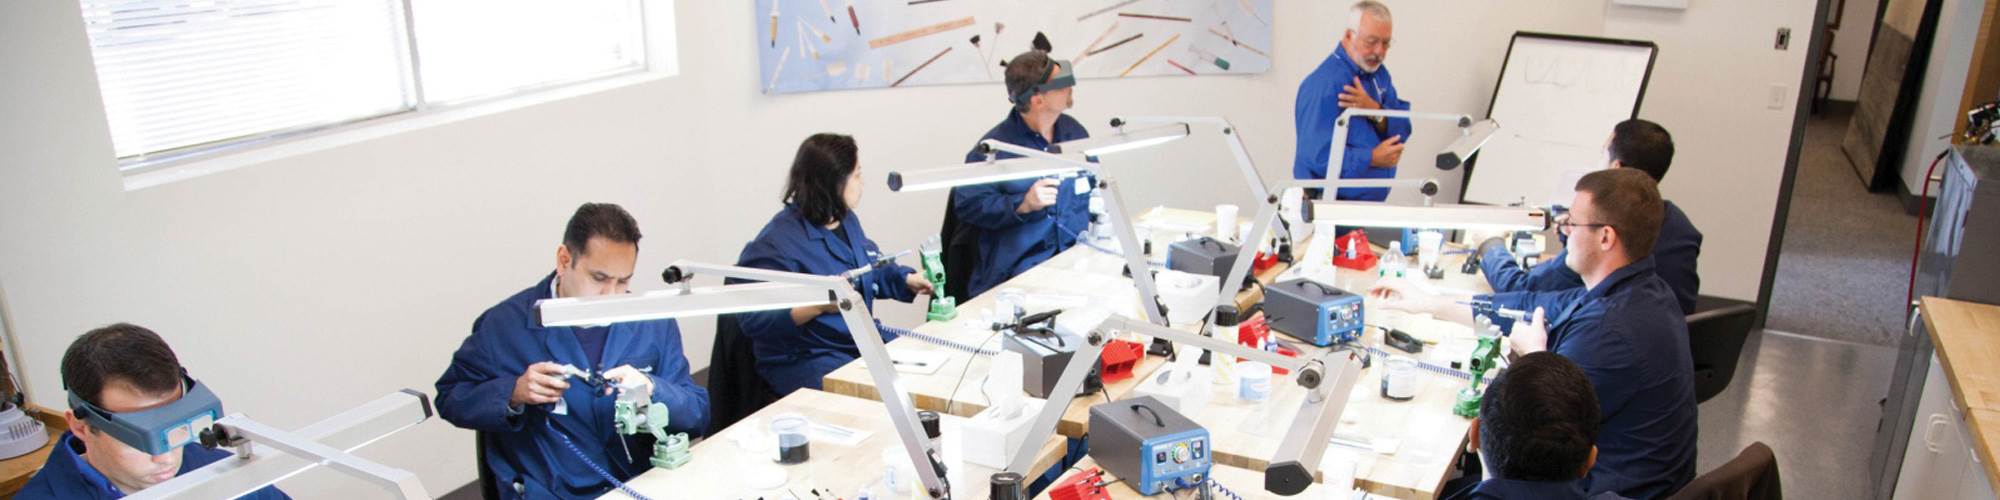


Within these polishing classes, students use the latest technology in tool and equipment while learning standard and efficient techniques to optimize polishing and improve quality. Participants will receive a certificate upon completion. Classes are limited to eight registrants per class. Images courtesy of Gesswein & Company.

Steve Smith, a master mold polisher with more than 50 years of experience, leads a two-day course providing intensive, step-by-step instruction in the polishing process and introduces trainees to the latest polishing equipment.
Share
Steve Smith considers himself a polishing coach. He is a big believer in taking work up to a very fine finish with abrasive stones using a crisscross method and then using a minimal amount of very fine diamond compound to do the final polishing. He learned this approach back in the 1970s, and it has served him very well throughout his career, including in his current role as a polishing instructor.
“Polishing is simple. It’s more about how you apply it,” Smith says. His standard process involves using general-purpose, middle-of-the-road hardness stones. Depending on surface roughness, he typically begins with a 400-grit stone, then a 600-grit, a 900-grit and sometimes a 1200-grit for the required finish. “For example, if you're going to an SPI A1 finish, the finer the scratches (peaks and valleys) are before you go to a diamond compound (loose abrasive) from a stone (fixed abrasive), the less the pattern of the scratches will show through (orange peel),” Smith says. That is why he likes to go up to at least a 900-grit stone, and if the surface needs a super finish, he will go one step further and use a soft 1200-grit stone.
Featured Content


The type of steel and the hardness dictate the process. Stones will rip and tear the surface of a 46 HRC 420 stainless steel or H13. Going finer and softer will yield finer peaks and valleys. Material with a hardness around 50–52 HRC will stone better. It will not rip and tear, so the polisher can get by with one less stoning operation, according to Smith.
Instead reviewing his step-by-step guide to polishing, he shares some insight into a few of the critical factors that contribute to a quality polish.
Machining. Smith’s number-one rule is “perform polishing in concert with machining.” This essentially takes communication and information. “Establishing the right culture to communicate properly is key. The machining department must know what the polishing department is facing upfront instead of relying on a ‘the polisher can fix it’ strategy,” Smith says. He recommends “going backward.” Going backward means that everyone has to help his or her internal customer, which is the person who comes next in the process. So, the machinist’s internal customer is the polisher, and the polisher’s internal customer is the actual customer, according to Smith.
The more a machinist helps the polisher, the better the product is going to be. Achieving a better product requires a conversation between the machinist and polisher. Knowing the required final dimension and required final polish at the start of the job is essential. The polisher knows the required finish, but what needs to be done to achieve that finish? Machinists often ask polishers how much stock they are going to take off to get a particular finish, but the answer is not that easy to provide, according to Smith. The customer will get better parts if there is enough stock to polish.
For example, consider EDM. Smith notes that often the machinist asks the polisher, “How much stock are you going to take off of the EDM finish? To which the polisher replies, “Well, how deep are the EDM pits?” The polisher can guesstimate how much stock he is going to take off, but it takes measuring the surface and years of practice for the machinist and the polisher to come up with the right answers. On top of that, many polishers have never actually measured the amount of material that they take off to achieve a certain finish.
The more a machinist helps the polisher, the better the product is going to be.
Measuring. “Let's say you have to have a high polish with no scratches (an SPI A1 finish). You might start off with a 400-grit stone and follow that up with three or four more steps, so you need to know how much material you're going to take off with each step. If you've never measured it, you don't know. This takes time,” Smith says.
Although this does take time, it simply entails using measuring equipment, such as a dial indicator and finding out how much stock a polisher removes. The goal is not for the polisher to achieve a certain size, but for the polisher to measure with each step how much he removes from the surface and record that measurement to establish a history of how much he removes.
It’s a visual, manual method. The polisher is always removing the preceding scratches that he creates. Smith recommends using a crisscross method. “Make all your scratches with a 400-grit stone in one direction, then when you move onto the 600-grit stone use it in a different direction, so you are removing the 400-grit stone scratches. You measure with the 400-grit then measure with the 600-grit, and you’ll calculate how much you removed,” Smith says.
The polisher, using a crisscross polishing method, sees the removed stock and can then easily measure it. Smith warns that sometimes the shape of the part prevents using the crisscross method. However, if the polisher has a history of the amount of removed stock, he can still measure and be fairly certain that he removed the preceding step.
Note that machinists and polishers must be honest about what they are measuring. Some people use an inspection sheet but wait until all the parts are finished and then place a checkmark all the way down the sheet without measuring each one. They make the mistake of measuring the first one and then assuming that the rest are all the same.
It's important for the polisher to know how much stock he takes off, so he can share relevant information to the process to save time. It is essential to have a means of communicating that data. It's about the value of measuring and communicating that information to the polisher’s internal customers, improving the process and satisfying the external customer.
RELATED CONTENT
-
Surface Finish: Understanding Mold Surface Lingo
The correlation between the units of measure used to define mold surfaces is a commonly raised question. This article will lay these units of measure side by side in a conversion format so that companies can confidently understand with what they are dealing.
-
Five Steps to Polish an Aluminum Mold
In time and with practice, each polisher will develop his or her own tricks and short cuts.
-
A Look at Mold Texturing
Laser texturing, if understood and appreciated, can open up the door to endless possibilities in texturing, according to this texture house.